Sew flowers and butterflies from felt. Soft toy butterfly made of felt. Garland of butterflies
Bright light butterflies delight us on warm summer days. And in other seasons, you can decorate your apartment with decorative butterflies sewn from colored pieces of felt. Butterflies can decorate curtains, walls and lamps; they will add a little color and joy to a monotonous interior.
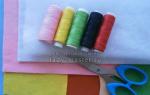
To make a decorative butterfly we will need:
- - thick orange felt;
- - thin felt in yellow, white, beige, green and pink colors;
- - sewing threads matching the color of the felt;
- - padding polyester;
- - scissors;
- - paper;
- - pencil;
- - needle.

The procedure for making a butterfly
1. Let's make a butterfly pattern from paper. Let's draw and cut out the butterfly's wings, body and head, as well as four pieces of different shapes to decorate the wings.

2. Lay out the felt on the table and cut out the parts from the felt. First, we will redraw the contours of the wings onto thick orange felt and cut out one part of the wings from felt.

3. On yellow felt, draw the contours of the details of the butterfly’s head and body. We will need two copies of each part.

4. We will cut out the parts for decorating the butterfly wings from pink, green, beige and red felt. We will cut out two pieces No. 1 from pink felt, two pieces No. 2 from beige felt, two pieces No. 3 from red felt, and two pieces No. 4 from green felt.

5. Cut out one antenna piece from white felt.

6. Take the two pink pieces that we cut out to decorate the wings, and sew a small red piece to each of these pieces.

7. Sew round green pieces to the beige pieces.

8. Now let's take wings cut from thick orange felt. On the upper wings we will place pink details with red decorations sewn to them. Sew pink details to the wings with pink threads.

9. On the lower wings we place beige details with green circles sewn to them. Sew the beige details to the wings using beige threads. The wings for the butterfly are ready.

10. Combine the parts of the butterfly’s body and sew them with yellow threads, making small overlock stitches. We will leave an unstitched area on the side of the butterfly’s body.

11. We will sew a head for the butterfly from two round pieces cut out of yellow felt. When sewing, you need to leave a hole on the head for filling with padding polyester.

12. Fill the butterfly’s body and head with a small amount of padding polyester.

13. Sew up the hole on the body of the butterfly with yellow threads.

14. Attach the butterfly’s head to the body and sew it with yellow threads, making small hidden stitches.

15. Place the prepared body with the head on top of the wings and carefully sew with hidden stitches. Using black thread we embroider small eyes on the head.

16. Attach the white part of the antennae to the butterfly’s head and sew it at the base with a hidden seam, making small stitches.

17. Using red thread we will embroider a small mouth for the butterfly. We will embroider the mouth using a stem stitch.

The decorative felt butterfly is ready. Such butterflies can be used not only for interior decoration, but also as decorative elements for children's clothing. For example, you can decorate a child’s blouse, hat or coat. To make it convenient to attach the butterfly to clothes, you can sew a pin or a special brooch holder to the back of the wings - then the butterfly can be attached while being worn, and removed during washing. You can choose any color of felt for making a butterfly, since butterflies in nature come in a wide variety of colors.

Children love to make crafts, but sometimes the results of such creativity become too many, and parents simply do not know what to do with them. Therefore, it is worth thinking about teaching your child to make not only beautiful, but also utilitarian things. Today we will tell you how to make butterflies from felt. Moreover, each of our products will not only be beautiful, but can also become a decoration of everyday life.
Garland of butterflies
If you need to quickly decorate a child’s room or room for a holiday, but you don’t know how, then you should use this method. To make such a garland you won’t need a lot of effort, and it won’t take much time to make. What do we need? Felt, scissors, paper and thread with needles. First you need to decide on the color scheme of the future garland. This kind of decoration, made with nuance, looks very beautiful, which means you should choose colors that are close to each other in color.
Let's get to work. It’s easy to make a felt butterfly template with your own hands. You need to draw the outline of a beautiful insect. If you do not have artistic talent, you can use the template attached above. Now we cut out our butterflies and sew them in the middle. The next stage is stringing butterflies on a thread. It is also better to choose it to match the product. In this way you can build a thin garland, or you can make an extravagant curtain.
Butterfly keychain

Felt can be used to make not only soft toys, but also utilitarian products. For example, keychains. A felt butterfly can decorate your keys or become an excellent gift for a loved one. How to do it? For this we again need a template. You can use the same one that we used in the first paragraph. We need to cut out 4 butterflies. Two of them will be the base, they should be the same size. The other two should be a little smaller. The first step is to sew together the two main large parts. You can use a sewing machine, or you can make a keychain by hand. After the first piece is ready, you need to stuff it. We sew up the hole for stuffing and start decorating. We plant another butterfly in the middle of the base and sew it on again. But only in the center, the wings should be free. We fasten the last part in the same way. Now all that remains is to decorate the keychain with sequins, beads or beads and sew on a chain with a key ring.
Butterfly as decoration

If you don’t want to decorate a gift box with a trivial bow, then you can use unusual decor. For example, make a butterfly from felt. It will serve as the center of the composition and can elevate any gift. To make such a butterfly we will need felt in two colors and thick silver paper. Cut out butterflies in three different sizes. The first and last ones will be made of felt, and the one in the middle will be made of paper. To make the decoration more festive, you can use nail scissors to cut out a geometric pattern on the wings of the butterfly. You can also decorate the decoration with embroidery or beads. After the blanks are ready, we sew them in the middle. If you are not very good with a needle and thread, you can use a glue gun. Sew the butterfly in the middle and glue it to the gift.
Layered butterfly

This craft can also be used as a decorative element for a gift, or can be used to decorate a room. How to make such a butterfly from felt with your own hands? We will need 4 shades of felt, beads and wire. The first step is to draw a pattern.

Felt butterflies can be the same as our sample, or you can give them any other shape. The main thing is that your patterns differ in size from each other. And it is desirable that the size of the butterfly decreases in a certain step, for example, 1 cm. We cut out the blanks and stack them on top of each other. Sew in the center. To hide the stitching and make a body for the butterfly, lay out a row of beads. All that remains is to make a mustache out of wire - and our craft is ready.
Butterfly as a decoration for a pencil holder

Sometimes parents don’t do crafts with their children only because there is simply nowhere to put them. And if your child loves to create, then offer to decorate his pencil holder with a butterfly. This utilitarian craft will appeal to everyone. The child will be happy to use his product, and parents will not clutter the drawers with another toy. How to make a butterfly from felt? First, cut out two pairs of wings. Some of them will be the base that is adjacent to the pencil holder, and the second will be the bright wings of the butterfly. Now you need to draw the body. This could be a regular caterpillar, that is, an oval with a circle at the end, or a cartoon version. We glue everything layer by layer to the pencil holder. And now all that remains is to give the butterfly some personality. We cut out the eyes, draw the nose and mouth, and we can also paint dots on the nose, body and wings.
Butterfly mask

Children in kindergarten, and even at school, often have masquerades. Therefore, you can invite your child to build his own mask. We will make it from felt. The butterfly will form the basis of our mask. You need to draw a large insect slightly wider than the child’s head. Now you need to cut eyes in the upper wings. In order not to transfer the felt, you must first make a pattern from paper. When the butterfly is ready, we move on to its decor. Cut out abstract or geometric shapes from felt of a different color and glue them to the base. You can make either a mirror pattern on two halves or an asymmetrical one. The final touch is to sew on an elastic band so that the mask can be easily fixed on the head.
This wonderful handmade butterfly will delight the eye and soul for a long time. It is very easy to sew, so try to introduce your child to needlework. It doesn't matter whether you have a boy or a girl.
What to cook
- 3 bright pieces of felt in bright, harmonious colors
- old soap (you can use chalk)
- sharp scissors
- needle and thread
- wire with pile
- round pliers
First of all, to create a butterfly with your own hands, you need to cut two circles from fabric. One circle is larger in size, the second is slightly smaller. This can be done in several ways. For example, draw a circle on paper with a compass and cut it out. Pin or press onto felt and circle with soap. So, the drawn line will be thin. Using it you can carefully cut out the desired piece of fabric. 
You can also press a glass, a lid, the neck of a jar—anything round—to the felt. Then circle it around again with soap, without bothering with paper. Write how you prefer to cut out shapes from felt - by redrawing the pattern from paper or are you able to carefully cut out a circle right away? 
We squeeze the circles and fold them as in the photo. We carefully sew it together. 
Cut out a rectangle of the required size for the body of the butterfly. We fasten it around her wings, as in the photo.
We make the antennae from wire with a pile, bending it in the middle. We twist the sharp ends of the antennae with pliers so that the child does not injure himself while playing with the butterfly. 
This completes the creation of a felt butterfly with your own hands. The butterfly can be used as a decoration on a hairpin, glued to a magnet, placed on a wall or flower, or sewn onto a curtain garter. Or give it to the child for toys.
Photos for this article were taken from the Internet. 
A stylish bow tie for a boy will be the final detail of a harmonious and elegant look. The accessory can be purchased ready-made, or you can make it yourself from any material. The most suitable are cotton, satin, silk and jacquard; less often, but still used, ready-made silk or rapeseed ribbon. Products made from brocade look unusual and solemn, while products made from leather or felt look creative.
Contrasting fabric butterfly without pattern
An ordinary children's bow tie does not necessarily need to be sewn using complex patterns. It’s easy to make an original model without complex calculations, having the necessary materials and proven step-by-step instructions on hand.
A simple example is a bright and original butterfly made from fabrics of contrasting colors. To sew it, you will need materials with dimensions of 14 × 23.5 cm and 11.5 × 22 cm. Separately, you will need to cut out the core - from fabric with dimensions 8 × 13 cm. In addition, for fastening you will need black threads and a needle, for fixing - an elastic band or a hairpin. Standard set of tools:
- ruler;
- pencil or soap wash;
- scissors.

Start by preparing the fabric. It can be any thin material, for example, satin. The parameters indicated for the material above are suitable for a child aged seven years and older. Toddlers will need even less fabric.
At the initial stage, measure and cut out rectangles with the indicated sides, using a ruler for convenience. The blanks are laid out and ironed. The finished parts are placed on top of each other and sewn on a machine. It is correct at this stage to choose a zigzag stitch, thus preventing the appearance of puffs and arrows on the fabric. It is also possible to sew elements together manually using a blind seam with a thin needle.
Next, step-by-step instructions involve moving on to the stage of making a ribbon for the middle of the butterfly. To do this, take a piece measuring 8x12 cm, iron it and put it on the prepared bow. A narrow satin ribbon (up to 1.5 cm wide) can replace the segment. The finished tie is glued to a clothespin or clip with glue, or sewn from the wrong side to an elastic band with fasteners (a convenient option for a baby).

DIY leather butterfly: process features
When you want to do something unusual, practical and stylish, you should opt for extraordinary solutions, for example, leather as the main material for a bow tie for a boy or man.
To make an accessory you will need very little material, and it can be either genuine leather or a high-quality substitute. The instruments remain unchanged.

For a butterfly, a child from 3 to 10 ribbons (finished product size 10×5 cm) will need:
- main part - length 20 cm, width 10 cm;
- jumper - length 7 cm, width 5 cm;
- elastic band for fixation (according to neck diameter).
Add 0.5-0.7 cm to each element for allowance.
The process begins with the manufacture of the main part. To do this, fold it with the front side inward and grind it down taking into account the allowance.

The part is turned inside out, folded into a bow and sewn up using a typewriter.
They work in the same way to make a jumper.

The parts are fastened by machine or by hand, and an elastic band is threaded through the jumper.

Cotton bow tie: classic version
The answer to the question of how to sew a bow tie using a pattern from thin cotton fabric will be in the master class below. You need to act according to the following scheme:

At the final stage, a tie for children with beautiful folds is formed and wrapped with a jumper. The strap is inserted into the jumper under the product for fastening using Velcro or hook-and-loop fasteners.