DIY white Christmas balls. DIY Christmas balls. Video: preparations for New Year's wreaths
Hello, friends! The ShkolaLa blog continues active preparations for the New Year 2017! Our och. skillful hands know no rest. They have already made beautiful ones. Already turned into . And they have already done it. Well, today they will make Christmas tree decorations from foam balls.
White foam blanks are sold in craft stores. Moreover, they can be not only in the form of balls, but also in the form of bagels, and in the form of Christmas trees, icicles and other interesting shapes. And it’s a pleasure to work with them!
Today we will tell you how you can make such beautiful toys with your own hands.

Welcome to our New Year's master class!
Lesson plan:
Shiny and sparkling ball with sequins
This is what he looks like.

But it can look different, it all depends on the pattern and color of the sequins that you choose.
To make this decoration we needed:

- foam ball;
- sequins;
- nail pins;
- glue gun (if you don’t have one, you can use glue, but using a gun is much more convenient);
- braid to make a loop for the ball, by which we will then hang it on the Christmas tree;
- a small piece of children's foam for creativity (foamiran), it will also be needed when we make the suspension;
- pencil or pen;
- scissors.
First, we come up with a design and mark it on the surface of the workpiece. We just have a wavy stripe in the middle. Or you can make, for example, a snowflake.

We take sequins of the intended color and carnation needles. We attach sequins to the needle.

And we begin to stick needles with sequins into the workpiece along the intended line. Make sure the sequins are adjacent to each other. And be careful! Don't prick yourself!

Our blue wave is ready!

We decided to line the space above the blue wave with silver sequins.

Carefully prick them in rows.

The top is ready!

Well, we made the bottom one from light green sequins. The ball is ready!

Now let's start making the loop. To do this, take a small piece (about 12 cm) of white zig-zag braid and cut out a small circle from silver foam.

We assemble the following structure from the above. You can read in great detail about how to make a toy hanger.

Using a glue gun, glue the loop to the top of the toy. The first one is ready!

Christmas decoration “Cake”

Let’s be honest, initially we weren’t going to make a cake, we were going to make a ball out of decorative cords, but suddenly... Okay, first things first.
So, to make this toy we needed:

- foam ball;
- decorative cords of two different colors (we purchased them at the Fabric store), each cord is 1 meter long;
- beautiful braid for decoration;
- glue gun;
- two needles-pins with balls at the ends;
- foam and ribbon for making a suspension.
First, using pins, pin the ends of the decorative cords to the workpiece.

And we begin by applying hot glue to the ball and gluing the cords in a spiral.

According to the original idea, we should have had enough laces for the entire ball. But suddenly... they ended.

But now we know that two meter cords for a foam ball with a diameter of 6 cm is not enough!!! We went to the store to buy more material, but they were no longer there. What to do? Don't throw away the toy unfinished. And this is what we came up with.
We have silicone molds in which we often prepare souffles. And for the sake of the New Year, we decided to sacrifice one mold. Our unfinished beauty, placed in this form, looks a lot like a pie, doesn’t it?

You just need to decorate the mold. For this we took:
- a silver ribbon, which we glue to the mold using a gun;
- red sparkles;
- PVA glue.

The tape was glued. Glue was poured into one plate. The other was filled with glitter.

Dip the mold into glue.

And then into a plate with glitter. This is what happened. Left to dry.

When the mold was dry, we glued the ball to it using a gun. The suspension was made using technology already known to you. The foam used was red. She also plays the role of a cherry for us. The result is such a sweet New Year's decoration!

New Year's "Disco Ball"
Why "disco"? Previously, such balls hung from the ceiling and sent bunnies in different directions on disco areas. And ours hangs on the Christmas tree!

For production we needed:
- foam spherical blank;
- old unnecessary DVD disc;
- scissors;
- glue gun;
- scissors;
- braid and foam for making a suspension.

First we will make a suspension for the ball.


We start gluing the mirror pieces on top.

And we gradually move lower.

As a result, we got a ball like this. Imagine how beautifully it will sparkle when the colorful lights of the garlands flash on the Christmas tree nearby!

Very cute "Chicken"
Let's turn another foam ball into an adorable chicken.

For this we need:
- workpiece;
- double-sided yellow colored paper;
- yellow acrylic paint (gouache will also work);
- a small piece of orange foamiran;
- PVA glue;
- nail pins;
- sponge;
- yellow sparkles;
- red satin ribbon;
- white braid for making a pendant;
- half beads (this is for the eyes, if there are no half beads, then the eyes can be made from cardboard);
- scissors;
- wooden skewer.

For convenience, we place our foam blank on a wooden skewer.

In a container, mix yellow paint and PVA glue in equal proportions.

Using a sponge, apply the color mixture to the surface of the ball.

If you press the sponge tightly against the ball and then suddenly remove it, the surface will not be smooth, but will look like an orange peel.

Immediately, while the paint is still wet, sprinkle our future chicken with yellow sparkles. It’s supposed to shine, because it’s New Year’s. Let the ball dry.

When the ball has dried, we begin to make the comb and at the same time the suspension. Take a red satin ribbon about 10 cm long, a piece of white zig-zag braid, and pins.

We apply a white braid to the very top of the ball, the tip of a red ribbon on it and secure it with pins. In general, we do it as in the photo.

We throw the free end of the tape to the other side, form a loop and pin it again with a needle.

We make a wave in the middle of the scallop and pin it again.

And at the end of the scallop we make a loop again. The scallop is ready.

We lift the white braid up, use a needle and white thread to connect the ends, we get a suspension.

Cut out a diamond from a small piece of orange foamiran.

Fold it in half and get a beak. We attach the beak with a pin.

From two dark half-beads we make the eyes of the chicken.

Cut out a pair of wings and a tail from yellow double-sided paper. We make cuts at the ends, it’s like feathers.

Using scissors, we curl our wings and tail a little. We spread the feathers in different directions.

We attach the wings to the body of the chicken using three nail pins.

And we attach the tail in the same way at the back.

We cut out these paws from orange foamiran. Which we also attach to our toy with pins.

The New Year's toy “Chicken” is ready!

Almost like a real “Snowball”
A Christmas ball, surprisingly similar to a snowball. True, he will never melt.

How to make it? Now we'll tell you. So, we needed:
- foam ball;
- white acrylic paint (gouache will also work);
- various beautiful ribbons, ribbons, lace, sequins for decorating the toy;
- PVA glue;
- semolina;
- glue gun;
- wooden skewer;
- scissors;
- spoon.

Place the ball on a wooden skewer. Mix white paint with PVA glue in a 1:1 ratio.

Add the same amount of semolina to the resulting mixture of paint and glue. And mix everything thoroughly.

The resulting composition, which has a consistency similar to cottage cheese, is gradually applied using a spoon to the entire surface of our ball. Instead of a spoon, you can use some other tool, for example, a plasticine knife. Do not try to make the surface absolutely flat and smooth. On the contrary, it should be rough. Let the ball dry.

Let's start decorating. We took a piece of silver-gray lace and a blue ribbon, as well as silver sequins. We will attach them to the “snow” ball with pins and nails.

This is how we got it.

All that remains is to make the suspension. The toy is ready!

New Year's decoration "Gift for the Rooster"
The owner of the coming year, the Rooster, should like this ball. After all, it is made from millet.

To make it you will need:
- foam ball;
- millet;
- PVA glue;
- acrylic glossy varnish (you can do without it);
- brush;
- sponge;
- glue gun;
- glitter;
- beautiful ribbons for decoration.

Place the ball on a wooden skewer. Pour PVA glue into one plate, pour millet into another.

Using a sponge, apply PVA glue thickly to the ball.

Roll the ball in millet. Make sure that the millet covers the entire surface. And leave it to dry.

To give our millet ball a beautiful shiny look, we cover it with acrylic varnish. This procedure, by the way, will further consolidate the grains. We dry it again.

After the toy has dried, we begin decorating. We used colored zig-zag ribbons for this. Which were glued with a gun.

We glue the first tape exactly along the equator.

The second is perpendicular to the first.

We also glue two more colors of braid. From the last ribbon we immediately make a loop for hanging. Add sequins for shine. We attach the sequins using nail pins.

This is what we got!

Well, since you and I have worked well, we have the right to have a good rest! To create a New Year's mood, let's listen to a song about New Year's toys, as well as pine cones and crackers!
All the best!
Come visit again!
You are always welcome here!
Some people go to the store before the New Year to replenish their supplies of Christmas tree decorations or update their Christmas tree “wardrobe” in accordance with the latest fashion trends, others prefer to create all kinds of toys and New Year’s balls with their own hands. The skill of some craftsmen can be envied, the jewelry that comes out of their hands is so spectacular and original. But some of them kindly share their work in master classes, which allows you and me to try to create something similar, having mastered a couple of interesting techniques. And there are actually many techniques for creating Christmas tree decorations, even if we talk only about New Year’s balls.
Thread products: knitting and gluing
One of the simple master classes shows how to make a ball of thread. Probably, many have seen such toys, large and small, in store windows; they also like to decorate Christmas trees in shopping centers with them. Let's try to make a ball of thread and glue, especially since it is very simple.
You will need:
- balloon;
- PVA glue;
- glue brush;
- scotch;
- Knitting thread.
 |
First, inflate the balloon to the desired size. Tie the end into a knot. |
 |
Cover this protruding tip with tape so that the ball is round. |
 |
Wrap the ball with knitting threads. There is no special technology here. Just wind the threads in a chaotic manner to the desired density. |
 |
This will be enough. |
 |
Now you need to lubricate the ball with glue. Pour some water into the jar. Add PVA glue. The consistency should be convenient for application. |
 |
Lay something on the table and start lubricating the ball with diluted PVA glue. Try to cover all the threads. If desired, you can sprinkle the ball with glitter at this stage. |
 |
Thread a string and hang the ball to dry. |
 |
When the glue is dry, puncture the inside of the balloon. |
 |
Pull it out through the hole between the threads. The finished ball can be decorated with felt, ribbons, and paper flowers. |
But that is not all. The ball is not only hung on a string, it can serve as the basis for a wonderful tabletop composition. Inside the ball, if you make a larger hole, put tinsel, ribbons, crumpled paper and even sweets.


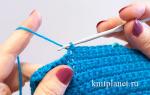
And if you take an ordinary skein of woolen thread and a knitting pattern, then you can easily knit an openwork or dense ball with a crochet hook or knitting needles.
Video: lace balls - knitting technique
Video: New Year's ball on knitting needles


Here are some interesting knitting patterns:


Ribbon balls for a Christmas tree: kanzashi and other techniques
To make a ball from ribbons you will need a round base. It is most convenient to use foam balls for this purpose. They are sold in craft and craft stores like Leonardo's. If you remember seeing embroidery, soap-making or beading supplies in one of the stores, most likely there will be foam balls of various sizes.
Let's try to wrap the ball with a thin ribbon of two colors and decorate it with artificial fir branches and natural cones.
Prepare:
- foam ball;
- blue and purple ribbon (length depends on the diameter of the selected ball);
- artificial spruce branches;
- several pine (fir) cones;
- glue gun
 |
This will be the result of the work done. |
 |
Let the glue gun warm up. Take a foam ball in your hands. |
 |
Squeeze out some glue. |
 |
Glue the edge of the tape to the ball. |
 |
Start wrapping the ball, crossing the layers. |
 |
Every few rows, if necessary, secure the tape with glue. |
 |
When you're done with one color of ribbon, cut it and glue the end. |
 |
Apply glue again and glue the end of the tape of a different color. |
 |
Layers of the next color will have to be glued more often, because a protrusion has formed at the intersection, from which the tape slides. |
 |
After wrapping the ball, cut the tape with enough room for a loop. |
 |
Use glue to make a loop for hanging the toy. |
 |
All that remains is to decorate the ball with decor. Glue it using a heat gun. |
Ribbon balls made from small pieces look interesting. The layers of ribbons make them look like a bump.
Video: making a cone ball
You can also make a ball from ribbons using the kanzashi technique. Craftswomen who work in this technique know how to fold pieces of ribbon in the form of petals and then collect flowers from them. To make these Christmas balls with your own hands you will need:
- grosgrain ribbon in two colors;
- candle;
- glue gun;
- beads;
- ribbons;
- foam ball with a diameter of 10 cm.
 |
Cut a 4x4 cm square of ribbon and form it into a round kanzashi petal. Fold the square diagonally. |
 |
Then we bend the corners towards the middle. |
 |
Fold in half along the middle line, as shown in the photo. We trim the tip a little and treat it with a candle flame. |
 |
Then we trim the back of the petal and process it. We straighten the petal. |
 |
90 white petals are needed. Glue 5 petals together. |
 |
Glue a bead to the center. You will get 18 flowers. We do not glue a bead into the middle of one of the flowers. |
 |
We make a loop from a narrow ribbon 20 cm long and glue it to the middle of the ball. |
 |
From a wide ribbon we cut 5 pieces of 10 cm each. We fold the pieces, gather the edge and spread it with glue. |
 |
Glue all five blanks in a circle onto the ball next to the loop. |
 |
We take a flower without a bead and stretch a ribbon loop through the middle. Spread the wrong side of the flower with glue and glue it to the ball. |
 |
Glue the remaining white flowers in a circle. |
 |
We make flowers from lilac ribbon using the already known method. 115 petals required. You will get 23 flowers. Fill the empty space with flowers. |
Perhaps a ball with roses will seem more attractive to you. It is assembled in the same way, you just need to master the technique of making roses.
Video: ball with ribbon roses
See what magnificent ribbon balls you can make yourself:
Read New Year 2016 costumes for children


Paper and cardboard kusudama and pom-poms
Making paper balls is even easier. Paper and cardboard hold their shape better, and you can use them to create different compositions with your children.
Pom-pom balls will enliven the interior. They are made from thin multi-colored tissue paper. In addition to this, you will need scissors, a pencil and soft wire.
 |
Prepare everything you need. Sheets of tissue paper should be the same width as the diameter of the future ball. |
 |
For one pompom you need 8 sheets. Place them neatly into a stack. |
 |
Then fold everything together like an accordion, trim off the excess. |
 |
Take a piece of wire about 10 cm long and secure the accordion in the middle. Using a pencil, make a loop of wire. Wrap the free end of the wire around the base of the loop. |
 |
Trim the edges into a semicircle. Unevenness can be removed using small scissors. |
 |
Bend each sheet and straighten it. |
 |
The more carefully you straighten the sheets, the fluffier and neater the ball will be. |
Did you know that you can make a ball from paper strips? Yes, even they can be given a round shape if you know how. In fact, there is nothing particularly sophisticated here. To make such a product, you will need:
- thick paper or cardboard;
- thread;
- two beads;
- awl;
- scissors.
 |
Keep in mind: the shorter the strips, the smaller the ball will be. |
 |
Cut 10 identical strips. |
 |
Take an awl and make a hole in the paper strips on one side and the other. Thread the thread through the hole. |
 |
Then thread the bead and tie it in a knot. |
 |
Insert the thread into the hole from the opposite end. |
 |
Attach another bead. |
 |
Here we have a ball. If you want to make a ball with a larger diameter, take longer strips. The width and number of stripes can be chosen at your discretion. Such toys are decorated with ribbons or left without decoration. |
Even New Year's balls are collected from book pages, carelessly torn into strips. And it turns out very cool and stylish.

The technique for making balls using the templates you can see below is similar. Having cut out the protrusions, you just need to assemble the parts onto a thread and slightly pull the edges towards each other, giving the toy the shape of a ball.


Try making balls like this out of paper.


To make them you will need templates. You can print them in any size.


After cutting out the blanks, the middles will need to be connected in the form of rays diverging from the center and pasted paper circles on top and bottom. Then simply intertwine the pieces of paper together. The shape will form itself.
Paper balls made from modules differ significantly in technique. There are modular origami balls that are assembled from small modules. They are quite difficult to perform. But if you still want to try, watch the video instructions.
Video: modular ball with herringbone pattern
Below we present a master class that even a child can use.
A lot of balls are also made from paper, for example Chinese or Japanese ones. The technique of making a Chinese ball is quite simple, but you will have to carefully monitor what the master is doing.
Video: Chinese paper balls
But kusudama balls can be very difficult to make. This depends on the folding technology of the base element. We have selected two relatively simple master classes.
Video: making a kusudama ball
Video: simple kusudama ball
Judge for yourself how original kusudama can be:


What to make from a foam blank and fabric?
Fabric balls, especially those made using the artichoke technique, are very popular among fans. This specific technique allows you to make balls of a wide variety of shades, different from each other. How to make such balls is not easy for a beginner to figure out, so step-by-step instructions are needed.
To make a ball you will need:
- fabric of different colors;
- foam blank (in this case, a ball with a diameter of 8 cm is used);
- pins with a cap (similar to carnations);
- ribbons for decoration;
- lighter;
- marker.
 |
You will get a ball trimmed with fabric with a jagged pattern. |
 |
The first step is to mark the ball so that the fabric lies flat. There is a processing line on the ball; it divides the ball in half. Insert a pin anywhere along this line and measure the circumference with a measuring tape. Divide the resulting number in half, so you will find the opposite point. Measure this value and stick a second pin into the ball. Duplicate the circle line with a marker. |
 |
To measure a horizontal circle - the “equator”, you need to divide the first value by four and put it along the line of the circle on one side and the other of the pin. Apply a measuring tape to the points and draw a second circle. Now all that remains is to plot the same distance along this circle again (the circumference divided by four) and draw a line. We divided the ball into 8 equal parts. |
 |
The fabric needs to be cut into square pieces with sides 7x7 cm. The first layer will require 10 pieces, the second and third - 16 pieces each. Each piece must be folded in half and ironed. This will make subsequent work much easier. |
 |
First of all, we make the substrate. We take one piece. We secure the center with a pin and stretch the corners, pinning them with pins. |
 |
Then we take another scrap, stick a pin into the center, fold the fabric in half so that the head of the pin is inside, as in the photo. |
 |
We stick a pin into the center of the ball. Remove the pin securing the center of the backing. |
 |
We bend the corners towards the middle and secure them with pins. The middle line should exactly follow the line drawn with the marker. |
 |
We fasten the flap opposite in the same way. |
 |
Then add two triangle pieces between. We tighten the corners, but not all the way, and secure them with pins. It is recommended to immediately repeat the steps on the opposite side of the ball. |
 |
Now we mark with pins where the vertices of the triangles of the second row will be. We measure one and a half centimeters along the line formed by different parts. Stick in pins. |
 |
We secure 4 blanks with pins. |
 |
Then we measure one and a half centimeters along the lines of the middles of the white triangles and stick the pins in again. Fill the gaps with triangles of red fabric. |
 |
We make a row of green fabric in the same way. Don't forget to repeat the rows on the opposite side. |
 |
Then we measure the circumference of the ball. It will be slightly larger than when measuring a foam ball due to layers of fabric. Cut out a strip of fabric 3.5 cm wide, length according to your measurements plus an allowance of 1 cm. Fold the edges half a centimeter and iron. We pin the beginning with two pins in the corners, wrap the ball, covering the edges of the shreds, bend the end of the ribbon and pin it. The main work is finished. Now you can decorate the ball as you wish. |
Read What to cook for the Year of the Monkey 2016
It’s also worth making balls for the green beauty by tucking the fabric into the slots of the foam - kimekoni. Anyone can master the manufacturing principle. Materials you will need:
- foam ball;
- some fabric, maybe trimmings;
- paper;
- narrow ribbon.
From the tools:
- pencil or marker;
- scissors;
- ruler;
- pins;
- glue gun
 |
Take a foam ball. |
 |
Draw the desired design. In our case, the ball was simply divided into sectors. |
 |
Wrap the ribbon around the ball. Thus measure the circumference and cut off the excess. |
 |
Cut the ribbon in half. Measure with a ruler. |
 |
Find the middle of the segment. Measure the length to the middle. |
 |
Draw a template on paper. Take into account the allowances that will be tucked in. The length of the template should be slightly longer than the length of the tape piece. Find the middle. Measure the sector drawn on the foam ball at its widest point. Add three millimeters on each side and, according to the measurements, make a template. |
 |
Cut out the required number of “petals” from the fabric. |
 |
Make cuts along the lines on the foam ball. |
 |
Apply overlapping scraps. At the intersections, secure with pins and press them into the slots. |
 |
If necessary, use a flat tool to thread the fabric. |
 |
Take the ribbon until you cut it from the skein. Glue the tip with a glue gun. |
 |
Cover the seams of the fabric. use glue if necessary. Cut the tape. |
 |
Make a bow out of ribbon. |
 |
It can be small, modest or magnificent. |
 |
Glue a loop of tape. |
You can thread the fabric without pins. How to do this is shown in the video:
This way you can make a ball with any ornament.
Video: kimekomi ball with complex patterns


Other balls: rhinestones, sequins
It is impossible not to mention other ways of making beautiful Christmas tree decorations. Some of them again use a foam ball as a base. For others, glass or plastic balls. Continuing the theme of decorating foam balls, we suggest you see how to decorate a ball with lace and rhinestones.
Video: a ball made of lace ribbon and rhinestone ribbons
You can make a ball with sequins. Insert a pin into the hole of the sequin and then into the foam ball. If you place the sequins overlapping, you will get such a beautiful ball.

And if you combine several techniques: kimekomi, decoration with ribbon and sequins, then such a miracle can be created.

Handmade from beads and beads
If you really like working with beads, then try weaving a “case”. It can be solid or cover the ball only on top. But this work will take a long time. If you want to make several balloons, it is better to start long before the New Year. It is best to make such a ball as a gift; the effort will be completely worth it.
Thick covers are made using the crochet technique. The middle is stuffed with padding polyester. In principle, it’s simple, but the main thing is not to make a mistake with counting the beads if you are knitting a pattern, otherwise you will have to unravel them.
Video: one-piece bead ball
Openwork covers are made using a needle and fishing line. It is also easy to make mistakes in calculations here. For this work you will also need a one-color Christmas ball - plastic or glass.
Video: braiding a Christmas ball with beads
By the way, you can simply glue the beads. Then something like this will happen.

Look at the complex bead decorations craftsmen make.


Simple and complex decoupage
Incredibly beautiful balls made using decoupage technique. Of course, much is determined by skill and imagination. But now there are a lot of truly original decoupage cards on sale. In addition, you can use a regular printed picture. For the next master class you will need:
- glass balls;
- sandpaper of varying degrees of grain;
- acrylic primer;
- acrylic paints;
- acrylic lacquer;
- synthetic and natural brushes;
- a piece of foam rubber;
- image;
- one-step craquelure;
- decoupage glue;
- gold leaf;
- glue for gold leaf;
- glue Moment-Crystal;
- scissors;
- file;
- Toothbrush.
 |
This work is admirable. |
 |
For work we use pre-primed glass balls. |
 |
Paint the area under the picture with white paint using a piece of sponge. Dry it. |
 |
We coat the printout with three layers of varnish. Each layer should be applied in a perpendicular direction to the previous one. Dry well. |
 |
Cut out the picture and place it face up in warm water for about 30 minutes. |
 |
Treat the dried ball with medium-grain sandpaper. |
 |
We peel off the printout. The tip can be picked up with a needle. |
 |
Cover the place where we will glue the picture with decoupage glue. |
 |
Attached is a picture. We smooth out the wrinkles on the main details of the drawing as much as possible. |
 |
Dip your finger into the glue and run from the center to the edge, simultaneously gluing and expelling air from under the image. |
 |
Sand the folds with medium-grain sandpaper. |
 |
We cover the image with varnish. |
 |
After the varnish has dried, we go over it with fine sandpaper. |
 |
We paint over the abrasions. Let it dry. |
 |
Then we paint the back section of the ball golden. This color will show through the cracks of the craquelure. |
 |
Sand with fine sandpaper after drying. |
 |
Apply one-step craquelure with a brush. Dry it. |
 |
Apply paint using a sponge. |
 |
Varnish the ball. |
 |
Glue the lace onto Moment-Crystal glue. Let's dry it. |
 |
We paint it in the desired color. |
 |
Apply glue for the gold leaf. |
 |
Glue the gold leaf. Smooth it with a brush. |
 |
We varnish the gold leaf. |
 |
Now you can coat the entire ball with varnish. Decorate with lace and ribbons. |


Felted wool balls
Even if you have already tried different techniques for making balls, be sure to try felting a wool ball. This is an environmentally friendly technology. Not even glue is used here. All you need is wool, a felting needle, and thread. Felted balls are made using the wet and dry felting technique.
Video: red and white roses - wet felting technique
Video: technique for dry felting Christmas balls
The easiest way is to felt a ball, and then decorate it with beads and beads, or sew on a felt applique:


When you get the hang of it, start making balls with complex patterns:


Decor option: polymer clay
If you have the skill of modeling from polymer clay, then you will definitely like the idea of decorating balls with this material. There are several techniques: from using multi-colored clay circles to sculpting convex subjects.


Painted curls. Working with paints is only for artists?
Sometimes you can find beautiful hand-painted balloons in stores. They are very beautiful, but are prohibitively expensive. Making such a ball at home is not only easy, but also easy on the wallet. You will say that for this you need to be able to draw well... Not at all necessary. On the Internet you can download any ornament or design you like, transfer it to a ball, then draw the borders with a special outline and fill the gaps with acrylic paints.
Look at a selection of photographs of hand-painted Christmas balls:


Snowstorm at home
One of the options for New Year's balls is not to hang on the Christmas tree; such a ball is used as a table decoration. We are talking about a ball of snow.

Let's try to do it.
 |
To make a snow globe you will need a jar and a figurine. You can take any jar that you like in shape. If there are traces of glue on the jar that cannot be washed off with water, try washing them with sunflower oil. The fact is that such glue is most often fat-soluble. |
 |
Let's try the figure on the lid. It should not cover the thread that secures the lid to the jar, but should fit freely inside. |
 |
In order for the figurine to look good inside the jar, it must be placed on a raised platform. |
 |
To do this, you can use plasticine. Make a small mound on which to place the figurine. The figurine inside the jar can also be made from plasticine, but you should not use wax. The disadvantage of plasticine is that glitter sticks to it, so it is advisable to cover such a figurine with transparent nail polish. |
 |
When the mound is ready, squeeze glue from a glue gun onto the inside of the lid. Glue the pedestal. |
 |
Attach the figurine to the top using a glue gun. By the way, figurines from Kinder surprises are well suited for snow globes. |
 |
Try how the figure fits into the jar. |
 |
If the plasticine prevents the lid from twisting, remove the excess. |
 |
We prepare the liquid with which we fill the jar. Take glycerin and pour a quarter, maximum a third of the jar. The more glycerin, the thicker the liquid will be. And the slower the glitter will move inside. Now add distilled water to the jar. Please note that the figurine will displace some water, so do not fill the jar completely. In addition, you need an air bubble inside, which will mix the glitter. Mix everything well. |
 |
Add glitter, you can take more pieces of white plastic. These materials can be easily purchased at a store that sells everything for manicure. Don't overdo it with glitter. Stir the liquid again. |
 |
Take a napkin and wipe the neck of the jar dry. Coat the neck with Moment-Crystal glue and screw on the lid. |
 |
If desired, decorate the neck of the jar, for example, with lace. Cut the desired piece and use a glue gun to attach it to the lid of the jar. |
We wish you successful preparations for the New Year. And may the process of making New Year's balls bring pleasure to you and your loved ones!
You can make beautiful three-dimensional balloons for the New Year in different ways. In this material we will look at several ways to create unique jewelry that are understandable and accessible to everyone. There is still time to make beautiful crafts with your own hands to decorate the Christmas tree, home, and simply for gifts in honor of the New Year and Christmas to family and friends.
The ball is still the most popular Christmas tree toy. If just a few years ago it was customary for many families to buy a new ball for the holiday, today a homemade Christmas ball is especially valued. New Year's paper balls turn out beautiful and stylish, but you should also pay attention to other decorating options for this craft. For example, it could be old discs or fabric. Let's look at how to make New Year's balls step by step using different materials, not just paper.


DIY Christmas balls: diagrams and explanations
From paper No. 1
The first toy is made from colored paper (choose three colors that combine well with each other), you also need wire and glue, a stapler, and a glass. At the initial stage of work, you need to take a glass and draw a circle on each piece of paper. Then cut out four circles and fold them in half into a stack, alternating colors. First it is better to take one color, then two others, then the one that was at the beginning. That is, the point is to fold the stack in such a way as to avoid repeating colors one after another. Fasten the circles together by wrapping them with wire along the fold line. Connect the ends of the wire together.


Advice! If there is no wire at hand, it is recommended to use a stapler to fasten the ends. In general, it is recommended to work with those materials with which you are more comfortable; it is not necessary to strictly follow step by step what the instructions say. How to make it yourself.
After this, straighten the circles and glue the joints between them; glue is already used here. You need to glue the circles in such a way that the top of a circle of one color matches the bottom of a circle of another color. After finishing the gluing process, attach a satin ribbon to the wire and you will have a paper ball ready, which is perfect not only for decorating a Christmas tree. Such crafts will perfectly decorate the interior of any room; they can be hung on windows, on a chandelier, on the ceiling: such balls will lift the festive mood anywhere.


From paper No. 2
Another interesting option is how to make your own unique paper ball with your own hands. This version of the craft is voluminous; the master class is perfect for the process of needlework with a child. The product is made as simply as possible, but in appearance it turns out stylish.
What you need for work: paper of different colors (you can also take wrapping paper with different New Year's designs), glue and scissors, a glass and a satin ribbon. Again you will need to use a glass to cut out eight circles from different paper. But the size of the circles should be different - from small to quite large.


Fold each circle in half, focusing on the front side inside, and glue everything together. Be sure to glue additionally at the bend and after each such process, let the crafts dry at least a little. Thread a satin ribbon inside, and then glue the final volumetric paper ball together. By themselves, such balls look stylish and cute; they are also suitable for creating a beautiful and stylish garland, decorating a child’s room or living room.
From pieces of disks
We considered two options for how paper balls are made. In conclusion of this material, I would like to talk about another and original way to create beautiful, spectacular balls for the New Year tree. They will look especially stylish in the dark.
To work, you will need an old Christmas tree ball or just a foam blank, an old CD, satin ribbon and scissors, silver spray paint, and glue. Carefully cut the disk into small pieces (this is the most difficult process, it is better to ask a man for help).


Now take the ball and paint it with spray cans, leave until completely dry (in principle, the spray can can be painted with any color at your own discretion). After the workpiece has dried, you can begin gluing pieces of the disk to the ball. Cover the entire ball, but there will still be gaps between the pieces. After this, attach a satin ribbon and you can hang the ball on the Christmas tree or other place where unique New Year's decor is required.


This is how you make beautiful paper balls with your own hands, photo step by step. By following simple and understandable diagrams, as well as carefully viewing thematic photos and videos, there will definitely not be any problems with how to make a New Year's paper ball that is unique, neat and original. Happy holidays and enjoy your preparations for the New Year and Christmas.
Useful tips
To decorate a Christmas tree, home or office, it is not necessary to purchase a large number of New Year's balls.
You can make beautiful balls with your own hands at home from various materials.
Just stock up on a few simple tools to create Christmas balls, take the time to make crafts, and be patient.
All New Year's balls are made quite simply, and even children can be involved in working on them.
On our website you will also find:
Craft for the New Year: a ball of bows

You will need:
glass or foam ball
hot glue
small ribbon bows.
* You can make bows yourself or buy ready-made ones (usually they are self-adhesive).

Take a balloon and cover it with bows.
If you use a foam ball, then attach strong thread or tape to it.

Volumetric balls for the New Year: a ball made of foam and fabrics

You will need:
-
glue brush
foam ball
1. Using a skewer, make a hole in the center of the foam ball.
2. Now take the ribbon and use a skewer to thread it through the hole. Pass the end of the ribbon through a small bead and tie the ribbon in a knot.

3. Pass the other end of the ribbon through another bead and also tie it in a knot. You can secure the knots with PVA glue.
4. In a bowl, dilute PVA glue and a small amount of water.
5. Cut the fabric into several pieces of different shapes and sizes.

6. Using a brush, apply glue to the ball and begin carefully gluing pieces of fabric.

*Do not apply too much glue.

How to make a New Year's ball: Golden Snitch

You will need:
-
self-hardening modeling compound
acrylic paint
paint brush.
thin wire
thin paper (papyrus paper)
1. On paper, draw a pattern of wings for your Snitch. Use this pattern to model thin wire wings. Twist the ends of the wire.

2. Place a sheet of thin paper on the table and place wire wings on it.
3. Apply a little glue to the wire on several sides and carefully bend the paper.
4. Carefully trim the paper around the wire to create wings.
*You can paint the wings using acrylic paint.
*You can also apply glitter. To do this, coat the wings with PVA glue and sprinkle with glitter.

5. Glue the wings to the ball using self-curing modeling compound.
* You can also use a foam ball instead of a glass ball. In this case, the twisted ends of the wire wing are simply screwed into the ball. The foam ball will also need to be decorated with paint, for example.
Christmas balls made from chewing candies for the New Year

You will need:
-
hot glue
small chewy candies or marmalade
foam ball

1. Take a foam ball and use glue to glue a piece of ribbon to it and thread it with a pin on top so that you can later hang the ornament on the Christmas tree.

2. Start adding glue drop by drop and gluing the candies or marmalade (or pieces of marmalade) to the ball.

* Instead of sweets, you can glue almost any decorations: buttons, sequins, small tinsel, etc.

A ball of acorn caps for a Christmas tree for the New Year


You will need:
-
hot glue.
acorn caps
acrylic paint and brush
foam ball
jute rope
thin wire (floristic, for example)
thin tape
glitter (optional)
1. To paint the foam ball, choose a color close to the color of the acorn caps. You can skip this step. It is only needed to hide the white color of the ball.
2. Start adding hot glue drop by drop and attaching the acorn caps. You can pierce the foam ball a little with these caps. Glue the hats as close to each other as possible, but don't worry too much - there will still be gaps, and that's normal.

3. Make a loop from the wire, twist the ends and screw them into the ball. Now you can cut the rope and thread it through the loop to hang it on the tree.
4. You can also make a bow out of ribbon and hot glue it to the top of the balloon.
5. You can apply PVA glue to the outer parts of the acorn caps and sprinkle glitter on the glue.

DIY New Year's crafts: balls decorated with thread

You will need:
-
wire or pin.
knitting thread (the thicker it is, the easier it will be to secure it)
foam ball

1. Bend a piece of wire into a U shape and insert it into a foam ball. The wire will then help you hang the ball on the Christmas tree.

You can use a pin to pierce the thread and then insert it into the foam ball. In this case, you will need to leave a small tail on the thread (which you will then glue onto the ball) in order to hang the ball on the Christmas tree.
2. Cover half the ball with PVA glue and begin to carefully wind the thread around it.


3. When you have almost reached the center of the ball, turn it over, apply glue to the other half and continue wrapping the ball with thread.

Do-it-yourself volumetric balls for the New Year

You will need:
-
printer (to print the template)
cardboard (white or colored)
*You are asked to print two versions of templates for two balls of different sizes.
* Each ball is made from 12 paper pieces of the same size.
Paper ball templates for the New Year
Small

Big

1. Print the templates and cut them out, making cuts in the indicated places.
2. Make a small hole in one cut out flower, thread a thread through it, tie its end into a knot and secure it on the back with tape.

To make it easier to assemble the ball, consider the part with the thread to be the “north pole” of the ball. Add details to it until you reach the “south pole”.

3. Use the cut lines in each cut out element and fasten all the pieces together to form a ball.


Beautiful balls made of paper strips for the New Year.
Option 1.

You will need:
colored cardboard
1. Cut a sheet of colored cardboard into several identical strips.
2. Fasten all the strips with a stapler. First, cross two strips at right angles and fasten them, then add two more strips diagonally and also fasten (you can use glue).
3. Bend each strip in turn and secure the ends.
The ball can be decorated with tinsel by cutting off a small piece and gluing it.
Christmas balls for the New Year
Option 2.

At the end of the text instructions you will find video instructions.
You will need:
-
cocktail straw
pencil
needle and thread (or wire)
awl or screwdriver
-
various decorations (optional).
colored cardboard (multi-colored magazines)

1. You need to cut out 6 strips of colored cardboard. The stripes should not be too wide.

2. Using an awl, make a hole at the end of each strip.
3. Lay out all the paper strips as shown in the image, and use an awl to make a hole in the center.

4. Prepare a thread, a needle and a bead, which will need to be attached to the bottom of the future ball.

Cut the thread to the required length so that you can hang the ball.
Pull the first bead all the way through.
Pull the needle and thread through the hole in the center of the strips, leaving a bead at the bottom.
5. Cut off approximately half of the cocktail tube (its length is 1/4 the length of the paper strip), insert it into the center of the workpiece and thread a thread and needle through it.

6. Start bending the strips at the top and pull a thread and needle through the hole at the end of each strip. It is also better to secure a bead on top.

Video instruction:
*You can use wire instead of thread.
Crafts for the New Year: paper balls

How to decorate a foam ball for the New Year

Cupcake made from a foam ball for the New Year

Craft from a foam ball for the New Year

Paper balls for the New Year (video)
Ball made of paper strips for the New Year
Paper ball for New Year
The New Year is rushing towards us! New Year's Ball Parade!
Christmas balls made of fabric
To create a New Year's ball from fabric you will need:
A foam ball with a diameter of about 7 centimeters;
- colored synthetic fabric;
- a lot of safety pins;
- a string of white beads;
- scissors, heat gun.
Christmas balls made of fabric step by step:
Cut the fabric into squares with sides about 5 centimeters. For special texture, it is advisable to use squares of two shades (photo 2).

To simplify the workflow, draw median lines directly on the foam ball. In total, you need to make eight lines located at an angle of 45 degrees to each other (photo 3).
Take a square of fabric and fold it in half, then in half again. Attach the square to the axis of intersection of the median, pin it with a safety pin (photo 4).
Also fold squares of a different color into four parts and pin each ball crosswise to the surface (through one median) (photo 5).

Next comes a layer of squares that need to be pinned in the same way as the first, but stepping back a little from the center and closing the gaps (missing medians) (photo 6). Continue pinning fabric squares to the ball until you have covered exactly half the surface of the ball (Photo 7). It is advisable to make the second half plain (photo 8).
Glue a string of beads onto the back side of the ball surface using hot glue and twist this element in a spiral (photo 9). While working, a cobweb of glue may remain on the beads - this is not scary. After a few minutes, when the glue has completely dried, the cobwebs can be easily removed (photo 10).

The New Year's ball made of fabric is ready! As you can see, there is nothing complicated in this technique. With great desire and perseverance, you will receive an original decorated New Year tree.
MK author: Madame Gritsatsueva (Margarita)
New Year's patchwork ball.

To make a New Year's patchwork ball you will need:
Scraps of fabric;
- foam ball blank (any size);
- pins;
- felt-tip pen/pen;
- tape measure/centimeter;
- glue stick;
- wooden skewer;
- breadboard knife, compass, scissors;
- lace, ribbon, etc. for decorating the ball.
New Year's patchwork ball step by step:
Take a foam ball as a basis, in this case 60 mm in diameter. Using a centimeter, mark the center line on the ball, divide the circumference in half, mark with pins - these will be the lower and upper points of the ball (photo 1). Using a centimeter, draw another line through these points, dividing the ball into four equal parts (photo 2). By analogy, divide each part of the ball in half, so you will divide the ball into eight equal parts (photo 3).

Now draw a transverse line along the center of the ball. To do this, divide each line from the bottom and top points of the ball (where it was marked with pins) in half, and draw a transverse line along the marks (photo 4-5).
Next, take a compass, place it first at the top point of the ball, draw a circle, then do the same on the other side (photo 6). As a result, you will get a blank, as in photo 7. Make cuts along all the lines (that were marked) using a stationery knife to a depth of approximately 1-2 cm (photo 8).

You will need two templates, one in the shape of a triangle, the other in the shape of a trapezoid. Draw templates on paper, adding an allowance of about 7-8 mm. We advise you not to rush and not to cut out all the elements at once. First, try to cut out one part and secure it to the ball. It is likely that you will need to adjust the pattern, increase or decrease the allowance.
In this case, only two types of fabric were used, so 8 triangles and trapezoids were cut out of plain red fabric and the same number of elements from fabric with branches (photo 9). To secure small elements, use a glue stick, which fixes the fabric parts and prevents them from moving (photo 10).

Then, using a wooden skewer, begin to carefully tuck the excess fabric into the slits, paying due attention to the corners. For convenience, use a large needle with a blunt tip. For large items, a sandwich knife with a rounded tip is suitable (photo 11-12).
By analogy, fill all the parts (photo 13). And after a couple of hours, admire the result (photo 14-15). Now all that remains is to decorate the ball with ribbons, cords, beads, bells, pompoms, and caps for beads (photo 16).

New Year's balls made of threads.

To create Christmas balls from threads you will need:
Air balloons
- thick decorative threads or thin multi-colored cords
- PVA glue + glue container in which you will need to make holes
- needle, scissors
Christmas balls made of threads step by step:
Take a balloon and inflate it to the appropriate size. Tie it up. You can knead the ball a little in your hands to give it a more rounded shape.
Thread the decorative thread through the needle and pierce the empty plastic glue container all the way through. It is better to do this closer to the bottom of the container.

When the thread passes through, pour PVA glue into the container, of which you will need quite a lot. It is not advisable to dilute it with water.
When using a thin ribbon, you can soak it completely in glue (Figure 3).
Pull the thread through a container of PVA, soaking it entirely with glue, and wind it around the base ball. When winding the thread, the ball must be turned frequently. At the same time, do not forget that the balloon will need to be removed later, so leave a little space in the area where the balloon is tied.

Once the desired density of the ball winding has been achieved, cut the thread, leaving a small tail to create a loop (for hanging).
Next, the ball should be left until completely dry for 1-2 days or dried with a hairdryer for about 5-10 minutes. After the glue has completely dried, pierce the balloon with a needle and carefully remove it. It is more convenient to do this through the place where it is tied. Make a loop from the remaining tail of the thread and tie it to the ball.

Decorate the resulting ball as you wish. You can paint it, cover it with sparkles and sequins, or leave it without decoration.
The ball is ready!
New Year's ball made of fabric

To create these New Year's balls you will need:
A foam ball with a diameter of about 10 cm
- tailor's needles with a metal cap
- three types of fabrics (three colors).
The process of creating Christmas balls from fabric:
The first step is to cut a lot of fabric squares. If your ball is 4 inches in diameter, cut the fabric into 3-inch squares. Make 8 squares of one fabric and 16 squares of 2 other fabrics.
You can also use two small pieces of the first type of fabric so that the foam ball does not show through the first layers. First we will make one half of the ball.
Pin one of the 2 fabric squares into the center of the ball; it may bulge a little, but in any case it will be completely covered by the next layer (Fig. 2).

Then take one square of the first material and fold it 4 times to determine its center (Figure 3). You need to insert a pin into the center of the square from the inside out (Fig. 4). Insert a pin with a fabric square into the foam ball (Figure 5). The fabric needs to be folded in half again, pinning the corners (Fig. 5).


You need to pin three more fabric squares (first material) to the ball. The result should be a completely closed fabric top (Figure 6).
Take the squares from the second fabric and start pinning them onto the ball (Figure 7).
Start with 4 squares, which seem to be a continuation of the previous layer. Adjust the distance between layers as desired. In this case it is about 1 cm. Use something like a template to keep all the pieces of fabric the same distance.
Secure four more fabric squares between them, as in Fig. 9-10.

You can stop at two layers or make a third layer similar to the previous one (Fig. 12).
Next, you need to turn the ball over and repeat the above steps with the second half of the ball. However, when placing pieces of fabric on the second side of the ball, it is necessary to take into account the first half, but 100% compliance is not necessary, since the joint will be covered with fabric.
So, the excess material at the junction of the 2 sides can be trimmed off. After which you can cover the joint with the material of the second layer, decorate with an organza ribbon. Pin one edge of the ribbon and sew the other.
You can also make a bow from a ribbon, by which the ball can be hung on a Christmas tree.
Glue or sew, as desired.
Ball made of fabric using the artichoke technique. Master Class.

An excellent master class on creating a completely textile ball with your own hands from scratch.
To create a fabric ball using the artichoke technique you will need:
Fabric for base;
- template paper + pencil;
- needle + thread, sewing machine;
- padding (sintepon/cotton wool).
To decorate the fabric ball:
For the lining there are two red squares, 8 beige squares measuring 5*5 cm, 16 squares of the same size, but of a different color (in this case with green stars), 16 squares of a third color.
- beads for decoration.
Artichoke fabric ball step by step:
1. Creating a fabric ball - the base.
Prepare a pattern from paper (Figure 1). Transfer to the fabric from the wrong side (Fig. 2). You will need to create 4 petals. Cut, remember to leave a seam allowance (Figure 3). Sweep the petals together in pairs (Figure 4-5).

Machine stitch on one side (Figure 6). As a result, you will get “pockets”, as in Fig. 7. Place them together with the front sides (Fig. 8-9).

Sweep or pin. Then we grind it down (Fig. 10-11). Leave a hole on one edge of each petal through which the future ball will turn out and be stuffed (Fig. 12-13).

Fill the ball with filler and then sew it with a hidden seam (Fig. 14-15). As a result, you will get a ball, as in Fig. 16.

2. Ball decoration:
Take all the squares for decoration (except for those for lining), fold in half and iron (Fig. 18).

Place the squares intended for lining in the middle of the ball and pin them with pins so that they do not fidget (Fig. 19).
Then take the ironed beige squares (rectangles) and fold them into triangles (Figure 20-21).

Place such a triangle in the middle of the future fabric ball, as shown in Fig. 22 and pin it with pins.
Pin the 4th triangles and get a blank, as in Fig. 23. Start sewing the corners of the triangles. Sew opposite corners of some triangles (Fig. 24), and then others (Fig. 25).

Sew a bead for beauty at the junction (Fig. 26). Bring the needle under the triangles, as shown in Fig. 27. And carefully sew the triangles along the edge to the base of the ball (Fig. 28).
As a result, you will get something like in Fig. 29. Do the same with rectangles with asterisks. First, fold them in the form of triangles, and then put them on the ball and pin them with pins. Place the triangles in the proper order (Figure 30-31). Sew similarly to the previous steps (Fig. 32-34).

Apply triangles of the third color (Fig. 35-38).

As a result, you will get this half of the ball (Fig. 39), and make the second one by analogy.

After that, cut strips measuring 5*10 cm and fold them in the same way as in Fig. 41. Iron everything. Attach it to the ball and pin it with pins (Fig. 42). This must be done in order to decorate the sides of the ball.

Once again, cut strips 5*10 cm long and fold them as in Fig. 43-44.

Place these triangles on top of the previous ones, as in Fig. 45. Overlap (Fig. 46). Pin everything with pins (Fig. 47) and sew (Fig. 49-50).

A ball made of fabric using the artichoke technique is ready!
Thanks to the author - Natalya Semenova for the excellent MK.
Cone using the kanzashi technique. Master Class.

To create a cone using the kanzashi technique you will need:
Satin ribbon about 2.5 cm wide (two colors);
- base ball for ping pong;
- thread, monofilament or thin fishing line;
- thermo gun;
- tweezers;
- bead or attachment to Christmas tree decorations.
Cone using the kanzashi technique step by step:
Initially, cut squares from ribbons of two colors with a side of 2.5 cm and fold them in half into triangular modules (photo
1). One fabric square needs to be secured to a ping pong ball, gluing the center and edges well (photo 2). The base ball should be placed on a small jar, for example, a cream jar - this way it will not roll around on the work surface.

Fold the triangular modules in half again (photo 3). Then make the first row - glue four modules at once onto the surface of the ball so that it looks like a square (photo 4). Subsequent rows should consist of 2 parts, four modules in each.
Glue the second row of modules. Glue the first part of four modules between the parts of the first row (photo 5). And glue the second part between the parts of the first part so that the lower part of both parts of the second row is at the same level (photo 6).

Also glue all subsequent rows, alternating the colors of the modules (photo 7-8).
After gluing the penultimate row of modules, glue a piece of satin ribbon, hiding the surface of the ball (the same as at the beginning of the work process) (photo 9-10). Next, glue the last row of modules (photo 11-12).

The almost finished kanzashi cone needs to be decorated, starting from the top of the Christmas tree decoration. To do this, gather a satin ribbon onto a thread and pull it together to form a bow (photo 13). Hide the middle of the bow by gluing a mount for Christmas balls to it (photo 14).

A cone made using the kanzashi technique is ready to decorate the New Year tree.
Christmas tree ball using kanzashi technique.

To make a Christmas tree ball you will need:
Satin ribbon 2.5 centimeters wide in primary color (about 2.7 m) + ribbon for spirals (about 1.1 m);
- ping pong ball;
- wire, awl;
- decor: sequins, beads, pins, cord for hanging;
- heat gun and all other tools for Kansas production.
Christmas tree ball using quilling technique step by step:
The base will remain inside the Christmas tree decoration, so inexpensive ping-pong balls that are very light are best suited. The ball tolerates hot glue well, so there is no need to wrap it in anything and you can glue the “petals” directly onto it.
You will also need to securely attach a ribbon for hanging. Of course, you can simply glue the bead, but you can also secure it more securely by marking the middle approximately on both sides and piercing it through with an awl (photo 1). Then secure the wire with the fixed bead (photo 2). Try on the top (photo 3).

Glue sequins or other decoration and form the top (photo 5). And start gluing the petals.

1st row: 2 white, 2 red, 2 white, 2 red
2nd row: 1 white, 3 red, 1 white, 3 red
3rd row: increase, glue 2 petals each. 2 white, 6 red, 2 white, 6 red
Continue in the same spirit without increasing the quantity.
In photo 10 it is noticeable that the petals are starting to “crowd” too much; it is clearly necessary to reduce them to the original 8 petals. And the last row is also 8. It took 144 petals to make this ball.

You can, of course, take not 8, but 10 petals in the first row, and then the ball will turn out more magnificent, since the petals will be attached more tightly.
The Christmas tree ball using the quilling technique is ready!
New Year's toys made of sequins and beads.

To make New Year's toys you will need:
Foam ball (about 6 cm in diameter);
- sequins and beads;
- needles with pearls.
New Year's toys made from sequins and beads step by step:
Sequins on a foam base can be attached in a chaotic manner, using fittings of different colors. So, take a sequin and put it on a needle with a pearl. You can also attach several sequins of different shapes at once. For example, first put a blue sequin in the shape of a snowflake on the needle, and blue and/or purple on top.

Begin to carefully insert the needle into the foam ball, trying to fill its entire surface without gaps. You can place one sequin on top of another, but in this case you need to make sure that all the sequins are located at an equal distance from each other.

New Year's toys made of sequins and beads are ready!
DIY unbreakable Christmas balls

To create unbreakable toys you will need:
Floss threads of different colors + needle
- a foam ball, you can cut it yourself from polystyrene foam or make it from foil, newspapers, tightly tied with threads. You can use different materials, just make sure that the balls do not turn out too heavy.
- all kinds of decor (you can even use ready-made New Year’s applications)
Unbreakable Christmas balls step by step:
First of all, you will need to wrap a round workpiece with threads, for which you take it and start wrapping it crosswise several times. You need to wind it tightly enough. Finally, secure the end of the thread to prevent unraveling.

Now let's start decorating the ball (here everything will depend on your imagination and the availability of decorations). If you know how and love to embroider, you can embroider all kinds of New Year's ornaments. You can also sew a suitable applique to the toy, decorate it with beads, beads, or fabric flowers.

Finally, do not forget to make a holder for the finished Christmas tree decoration in the form of a rope, by which the ball will be hung on the Christmas tree.
Sweet New Year's balls. Master Class.

To create New Year's balls you will need:
Chocolate glaze;
- Balloons;
- kandurin;
- soft wide brush;
- baking paper;
- mastic/marzipan;
- wire;
- colander.
Sweet New Year's balls step by step:
Fill a balloon with water, tie it and place it in the freezer for 24 hours. Melt the chocolate glaze and fill it into a bag made of baking paper. Remove the ball from the freezer and remove it from the ice ball that formed from the water in the freezer.

Place the ice ball on a sheet of baking paper and decorate the ball on all sides with chocolate icing. Any glaze that accidentally gets onto the baking paper rather than onto the surface of the ball, after hardening, remove it from the paper and use it again.

While the ice is melting and flowing through the holes in the chocolate painting, prepare the top for the balls. Twist a loop from the wire, and form a top from mastic or marzipan. Cover everything with silver/golden kandurin. Connect the top to the ball using melted chocolate.
Note: for pearl and silver balls, we recommend using white chocolate icing.
New Year's openwork paper balls.

We invite you to make these bright, openwork New Year's balls for the New Year that will fit perfectly into the interior or help you decorate the New Year tree.
To create openwork New Year's balls you will need:
Sheets of thick colored paper in A4 format;
- knife for artistic cutting;
- needle and thread;
- glue, scissors;
- beads for decoration;
- template (presented at the end of the article).
The process of creating Christmas balls from paper:
First of all, you will need to print out the templates on paper. If desired, you can resize the template proportionally.

Next, start cutting out patterns using a pattern knife. Part of the paper with the design can be covered with a sheet of paper so as not to accidentally erase the diagram during operation (Figure 2-4). After cutting the pattern, begin cutting out the unfolded ball along the contour (Fig. 5).

Now you need to give each part of the cut out diagram a rounded shape, for which you can use a round pencil (Figure 6-7).
Then punch holes on both sides at the end of each petal (Figure 8).
Roll the cut paper into a ball and glue the edges of the development (Fig. 9).


All that remains is to make a loop from the thread - and the New Year's ball is ready for hanging.


MK author: Olga Kachurovskaya
New Year's ball made of fabric and foam.

To create these New Year's balls you will need:
Styrofoam ball with a diameter of about 7-8 cm;
- satin fabric or other fabric as desired;
- braid or ribbon, decorative beads;
- glue gun;
- scissors, knife.
New Year's ball made of fabric and polystyrene foam step by step:
First of all, mark the ball. To do this, take a thread, wrap it around and tighten it so that a small groove is formed on the ball for further work. The ball can be divided into any number of parts - 4, 6, 8, etc. In this case it was divided into 4 parts. You can draw the lines with a pencil for convenience.


Next, using a knife/scalpel, make cuts along the marked lines, about 7-8 mm deep. This should be done quite carefully so that the ball does not fall apart in your hands, especially if its diameter is small (less than 6 cm).
Cut out a petal from the fabric that is larger than the slices on the foam ball and begin to carefully tuck the edge of the satin fabric inside. First insert to a depth of about 3-5 mm. After you go around the entire outline, cut off the excess fabric and hide the edges. Thus, cover the entire surface of the ball, slice by slice.

Then start decorating. Place the ends of the beads inside the ball. Secure the loop with a drop of hot glue. Moment type glue can cause the foam to begin to melt. Pull the beads tightly so that they do not dangle when finished. And also with the second half of the beads.

Cut the loop to the desired length, add a drop of glue, insert the tails, and press.
The New Year's ball made of fabric and foam is ready!

You can tie a bow, draw snowflakes or glue sequins!
This ball will be a great gift for the New Year!
Decoupage of New Year's balls.

To decoupage Christmas balls you will need:
Plastic balls with a diameter of 8 cm;
- three-layer napkins with a pattern;
- acrylic paints of different colors: white, blue, yellow + brush;
- PVA glue;
- acrylic lacquer;
- a little semolina;
- sparkles;
- contours on ceramics and glass;
- a piece of sponge for washing dishes;
- plastic board for modeling.
Decoupage Christmas balls step by step:
You can purchase simple balls without a pattern in any color (gold, purple, silver, matte or glossy.

Take a ball and a piece of sponge, put a little white paint on the board, dab the sponge into the paint and apply it with point movements onto the ball. Make sure that there is always paint on the sponge, then you will get the effect of a snow coating on the ball.
Paint all the balls in this way and hang them to dry for about an hour.
Meanwhile, prepare your napkins. Why separate the top bright layer from the white one. Carefully cut out the design.

Dilute the PVA with water by half and glue the design to the ball. Start gluing from the center of the picture, gradually moving towards the edges. Do this action with all motives.
For balloons with bunnies, make light yellow paint and apply it with “smacking” movements around the motif on a white background.

After the paint has dried, coat the ball with varnish.
Next, let's create a winter effect, for which take a small amount of white paint and mix it with semolina until you get a thick porridge. Using a thin brush, apply to the ball in those places where there will be snow. 
Let it dry. After that, take varnish and small silver sparkles, and cover the semblance of “snow” first with varnish, and then apply glitter.
Decoupage of New Year's balls is completed!
MK author: Elena Slastina
Wool Christmas ball.

In this master class you will see the process of making New Year's wool balls. The process is quite simple and does not require you to master wool felting skills.
At first glance, it may seem that it is very difficult to learn how to felt felt toys. But such beautiful things can be done without certain skills and special tools. However, in this case, you will still need to purchase wool from a craft store, and then you can make exactly the same woolen Christmas ball. Children will be delighted with these balls - they can be removed from the branches and played with snowballs right in the apartment!
To make woolen Christmas balls you will need:
Felting wool in different colors;
- padding polyester (other filler);
- sewing needle + thread, scissors;
- pins with pearls;
- nylon stocking;
- optional decor: beads, sequins.
Wool Christmas ball step by step:
Form a ball of padding polyester and tie it with thread so that it holds its shape. Then evenly wrap colored felting wool around the padding polyester blank, secure it with a felting needle or using regular pins.

After completely wrapping the ball in wool, place it in a nylon stocking and tie a knot. All you need is to wash the workpiece in hot water (in a washing machine) on the “boiling mode” and spin at maximum speed. Then remove the ball from the stocking and dry it.
Start decorating - mark the future design with pins. Decorate the ball with woolen threads, securing them with pins with “pearls”, thereby laying out the desired pattern. Secure the resulting decor using sewing threads, while decorating the ball with beads and sequins in the places where the pattern is secured.

Attach a beaded loop to the top of the Christmas ball and you can hang it on the tree.
Happy Holidays!
Painting a glass ball for a Christmas tree.

To paint the ball you need:
Glass bowl;
- contour for glass and ceramics;
- stained glass paint on a varnish base (here from Hobby Line);
- paint for creating pearls (here from Viva Dekor);
- thin synthetic round brushes number 1 or 2 (ideally, each color has its own brush);
- the most inexpensive nail polish remover (acetone);
- cotton pads, rag.
Painting a glass ball on a Christmas tree step by step:
First, think about what you will depict on the ball. Here, elements of lace served as inspiration (photo 2). Apply the design with a silver outline. First, you can draw a schematic drawing using a washable marker and make sure that the outline is located next to the line and not on it. While painting, the ball can be placed on a mug or glass - this way it will be fixed and will not turn over (photo 3). Since the ball is round, first paint one part and let it dry (this way you don’t accidentally push the drawing together while working) (photo 4).

After you have painted the entire surface of the ball and allowed it to dry completely, proceed directly to painting. For this ball, white and blue stained glass varnish paints were used. For the third color they were mixed together in the lid (photo 5). Carefully drop paint onto a fragment of the design and stretch it to the edges. The advantages of varnish paints include quick drying and the complete absence of air bubbles on the surface, which is quite important when painting small elements (photo 6). Let the paint dry before starting to paint the adjacent element so that the paints do not mix (photo 7).

Slowly paint the entire surface of the glass ball. Let it dry by hanging it somewhere, just make sure first that the paint will not bleed (photo 9). Decorate the ball with paint to create pearls (photo 10). Place droplets of different sizes wherever you wish. Let dry.

Clean paint brushes using nail polish remover and cotton pads. By changing the color of the outline and paints, you can paint a couple more balls.
Author MK: Hamster Paradise (homorai)
Christmas ball decor using polymer clay.

To create such a ball you will need:
Clay of two colors (in this case red + white);
- glass ball;
- two 18-inch strips about 2x4 long;
- extruder;
- wax paper;
- glue;
- rope/ribbon for hanging.
We decorate the Christmas ball with polymer clay step by step:
Drill a hole in the top of the bar that is slightly larger than your extruder. Fasten the two planks together using a connecting loop. Next, you need to close the slats and create a shallow hole in the bottom of the slats in the same place. This will prevent the piston from slipping. To use this design, simply insert an extruder with clay into it.


Then put two pieces of clay of different colors together and wrap them in wax paper, the ends of which should be slightly longer than the “sausages” (Fig. 8-9).
Now, using an extruder, you need to squeeze out two-color strips of clay (Figure 10). Then clean the piston from the extruder and proceed to the next step (Figure 11).

Take one of the resulting thin strips and lay it out on your work surface. Cut one end and start twisting into a spiral (Figure 13).

Then place the twisted spiral of clay in the lower center of the glass ball and gradually begin to wind this strip onto the ball in a spiral (Figure 13-14). Use glue to hold the clay on the surface of the ball. When you have covered half the ball, carefully trim the end of the “sausage”.
It's easier to work with clay when it's not raw, so hang the ball on a wooden stick or toothpick, place the ball in a glass container and bake in the oven for 30 minutes at 265F. After the ball has cooled, remove its iron top and continue wrapping it with clay.

Continue until you completely cover the surface of the ball with clay. Try to connect the “clay sausage” as clearly and evenly as possible. Then replace the iron ball mount and bake for 30 minutes.

Decorate the finished ball with a beautiful bow!