What to make from large cardboard. Cardboard crafts for children
Today we have extremely interesting topic, which has the most practical value for making gift wrapping with your own hands: we will turn ordinary cardboard and plain paper in cardboard and designer paper. The method that will be discussed has already been covered more than once in RuNet, but it is so simple, elegant and effective with minimal material and time costs that it is certainly worth continuing the relay of master classes. Moreover, we will immediately use the result for its intended purpose and make wonderful gift boxes.
So let's get started, friends. For the intended transformation we will need:
- ordinary white cardboard for children's creativity,
- decorative napkin,
- cling film,
- scissors,

The idea is based on a type of decoupage known as napkin technology: the top layer of a three-layer decorative napkin is glued to the surface of the cardboard, but instead of traditional glue, cling film is used, which melts when heated and perfectly holds the materials being joined together. Created this way designer cardboard(or designer paper) perfectly retains its mechanical properties, while transforming into a completely new quality.
I show you the whole process step by step.
1. The selected napkin must first be thoroughly ironed to remove wrinkles (if the iron’s capabilities allow, you can spray the napkin with steam if necessary)

2. After this, separate the top layer with the pattern from the napkin

3. Place cling film, napkin and gauze alternately on a sheet of cardboard

4. Carefully and slowly iron it all with an iron. There is no need to skimp on temperature. I set the control to the “Clap” position, and it was just right. Special attention You should pay attention to the corners and edges where it is advisable to hold the iron for a few seconds.

5. Turn the cardboard over and trim off the excess film and napkin with scissors. It may turn out that the napkin did not grip well at the corners. No problem, we’ll fix this problem at the next stage.

6. Iron the cardboard again from the front and back sides


The result is a single sheet of cardboard with beautiful design and pleasant to the touch texture.

And it only took about 10 minutes to do everything.
Using this napkin technique, you can also make colorful designer paper from ordinary office paper, white or colored.
But if we talk about cardboard, the best results are achieved when using high-density photo paper.
The photo below shows 2 sheets of cardboard decorated using decoupage. One (on the left) is made on the basis of ordinary cardboard for children's creativity, the other (on the right) is based on Lomond matte photo paper with a density of 230 g/m² (the density is approximately the same as cardboard).

As you can see, the second option naturally turned out brighter, but another undoubted advantage of it is the clean White color wrong side.

If desired, the reverse side can be easily tinted by applying the desired color on a computer and printing it on a printer.
By the way, using Lomond photo paper will not cost much more than using regular cardboard. Judge for yourself: one sheet of uncoated cardboard for children's creativity costs an average of 2.5 rubles, and the cost of 1 sheet of photo paper in my case was 4 rubles (but you can find cheaper ones). Obviously, in terms of price-quality ratio, Lomond is unrivaled. But this, as they say, is food for thought.
And here are a couple more sheets of designer paper (Lomond, density 120 g/m² (for comparison, the density of regular office paper is 80 g/m²)) frankly New Year themed

Stocks of designer cardboard and designer paper have been replenished - you can start making gift boxes. We'll continue tomorrow. Don't forget your designer cardstock. :)
Quick navigation through the article
Cardboard is easy to bend, cut, paint, glue, stitch and hold its shape, and it is always available. What you need for children's creativity and development fine motor skills, hand-eye coordination, logical thinking and imagination! In this material we presented 13 super ideas, 100 photos, 1 step-by-step master class and a selection of video tutorials on making cardboard crafts with your own hands.
Where can I get cardboard?
For making children's crafts other than sheet colored or corrugated cardboard from the store, you can use the following scrap and scrap materials:
- Cardboard boxes (you can ask the warehouse workers at your nearest store);
- Disposable paper tableware;
- Bushings from toilet paper and paper towels;
- Packaging of cereals and sweets, such as corn flakes;
- Egg packaging (it’s good to use cells);
- Packaging of dairy products.
13 ideas for cardboard crafts + Master class
Idea 1. Construction toys
The good thing about cardboard “constructors” is that they are easy to make and decorate, fun to assemble and, of course, play with. You can come up with and design such a toy yourself, or you can make it using a ready-made diagram from our article or found on the Internet.


Click on the photo to download the templates for these figures

Click on the photo to download the templates for these figures


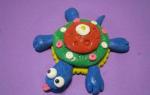
Idea 3. Puppets or just dolls with moving parts
Making a puppet out of cardboard is very easy and at the same time interesting. You just need to draw the details of the man, cut them out and fasten them with mini pins (sold in scrapbooking stores).

- Instead of special fasteners, you can use thin wire (for example, for beading). Simply cut a piece of wire 2 cm long, thread it through the holes of the parts and twist its ends on the front and back sides as shown in the photo on the right. You can also use metal rings as fasteners.
If you want the figurine to become a real puppet, then you can:
- Connect the arms and legs with a single thread, as shown in the photo below, or with two threads (one thread connects the legs and the other - the arms).


- Tie a rope to each arm and leg, then tie all 4 ropes to the ends of sticks folded crosswise. An example of such a puppet is shown in the following photo.


Idea 4. Finger puppets
Finger puppets are made even easier and faster: a small figurine is drawn, then two holes are cut out in its lower part. Woo-ala, the first “actor” for puppet theater ready! In the following selection of photos you can get some ideas for finger puppets.


Idea 5. Land, air, water and space transport
A car, plane, bus, ship, boat or rocket made from cardboard is no worse than one bought in a store. After all, making such a toy with your own hands together with your parents already seems like a fun adventure. And when you get tired of the cardboard vehicle, you can use it to make other toys and crafts.


Idea 6. Mini kitchen
If you have a couple of boxes square shape, then why don’t you make a mini-stove and sink out of them?


From one rectangular box elongated shape you can make a refrigerator.

If there is enough space in the room, a washing machine can complement the kitchen.


For a master class on how to make a cardboard craft in the form of kitchen furniture, watch the following video.
Idea 7. Toy equipment and household items
Do you need props for role-playing games or things to decorate a cardboard house? We suggest making them from cardboard with your own hands.


Idea 8. Masquerade costumes
IN kindergarten Or is there a matinee or performance coming up at school? Or does your baby just love transformation? You can make an amazing outfit from cardboard. Here are photo examples fancy dress made of cardboard for boys.


And here are photo examples of cardboard costumes for girls.


Idea 9. Bookmarks
To make bookmarks, it is better to use not too thick colored cardboard, and in order for the craft to last as long as possible, it should be laminated with transparent tape.


Idea 10. Aquarium with fish
Cut off the lids of the cardboard box and paint its inside in blue tones; if desired, decorate the aquarium with applications made of plasticine, glitter, colored paper, etc. Cut 3-5 holes along the top of the box and pass a thread through each hole. Next, cut out 3-5 fish from colored paper. Attach a large button (from the outside of the aquarium) and a fish to each thread. That's all, the aquarium is ready.


Idea 11. Town in a box
You just need to trim the sides of the box and paint them with inside and... voila! You get a city with roads, with which the child will play for hours, moving cars and figures of men.

Idea 12. Three-dimensional toys made of corrugated cardboard using the quilling technique
Volumetric crafts can be “twisted” using the quilling technique from corrugated cardboard. Having mastered the skill of forming various figures, the child will be able to experiment with shapes and colors and even create figures of their favorite cartoon characters.

Materials and tools:
- Cardboard box;
- Tracing paper or white tissue paper;
- Black cardboard (you can paint regular cardboard with a thick layer of black paint);
- White pencil;
- Wooden skewers, straws or wire;
- Scotch tape and/or glue;
- Scissors;
- Stationery knife.
Step 1. First we need to make the theater body. To do this, cut off the lids from the box, and then cut out its bottom.
Step 2. Cut a piece of tracing paper larger than the box size. Carefully glue it to the sides of the theater with slight tension, as shown in the photo.
Step 4. Now it’s time to cut out the characters for the future play from black cardboard. Keep in mind that the more detailed the silhouette of the figure, the more realistic the shadow theater will be. Therefore, it is best to draw figures using templates found on the Internet and printed.

Step 5. The shadow theater is almost ready, all that remains is to glue the figures to wooden skewers or wires. You can glue them as shown in the photo below or perpendicularly to make it easier to control the characters.
Useful tips
If you still have cardboard boxes after purchasing electronics or other items, there is no need to throw them away.
You can make a huge number of crafts from cardboard, both for home and for children.
Here you can learn how to make 5 very interesting and useful things from cardboard, and also see what incredible crafts some masters of their craft make.
DIY cardboard garland

You will need:
Sequins on the dress (sequins)
Stationery knife
Superglue or hot glue
Rope.

1. Draw straight letters on cardboard, geometric figures or patterns and cut them out.

* To get a letter on cardboard, you can simply use a ruler and a pencil, or you can print the letter on paper, place the paper on the cardboard and use a utility knife to cut out the letter, tracing it along the outline.
2. Prepare sparkles (sequins) and start gluing them to the cardboard. Can be used different types sequins and it is not necessary that the sequins be on the thread.


3. When all the letters or shapes are ready, place them on a flat surface back to front and in reverse order and glue the thread to them.

When the glue has dried, the garland can be hung.

How to make a desktop organizer out of cardboard

You will need:
25 sheets of cardboard (25 x 25 cm)
Ruler
Pencil
Stationery knife
Glue brush (if necessary).

1. Using a ruler and pencil, draw on one sheet of cardboard the places where you want to make indentations (for pens, small items, etc.), leaving at least 2.5 cm from the edge of the cardboard.
2. Place the finished sheet of cardboard on new leaf, trace where you made the holes and cut them out of a new sheet.

3. Repeat the same steps with other sheets, but leave 5 sheets untouched at the end.

4. Start carefully and evenly gluing together all the sheets with holes. You can use a brush to apply glue. You can first glue 5 sheets, then five more, and so on until the end.

5. Glue 5 untouched sheets together to make the bottom of the organizer.
6. Now all that remains is to glue the bottom of the organizer to the cut out part of 20 sheets.

Let the craft dry overnight and then you can use it.

DIY cardboard crafts: geometric lamp

You will need:
Thin cardboard
Scissors
Stationery knife
PVA glue or hot glue
Ruler, compass and pencil (to draw a pentagon)
LED light bulb (it is important that there is an LED light bulb so as not to burn the cardboard)
Lamp socket.
1. Start drawing pentagons (a figure with 5 identical sides) on cardboard. To begin with, you need 11 pieces, later about 10 more. In this example, the side size of each pentagon is 6 cm, but you can choose a different size, as long as all the figures are the same size.

How to draw a pentagon (video)
To draw an even pentagon, watch this video:
Once you have drawn and cut out the pentagon from your cardstock, use it as a template to trace and cut out the rest of the pentagons.
2. Inside each of the 11 pentagons, draw 5 smaller pentagons. In this example, the distance between them is approximately 6 mm.

3. Using a utility knife, cut out all the shapes from each cardboard pentagon (see image). This is the longest process, but it is quite simple.

4. We begin to collect parts.
Prepare one group of 5 pentagons. Place the largest one on the table, and glue the next largest one on top of it so that its ends touch the sides of the large pentagon. Continue in the same style until all the pieces have been glued.


5. Repeat step 4 with the remaining groups of pentagons.
6. Assembling the lamp.
When all the parts are assembled, you can assemble the lamp. Place one piece on a flat surface and begin gluing the remaining pieces to its sides. Try to glue so that adjacent parts also have glued sides (see image).

*You will have to lift the pieces up a bit. You will get something similar to a vase.


7. Now you need to make the base for the lamp. To do this, you need to draw a few more pentagons (in this example there are 8 of them) and cut them out.
Inside each shape, draw another pentagon (1 cm from the edge) and cut it out. Remove the cut out part and carefully glue all the other parts together.


8. For the light bulb, you need to cut out another pentagon and make a hole in it for the lamp socket.


9. Glue the part from step 8 to the base of the lamp.

10. After attaching the light bulb to the base, place the lamp where it should be (on the base) and make a small cut (or hole) for the cable. You can add a little glue to better attach the base to the lamp.


DIY cardboard wall decoration (diagram)

You will need:
Scissors
Pencil and ruler (to draw some squares)
Acrylic paint or spray.
1. Cut cardboard (cardboard box) into several squares of different sizes.

2. Color all the squares. In this example, metallic color was used.

3. Prepare a large sheet of cardboard and paint it.
4. Start painting all the other squares and gluing them to the large sheet.

*Glue however you like.
5. You can stick the work to the wall using double-sided tape or simply place it on a shelf near the wall.


DIY cardboard furniture: cloud-shaped shelf

You will need:
Several sheets of cardboard
Stationery knife
Pencil
Scissors.
After the text instructions, you can find video instructions for creating this shelf.
1. Take one sheet of cardboard and draw a cloud on it. It is better to draw so that one side of the cardboard sheet serves as the bottom of the cloud (see image).
2. Cut out your cloud with scissors.
3. Use a cardboard cloud to make several more of the same blanks - trace it on each sheet and cut it out.

* In this example, 23 sheets of cardboard were used - 3 sheets will follow the shape of the cloud and 20 will be "inside" the cardboard structure and they have a similar structure, but they can save cardboard (see video).
4. Cut the unused cardboard into small pieces that need to be glued between the cloud pieces
5. Start gluing carefully and one by one all the parts of the shelf, not forgetting to glue pieces of cardboard between the parts (see picture).

6. To hang a shelf, you first need to attach one hook and one nail (see video) and hang the shelf on them.
How to make a shelf out of cardboard (video)
DIY cardboard chandelier (photo)


Crafts made from paper and cardboard: mirror decorated with cardboard parts
All the little parts are made from cardboard paper towel or toilet paper rolls.
First you need to cut the roll into rings of equal thickness, and press down these rings with a hammer. From the obtained parts you can make beautiful decorations and crafts.
A little information was given about binding cardboard and its use in cardboard art. It is preferable to make many cardboard products from bookbinding cardboard: such as a chest of drawers, an organizer for jewelry, a cover and pages for a scrapbook, etc.
This type of cardboard is more difficult to obtain than corrugated cardboard. To make it, more material is needed, and therefore there is a difference in price. At first I tried to find a replacement for this material, making it myself. The result is high-quality cardboard... but the time and labor costs are high...
With experience, I came up with the idea of how to make such cardboard with my own hands, with less cost and time.
For this I take:
- corrugated cardboard
- stationery knife
- PVA glue
- remnants of unnecessary paper and fabric
On corrugated cardboard, I draw a frame at least 3cm wide, so the cardboard will not lose its shape when it gets wet.

Using a utility knife, I cut through the layers of cardboard, not reaching the bottom.

I moistened the top layer of cardboard with water and let it blot a little, for better separation of the layer.

Peeled off the first layer of paper.

I did the same with the second layer of cardboard, putting it aside.
It will still come in handy.

The bottom, last layer remains.

I coat it with PVA glue.
I would like to draw your attention: in my work I use three-layer cardboard, at the end of the work I will get 0.2 cm binding cardboard.
If you use five-layer cardboard, it will be thicker accordingly. The thickness of the end (edge) can be adjusted as desired by gluing the sides (3cm) of corrugated cardboard with PVA glue.

The middle can be filled with whatever is at hand, coating each layer well with PVA glue. This stage of work must be done on oilcloth or a surface that will easily come away from the cardboard when the work dries.
You can fill it with papier mache, make layers from pieces of fabric, or use leftover paper.
I decided to use everything at once!! :-)


I wet the pieces of paper well and squeeze them out of the water, so it becomes easier to work with.


When I reached the top of the side, I covered the craft with paper (or other paper) and leveled all the layers with a rolling pin, applying light pressure with it.
In this case, the excess will go beyond the frame, the layers will be evenly pressed together.
It’s not for nothing that binding cardboard is often called pressed cardboard.

I coated it with PVA glue and removed the excess. When the top had dried a little, I placed the press on the entire surface.
Once dry, I turn the cardboard over. It dries within a week, maybe longer.
What kind of transformations does cardboard not undergo?! IN Lately More and more photos of cardboard crafts are appearing on the Internet.
But if earlier cardboard experiments could be found in kindergartens and art classes in primary school, then today the audience of fans of this activity is expanding in completely different age categories.
Moreover, crafts made from paper and cardboard, made by amateurs, can serve not only as entertainment for children or a modest present, but also as a presentable panel for the interior, designer gift wrapping, an exclusive box and even a sculpture, not toy furniture or home.
Preparation of material
How to prepare cardboard for your favorite business? On your own or by purchasing from expensive office supply departments? In fact, cardboard is found in our everyday life much more often than we think, so it is not necessary to buy it specifically. Here are several sources through which you can accumulate the required amount of raw materials:
- - various packaging: boxes, cylinders, bags;
- - inner liners for toilet paper rolls, culinary parchment, cling film, etc.;
- - details of packaging for tights.
As can be seen from the above, DIY cardboard crafts, in fact, can be made from garbage, and what kind of ones at that?! If you need colored material or more exclusive raw materials, you can always purchase it, if not in a stationery store, then in the scrapbooking department.
Regarding the tools, you don’t need anything special except scissors, as well as a breadboard knife, glue, paint and a few auxiliary attributes at the discretion of the amateur craftsman.
There are several of them, but the most elegant, rightfully, are postcards. In second place are products using the appliqué technique. On the third - cardboard crafts for children: castles, housing and furniture for dolls. Let's look at each of the ideas mentioned in more detail:
Postcard
One of the varieties of crafts made from colored cardboard. When working with such a product, you cannot do without a printer (for copying a diagram, enlarging it to the required size and printing it). The next step is to transfer the design onto cardboard and cut it out using a breadboard knife.
The final touch is gluing the blank onto a cardboard base of a different shade and slightly bigger size. The base usually has a rectangular shape. It is divided into two halves. The bend point is drawn with a thin crochet hook, the tip of scissors, or the empty shaft of any pen.
An important condition is that the fold must be drawn under the ruler. After this, the fold is carefully ironed from the outside. The front side is decorated with any decorations: beads, paper applications, rhinestones, bows, etc.
Such a product has a 3D effect, since it has a volumetric part, so it is not surprising that it can serve not only as a pleasant addition to a gift, but also as an excellent independent gift, into which not only money is invested, but also the soul of the performer.
Applications
This technology allows you to create things that combine simplicity and childlike spontaneity. Such decorations can decorate not only the interior of a nursery, but also rooms that are more demanding, from the point of view of high taste.
For example, you can make a “Seasons” panel, consisting of 4 parts. The ideal cut for it would be a plywood frame cut from a 4-mm plate.
The surface of the frame is sanded with sandpaper and coated clear varnish. In the absence of plywood, the frame is made of thick cardboard, divided into 2 parts: the bottom (a square with a colored cardboard applique) and the top (the frame itself, slightly smaller than the base). The lower part should protrude 2 mm from the frame. The frame itself is also decorated with appliqué.
Kids toys
The most suitable raw materials for this category are rolls on which toilet paper is wound, as well as various cardboard boxes.
Thus, a medieval castle made in this way will become a favorite toy attribute for both boys and their knights and girls and their princesses. To do this, it is enough to attach toilet cylinders-liners to a cardboard base, supplementing them with cone-shaped roofs, again cut from the same cardboard.
Individual turrets can be left without roofs, having their tops decorated with battlements. The towers are joined using slots in the cylinders themselves. The textured surface of the towers is made from transformed toilet paper, treated with PVA glue and painted with acrylic paints.
Cat's house
A house made from corrugated cardboard packaging, for example, from a TV, can become a separate masterpiece that your pet will also enjoy.
The technology for making cardboard crafts is as follows: using a compass or a bowl, circles are marked on corrugated cardboard, which are then carefully cut out; From round parts, using the principle of puff pastry, a house of almost any shape is glued together (from conical to cup-shaped, tapering upward).
If corrugated cardboard is not enough, then you can simply take a cardboard box, cut out windows and a door in it, not forgetting about the decor of the exterior and interior. In any case, if the idea is already ripe, but it’s still hard to imagine how to make a craft from cardboard, the Internet can help!