How easy it is to make curls without a curling iron. How to curl your hair without a curling iron, ironing and curlers - how to wind it beautifully. With a hairband
The article “How to make curls without a curling iron and curlers in 5 minutes” is interesting for those who want to create a spectacular hairstyle using auxiliary tools. We have selected effective methods suitable for home conditions. Below we consider atypical methods and a table of means.
What you need to know in order not to harm your hair when curling?
Before you learn how to wind your hair without a curling iron and curlers at home, decide on the structure and condition of your hair:
- Diagnose - inspect the curls, evaluate the evidence of damage.
- If the hair is hard and brittle, chemical perms are not recommended.
In case of severe damage, folk methods help out. With their help, beautiful curls are created without harm to the hair.
Pros and cons of using folk methods
How to make curls without curlers and curling irons in 5 minutes at home, and whether self-curling is generally useful is not an easy question. Consider the pros and cons of "folk" means:
- The simplicity of the method. The proposed methods are easily repeated at home, special knowledge, devices for curling hair are not needed.
- Budget. Unlike perm, home methods cost nothing. The only thing you will spend money on is foam to fix the effect.
- Safety. Folk methods do not change the structure of the hair. "Grandma's" means - a reliable way to preserve the original beauty of the hair.
- The fragility of the effect - chemical or curling with a curling iron keeps on the head longer.
- Unpredictability of the result - curls at home often differ from each other in elasticity and thickness.
- Simplicity. The proposed methods are easily repeated at home, special knowledge and devices for curling hair are not needed.
Why curling irons and curlers harm your curls?
Mechanical interventions in the hair structure lead to brittleness. In salon conditions, problems are easier to avoid: the master will select a special moisturizer. In home procedures, the risk of damaging the hair is high.

curlers- an easy way to curl curls, but not for everyone:
- curlers are useless if you wash your hair not in the evening, but in the morning;
- on large curlers it is impossible to sleep.
curling iron copes with the task quickly, but does more harm. Daily use is contraindicated for those who monitor the health of the hairline.
It makes sense to refuse thermal exposure for the following reasons:
- the appearance of split ends;
- weakening the structure of the hair cuticle;
- dullness of the strands;
- the appearance of dandruff;
- growth retardation.
Curling hair with a curling iron deprives them of shine and strength.

How to curl your hair without a curling iron and curlers?
Let's move on to tips on how to curl your hair without a curling iron and curlers. Since the time of our grandmothers, there are many ways to make a spectacular hairstyle without resorting to thermal manipulations:
- hairpins;
- rags;
- towel;
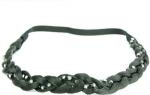
- bezel;
- hairpins;
- T-shirt;
- sock;
- foil.
Let's talk about methods in more detail.
Paper towels

Towels have been used since time immemorial - papillots from rags are still in many homes. We offer to make improvised papillots on your own. Paper absorbs moisture better than fabric, making curls stronger. The method is good for owners of very soft hair.
Wash your hair, dry a little. Curling on wet hair is not recommended.

The sequence is:
- Prepare a towel. Cut into strips - the optimal length is 5-6 cm.
- Twist the separated strands on strips like curlers.
- Tie the edges of the towels so that they do not get untied at night.
- In the morning comb large curls, fix with varnish.
hairpins

For winding curls, use ordinary hairpins. The method is simple and suitable for short hair:
- Moisturize your hair- manually or with a spray gun.
- Divide into small strands: the smaller, the curlier it will turn out.
- Twist the strand like curlers, a tight ringlet.
- Fix the ring hairpin.
- procedure repeat.
- Before going to bed head wrap in a scarf.
- In the morning remove the pins unroll the rings, straighten the curls with a comb. Fix the result with varnish.
Rags

An interesting way to make curls without curling irons and curlers. In childhood, many twisted such curls. You will need a sheet or an unwanted shirt.
- Cut into even pieces focus on the length of the hair. If you want large curls, make the patches wider.
- The resulting rags moisten a little, wind on your hair.
- Tie with a fabric strip, not to unravel.
The method is comparable in technology to curlers, but it is more pleasant to sleep.
Towel

This method is suitable for those who would not like to expose their hair to heat treatments. A towel is the most harmless way to get big curls.
How to curl curls with a towel:
- Roll up the towel tourniquet.
- Tie the ends rubber band will turn out - "donut".
- Moisturize, comb hair. To fix the effect, apply foam - closer to the roots.
- Distribute your hair evenly over the entire surface of the head.
- Put on a bagel on top.
- Take a wide strand and twist around the towel. Secure with invisibility.
- Wrap the rest of the strands(the larger - the more magnificent curls).
- Go to bed. Remove the towel in the morning.
bezel

If the towel helps to create large waves, then the rim, repeating the technique described above, makes the hair finely curly.
How to make curls for girls with short hair:
- Lightly wet split curls wrap under the rim.
- Repeat with all strands.
- Before bedtime put on a scarf.
- Comb in the morning and fix the hairstyle with varnish.
Hairpins

Hairpins will help to wind light curls on short hair quickly and simply. A long-term effect is obtained if the hair is wetted with a spray bottle. Dry spray, apply foam or styling mousse. Distribute by hand.
- Divide strands of hair.
- Wrap strand around the finger - better from the face.
- Fasten the curl invisible at the root.
- Repeat procedure with every strand.
Leave it overnight, in the morning. Do not forget to put on a scarf when you go to bed - the design will not fray overnight.
T-shirt
If a spectacular hairstyle is required in the morning, but there is nothing at hand, then the most ordinary T-shirt will save you.
How to make curls without curlers and curling irons at night? Use a T-shirt. The process does not take much time, and as a result it gives beautiful wavy curls.
- Select means for styling and t-shirt. The size of the sleeve does not play a big role, but long sleeves are preferable.
- Wash your head, do not dry the curls to the end, apply mousse or styling foam.
- Untangle your hair with your hands or separate with a coarse-toothed comb.
- Straighten your t-shirt on a flat surface.
- Tilt your head, pull your hair down towards the center of the T-shirt, wrap around your head, pin at the back of your head.
- top turn your head. The sleeves are easy to tie for fastening.
- Leave the T-shirt on better at night.
Rubber band and pencil
For lovers of heavy tight curls, this technique will be a discovery - it does not harm the hair structure, as curlers do, and the effect is almost the same.
How to curl your hair with an elastic band and a pencil. Before the procedure, take a shower, dry your hair slightly.
- Take a clean towel blot hair from roots to ends.
- Divide into strands. It is recommended to make small ones - they curl better. Large ones are smooth.
- Take a strand twist around the pencil to half, turn the pencil 180 degrees.
- Watch out to keep your hair from slipping off. Wind a strand on a pencil up to about 3-4 cm. Otherwise, the curls do not fit the head.
- Leave the pencil for 2-3 hours. The longer the procedure, the better the curl will curl. Secure the strands around the pencil with an elastic band or hair clips. Repeat with the next pencils.
- When the pencils are fixed, leave them overnight. Comb your wavy curls in the morning.
Sock

Socks are used not only for their intended purpose: they are used to get fluffy large curls in the Afro style.
An unusual, but effective method of how to twist hair without curlers and curling irons - with a sock:
- Lightly dampened strand twist on the toe from the tips to the roots and tie it in a knot.
- Repeat procedure with all hair.
- In the morning socks are removed, Hairstyle is lacquered.
Foil

The foil method is effective, but less convenient than paper curls without a clip.
You will need foil and cotton wool.
- cut the foil for long stripes.
- In foil wrap the pieces of cotton.
- On pre-divided, slightly moistened strands wind up foil with cotton. The larger the strand, the thicker the curl.
- Foil at the roots fix.
- Repeat with all strands.
- Go to bed tying a scarf over his head.
- In the morning take the flagella out of your head.
- For styling to last longer fix with varnish.
Correspondence table
| Curling Method / For Hair Types | Short | Medium | Long | For the night | In 5 minutes | As simple as possible |
| Paper towels | No | Yes | Yes | Yes | No | Yes |
| hairpins | – | + | + | + | – | – |
| Rags | No | Yes | fit | Yes | No | No |
| Towel | – | + | + | + | + | + |
| bezel | fits | fits | fit | fits | fits | fit |
| Hairpins | Yes | Yes | Yes | Yes | Yes | Yes |
| T-shirt | – | + | + | + | + | + |
| Rubber band and pencil | – | + | + | + | + | + |
| Sock | – | – | – | + | – | – |
| Foil | corresponds | corresponds | fit | corresponds | does not match | does not match |
The easiest ways to curl your hair
The method does not require special devices. Braid your hair completely into braids, fix the ends of the braids tightly - otherwise they will unravel. We advise wet strands to be braided, but you can’t comb your hair in the morning - the curls will fall apart. Pay attention to the thickness of the hair: the thinner, the more braids.
How to wind curls with your own fingers:
- Separate a strand of hair from the mop.
- Apply foam or gel.
- Twist your hair around your finger.
- Gently pull it out, fix the curl with a clip, dry it with a hair dryer or use a flat iron. Be careful, don't get burned!
A few tips on the methods presented in the article:
- After styling, do not use the comb immediately - the curls will separate.
- Do not forget: the natural curls depend on the elasticity of the curls.
- If your hair is too straight, use styling mousse.
- Don't unwind quickly. For a good result, you will have to wait at least 4-5 hours.
Greetings, dear readers and subscribers of our blog. I want to talk to you today about how to curl your hair. Moreover, I would like to discuss options when you can do without special tools, and use only improvised options. How to wind hair without curlers and curling irons at home will be discussed further.
Beautiful curls of different sizes - from large to small - are traditionally correlated with different curling methods. Use irons, curling irons and curlers to create them. But what to do for those who are deprived of all this set at hand, but really want to look beautiful and romantic? It is necessary to use curling options without devices. Moreover, there are quite a lot of such options.
Multifunctional bezel
If you keep an ordinary headband on hand, it is quite possible to use it for curling. First you need to comb your hair and lightly moisturize it. To do this, simply wet your hands with water and run them through your hair. Then we take the headband in our hands, put it on the head. Then we carefully begin to wrap everything along the strands under it. Repeat this until all of them are twisted.
It is quite possible to use a similar method both for a while while you are going somewhere, and for the night, carefully hiding the entire structure under a hat or net - they will keep the hairdo not rumpled and will not allow the hair to crumble. If you can’t figure out how to wind it correctly, you can use the Greek hairstyle method - the principle of twisting the strands is the same.
When you remove the bezel, you will get beautiful curls. This hairstyle can be done for any occasion and for evening walks, outings and dates. It looks gentle and romantic, and it takes only 5 minutes to create it - a great savings in money and effort.
Sticks to help
Today, Chinese sticks for creating hairstyles are very popular. They help create original authentic hairstyles and buns. And not everyone is aware that these can be used to create beautiful and gentle waves on the strands. How to use hair sticks? Easy. It is necessary to divide the mop of hair in the middle. One side for convenience, so that it does not get confused under the arms, you can stab with a hairpin. The free strand must be collected in the tail. Then wind it on a stick and with a deft movement of your hand scroll the stick so that it easily tucks under the elastic band. In order for the sticks to be fixed more securely, it is worth threading them from the opposite side of the tail.
If you need to leave the design for the night, you need to additionally tie the sticks. After you remove the sticks, you can admire the beautiful and large waves.
Special spirals
Today, in various haberdashery stores, there is a huge selection of curling spirals. Large, soft - all of them allow you to easily and quickly get curls without the use of special devices.
It is quite easy to wind strands with their help - just take a spiral, separate the hair and gently wind it around the spiral. They easily fit around her, securely fixing. Such spirals can be left overnight, again securing them in advance.
improvised materials
On the Internet, you can now easily get acquainted with a large number of photos where girls and girls are sitting with bagels wrapped around their heads in rags. This method is extremely common and was used by our grandmothers. For curling in this way, you need to take a rag or gauze. Based on what you want to get a curl, you need to cut the material. You should focus on the following parameters - for small curls you need strips 2.5-3 cm wide, large ones require at least 5 cm.
It is important to consider that such an option as curling hair is good on clean hair. If they are dry, you need to spray them a little from the spray bottle. Everything should be divided into strands and begin to wind. Put a cloth under the strand should be based on the direction of the curl. It is necessary to fasten the fabric securely, you can tie it with an elastic band. This perm is usually done at night. In the morning they unfold and admire the result achieved.
With a hook
You can crochet curls. To do this, you need to take a hook, divide your hair into strands - they will be quite numerous, so you need to prepare and tune in that the procedure will be quite lengthy.
Crochet it is necessary to twist the strands in a circle in a spiral, and then twist them into a small bagel and fasten with hairpins on the head. Hair can be lightly sprayed with a spray bottle to make it damp - the effect will be more pronounced.
Waves after braiding
You can also curl with ordinary braids. Depending on the thickness of the pigtail, the coolness of the curls is also determined, the smaller the braid, the greater the curl. This curling method is great for those who do not want to spend time with rags, hooks and sticks. In this case, the result is excellent.
Do you know any of your secrets, dear readers of our blog, how you can wind your hair without electronic means? Share them with us, bookmark the site and subscribe to our news. We are waiting for you on the pages of our blog.
Your "Most Fashionable"
Everyone knows that the dream of every woman at any age is an attractive appearance, femininity and sexuality. In addition, any woman wants to be able to change her style whenever she wants to, experiment (including with her hair) and come up with new ways to improve her image.
hair waving- this is perhaps the most interesting and fascinating manipulation, thanks to which a woman can change her appearance without leaving home.
It's no secret that the most common way to curl hair is curling with curlers or with the help of electrical appliances (tongs or curling irons). Unfortunately, not any hair can be curled on curlers. For example, heavy, coarse or too thick hair is difficult to curl. As for the curling iron, its use often leads to drying and damage to the hair.
If you do not want to spoil your hair, or at the right time you did not have curlers or electrical appliances, then you will definitely begin to think about how to make beautiful curls using improvised means. Oddly enough, this is not at all as difficult as it seems at first glance.
How to make curls without curlers and curling irons - 1 way on paper
For example, some fashionistas perfectly replace curlers with ordinary ones. pieces of thick paper. On these pieces they wind each strand in turn and fasten it with laces or a thick thread. Although the unfinished look of this hairstyle often brings a smile, the result will exceed all your expectations.
How to make curls on pieces of paper - videoMethod 2 - with fingers
The second way of curling is even easier. To do this, you only need own finger. Apply a sufficiently large amount of foam to your hair, and then begin to separate strands from them, which you gently wind around your finger.
When you wind the strand, remove it from your finger and secure it to your head with a hairpin. After that, move on to the next curl. If you want to get larger curls, then the strand can be wound around several fingers. When you wind all the strands, wait about 30 minutes until the foam dries.
If you want to speed up the result, you can dry your hair with a hairdryer. Next, sprinkle them with varnish and dissolve the hair.
3 way - hair dryer and round comb
If you like big curls, then you can make them using an ordinary hair dryer and a round comb, wrapping each strand on it and fixing it with varnish.
4 way - using a pigtail
There is another way by which you can get luxurious curls without using curlers or curling irons. Lightly wet your hair and braid it in the evening. It is better to braid one or 2 French braids, then the hair will be curly from the roots. With these braids, you will have to sleep through the night.
In the morning, gently loosen the braids with your fingers (never use a comb for this!), then sprinkle your hair with a little varnish. Hair can be tied into a high ponytail.
Please note that it is better not to braid too small pigtails. Otherwise, you will get completely unnecessary volume. It is better to braid braids of medium thickness. To make your hairstyle even more original, try not to undo some of the braids.
5 way - we twist hair on rags
For this method, you will need ordinary rags, about 20 cm by 3-4 cm. Separate a strand of hair and wind it together with a rag in the middle, then tie a rag and do the rest of the strands in this way. If the hair is not obedient, then use a hair foam. On such rags it will be comfortable to sleep, and the curls will last a long time.
6 way - we twist the hair into flagella
We divide the hair into equal parts (the thicker the hair, the more parts it will turn out), apply foam to each strand and twist it into a flagellum, and then make a bundle out of it. Each bundle should be tight and hold well, for this we fix the tip of the hair with a hairpin. It is better to leave the bundles for a couple of hours or overnight. In the morning we get beautiful elastic curls!
Curls with flagella - video7 way - curls with socks
Thus, curls without curling irons and curlers are quite achievable, you just need to know some secrets.
Nature has endowed not every girl with beautiful curls and voluminous hair. And sometimes you really want to change your image at least for one day and surprise others with a new way of the owner of chic curls! Traditionally, curling irons or curlers were used to curl hair, but these methods are gradually falling out of fashion and women are increasingly resorting to alternative methods. The article is dedicated to fans of curls and those who are interested in how to make curls without curlers and curling irons.
Prelude to curling
Before you start curling, you should perform several actions:
- wash your hair thoroughly using balm and conditioner;
- apply all the necessary hair styling products;
- apply thermal protection;
- dry your hair (unless you are going to curl with a hair dryer).
How to make curls with a straightener
As it turned out, an iron (in other words, a straightener) can be used not only to straighten unruly curls, but also to curl straight hair. In this case, the temperature of the plates should be maximum, somewhere around 180-200 degrees. First, divide your hair into two layers - top and bottom. Fix the top layer at the crown (start it later), and you can start working with the bottom one.
Take a small section and grab it with a pair of tongs where you want the curls to start. Then make one turn with a strand around the iron, as if forming a ring, and slowly lower the tool down, as if straightening. Voila - the curl is ready! In principle, there is not much difference how to make curls: with an iron or a curling iron, the result will be identical.
Hair dryer
The second way to curl is to use a hair dryer. Here, in addition to the hairdryer itself, you will need either a round comb or a diffuser.
Slightly damp hair should be slowly wound on a round comb, while treating them with a jet of hot air. In order for the styling to last longer, each finished strand must be doused with cold air.
Those who are interested in the question of how to make curls without curlers and curling irons can stop their eyes on the diffuser. This is a special nozzle that has long protrusions over its entire surface. It is sold in a kit with almost any hair dryer. With her, everything is much easier. Simply dry your wet hair with a blow dryer with a diffuser, bringing the dryer up to your head so that the hair wraps around the fingers of the diffuser. When they become almost dry, you need to apply a fixative and repeat the procedure.

Braid curl
Braids are the most common and classic method. Just braid yourself one or more braids and go to bed. The number of them depends on what size curls you need. To make large curls, one or two braids are enough, but if you want small curls, then you will have to braid many small braids.
Hair can also be curled by tying a tight bun at the crown and leaving it for a while or overnight. True, the curls after this are not so durable, although their life can be extended by pre-treating the hair with special fixatives.
Curls with fingers
You can make curls at home with your own fingers. Twist the strand around your finger to form a ring. When you get to the roots of your hair, gently remove your finger without disturbing the shape of the ring, and secure the curled strand to your head with a hair clip. After twisting all the hair in this way, leave it for several hours or all night. If you have little time to pack, hold each ring for a few seconds with a hot iron. This will greatly speed up the curling process.

Curl "snail"
Divide damp hair into small sections. Twist each strand in turn, making a dense, twisting flagellum out of it. Then fix each flagellum on the head in the form of a small bundle. At the same time, it should take the form of a snail shell. Leave the creation all night, and in the morning disband the bundles. The result of your efforts will be luxurious large curls.
Curling "hoop"
Another interesting way to make curls without curlers and curling irons is to use a regular hair hoop. Here you will need the recently very popular circular hoop. Yes, yes, exactly the one that is used for the Greek hairstyle.

You put it on your head and all the strands, one after the other, are threaded under the elastic band of the hoop. It will be better if each strand is pre-fixed with varnish - the styling will be much more durable. Play around with the Greek hairstyle for a while, and then carefully remove the hoop. As a result, you will get spectacular curls.
Curling with rags
Our mothers and grandmothers also used this method. Creating curls without curlers and curling irons using strips of fabric is very simple, and most importantly, as they say, "cheap and cheerful." Take some soft waste fabric and divide it into thin strips. Divide washed and slightly damp hair into strands. Take one strand and fix its tip in the middle of the rag strip, tying a knot. Then twist the strand up and, reaching the roots of the hair, tie it again with a cloth around the resulting “knob”.

It is best to leave the hair twisted all night (so the hairstyle will last longer) and treat with varnish. Since there was no varnish in the days of our grandmothers' youth, they used sweet water or beer.
Now you know how to make curls without curlers and curling irons. Here are some simple ways you can use to temporarily become the owner of chic curls. They are quite simple and affordable, you just need to want to be irresistible!
Curls always look quite interesting and even romantic. To get the desired hairstyle, girls with naturally straight hair often resort to harmful thermal devices. But fortunately, there are many ways to curl your hair without heat! Conventional hair clips have been used for cold curling for decades, and they are suitable for hair of any length. You can also use cold curlers to curl your hair as it dries. If you prefer wavy hairstyles, twist your hair into a bun before going to bed, or wrap it around your headband for a vintage-inspired curl on any length of hair!
Steps
Curling with hair clips
Start with damp brushed hair and work through with styling lotion. Wash your hair with shampoo and condition your hair as usual. Then gently pat your curls with a towel until they are damp but not wet. Comb your hair with a wide-toothed flat comb, and then evenly distribute a small amount of styling lotion through your hair from roots to ends.
- If you have sparse hair that doesn't hold curl well, it may be best to start curling with wet hair. On the other hand, if the hair is very thick, it is better to curl it while slightly damp to shorten the subsequent drying time.
- If you don't have styling lotion, use a light styling mousse. Don't use products that weigh down your hair, as they will make your curls stiff and crunchy instead of soft and natural.
Separate a strand of hair about 2.5 cm wide near the face. In order for the perm to look its best, you should try to select approximately the same strands each time. Typically, curling with clips involves working with strands about 2.5 cm wide. This size of the strands makes it easier to twist them.
Wrap the tip of the strand around your fingers 1-2 times. Attach the tip of the strand to your finger, and then loosely wrap it around your finger several times. Try to create a neat ring, inside which the ends of the hair are hidden. This will allow you to achieve a better curling result when all the stages of work are completed.
- To create bouncy, springy curls, wind the strand around your finger in an upward direction or towards your face. For a more voluminous curl, wind the strand down or away from your face.
- Don't wrap the strand too tightly around your finger, or you'll have a hard time getting the ring of hair off your finger without messing it up.
- Hair can also be wound on two fingers at once, so it will be easier to remove them later.
Advice: for a more fashionable curl, leave the very tip of the strand (about 2.5 cm) untwisted. So you get curly curls, the tips of which remain straight.
Remove your fingers from the ring of hair and twist it to the very roots. Carefully remove your fingers from the ring of hair you created, holding it so that it does not ruffle. Then twist the strand around the ringlet to the very roots. When you complete this operation, the ring of hair should be located close to the scalp.
- Do not twist your hair when you twist the strand into a ring, otherwise the curl will turn out to be messy and will be very frizzy.
- You may need to practice a little - be patient and don't quit!
Secure the hair ring with a clip. Put the clip on the ring of hair you twisted and place it close to the scalp so that it securely fixes the hair. Work best with professional hairdressing hair clips, especially curved ones that fit more comfortably on the head.
Curl all your hair in the above way. Curling with clips requires some time, as in this case it is necessary to work with small strands of hair. However, it allows you to get big bouncy curls without any heat treatment, so be patient and process each strand as carefully as possible.
Let your hair dry completely before removing the clips. Traditionally, clip-on curls are done overnight, which allows your hair to dry while you sleep. Waking up in the morning, you can simply remove the clips and get a glamorous hairstyle that will last all day.
Curling with a bundle
-
Moisten your hair with water. If desired, you can wash your hair and treat your hair with conditioner. However, if your hair is clean, you can simply moisten it with water. Wet hair should first be blotted with a towel to remove excess moisture.
Hair will hold curl better if you wind it on 2-3 days after the last hair wash and not on the same day.
Comb your hair thoroughly. To get even, smooth curls, comb your hair thoroughly before creating a bun. To detangle your hair, use a flat comb with rare teeth, and if you plan to create more than one bunch, additionally divide your hair with a parting.
- In the event that you will do only one bunch, comb the hair back away from the face.
-
Create one bun for big, voluminous waves in your hair. Gather your hair into a high ponytail and secure it with an elastic band. Form a bun by twisting the ponytail 2-3 times and then winding it around its own base to the very end of the hair. Secure the bun with a second elastic band or bobby pins.
Create two buns on your head for a tighter wavy curl. If you want to make your hair a little more curly, try creating two buns at once. Once parted with a flat comb, pull each section of hair into a high ponytail. Tails should be on the sides of the head. Twist the ponytail tightly so that it begins to curl around its base, and then wind the hair around the base of the ponytail to the very end. Secure each bun with an elastic band or bobby pins.
- For additional fixation, tufts of hair can be hidden under a headband.
- To make the perm in your hairstyle start lower, place the buns closer to the base of the neck.
-
Lie down to sleep. Since you've twisted your wet hair tightly enough, you'll need to wait 6-8 hours for it to dry, or even overnight. Luckily, this method allows you to create a great curl during your night's sleep, and because the hair is neatly tied up, you'll sleep more comfortably than some other curling methods.
- If you don't feel like going to bed with buns on your head, try wearing them all day to get your glamorous hairstyle ready for the evening.
-
Let your hair down in the morning. Waking up in the morning, carefully remove the elastic bands or invisibles that fix them from the bundles. Use your fingers to straighten your hair and enjoy the easy curl!
- If desired, use a small amount of hairspray to set the curl.
-
Select wet curler slightly smaller diameter than the curls should turn out. If you need a big curl or just want to add extra volume to your hair, opt for large curlers (2.5-5 cm in diameter). If you need a tight curl, use small or medium-sized curlers (up to 1.5 cm in diameter).
- Spiral wand curlers are great for creating spiral curls or for bringing out natural wavy hair. They are also good for short hair because of their small diameter.
- If you don't have curlers handy, you can cut an old T-shirt into strips. Make strips about the same width as the planned curly curls, and a little longer in length than the length of your hair.
- Some foam curlers can be damaged if wet hair is curled around them, so make sure the curlers you are using are designed for wet curling. And if you plan to sleep in curlers, it is better to opt for soft curlers made of rubber, silicone or curlers with a satin finish.
-
Moisturize your hair. Wash your hair and treat your hair with a regular conditioner, or simply moisten the curls with water from a spray bottle. If you're starting with wet hair, gently pat it dry with a soft towel until it's damp. Curling will hold better if done on damp hair. Due to excess moisture, the hair may not be completely dry by the time you remove the curlers.
- Do not use a hair serum or leave-in conditioner, as these products may prevent the curl from set.
-
Comb your hair with a wide-toothed flat comb. Gently run a wide-toothed flat comb through damp hair to ensure there are no tangles. If the hair turns out to be tangled, it will be more difficult for you to isolate the same strands from the total mass and the curl will turn out to be messy.
- Do not comb wet hair with a hairbrush, otherwise it is likely to tear and damage it.
-
Highlight a small strand of hair in the center of the forehead. Separate from the total mass of hair a strand the width of the curlers you use or a little less. Usually, strands 2.5–5 cm wide are used. Lift the strand vertically from the head, then attach curlers from the back perpendicular to the ends of the hair. Wind the strand on the curlers to the very base in the direction away from the face. Secure the curler with the attached clip.
- If you are curling strips of fabric, wind your hair around them in the same way and then tie the ends of the strips together to secure.
- If you want to curl only the ends of your hair, stop short of your head and tie the ends of the strips at the level where you want the curl to end.
-
Curl the top of your hair. Following a specific curling pattern will give you a more symmetrical hairstyle, and it will also make it easier for you to separate sections of hair from each other. Start by curling the top of your hair from your forehead to the back of your head (in the form of a kind of mohawk). When you're done, you'll have a row of horizontal curlers at the top of your head.
- This perm will create additional volume at the roots of the hair.
-
To complete the curl, wind the sides and back of the hair. Having dealt with the upper part of the hair, select the next strand at one of the ears. This time, keep the strand strictly horizontal and the curlers vertical as you apply them to the ends of your hair. Wind the strand in the direction from the face to the very base and secure the curlers with a clip. Continue to work symmetrically on both sides.
- To make the curls curl towards the neck, wind the curlers down, and to make the curls springy and curl in the opposite direction, wind them up.
- On the back of the hair, the curlers can be positioned horizontally or vertically, depending on the desired effect. Horizontal curls will give you fuller curls, while vertical curls will give you more spiral curls.
-
Leave the curlers on your head until the hair is dry. Since you are not using a thermal device, it will take several hours to fix the curl. Therefore, be prepared to spend at least four hours in curlers, but it is better to leave them for the whole night. If you want to dry your hair faster without using heat, use a blow dryer set to cool air.
- Hide your curlers under a silk scarf if you need to go somewhere before your hair dries.
-
Remove the curlers and straighten your hair. Once the hair is completely dry, remove the clips from the curlers (or untie the strips of fabric) and remove the invisibles from the hair (if used). Work carefully, especially if you want to keep the look of a tight curl.
- To get big waves in your hair, carefully comb it with a wide-toothed flat comb. You can also comb your hair with your fingers to straighten it, but do not use a brush for this.
- If desired, fix the hairstyle with hairspray.
-
Start with wet hair. The perm will last best when done on slightly damp hair. Wash and condition your hair as usual. Then pat them dry with a towel. If you do not need to wash your hair, you can simply moisten your hair with a spray bottle of water.
- Use a wide-toothed flat comb to detangle your hair.
-
Put on a knitted headband. Put on the bandage so that it is located low on the forehead and wraps around the head along the entire hairline in a circle. Curls will start at the level where the headband is located, so adjust its position depending on what kind of hairstyle you want.
- This is a great curling method for when you need to go out while your hair is still drying! Your hair will be collected in a soft and romantic hairstyle. Try to find a headband that will complement your outfit!
Did you know? Curling short hair can sometimes be difficult, but if your hair is long enough to be wrapped around a headband, curling it won't be that hard!
-
Take a small section of hair and wrap it around the headband. Start working from the side, starting the curl from the strands located near the face. To create nice soft waves in your hair, select strands of the size that the curly curls themselves should turn out to be (about 1-2 cm wide). Lift the first strand up and wrap it around the bandage, putting the ends of the hair under it. This will make one turn around the bandage. Continue winding the strand around the bandage until the very end, and then secure it with an invisibility.
- If you don't have bobby pins, you can simply tuck the ends of your hair under the bandage to secure them in place.
-
Continue curling until you have wrapped all of your hair around the headband. After winding the first strand, go to the next strand of the same size and wind it in the same way. Continue curling further around the circumference of the headband until you have wrapped all of your hair around it.
- To ensure a symmetrical curl, you can first wind one side onto the bandage (moving from the forehead back), and then the other side (also from the forehead back).