DIY fashion bags (master classes). A time to live and a time not to die How to sew a shopping bag with your own hands
For shopping
Four rectangles: two for the front and back sides of the bag, two for the handles (see diagram below, for a bag-package). This is how the simplest shopping bag is cut out, which is usually used for shopping. Most people prefer to replace it with plastic bags, but if you are concerned about the environment or want to look more elegant, then it is better to use this simple pattern to sew a nice shopping bag from a more noble material: leather and fabric, for example, as in. Or from fabric with individual decor, for example, with weaving from ribbons - as described in, so in addition you can creatively use the remains of various ribbons and ribbons. You can also come up with your own version: from embroidery to patchwork appliques, as users of our portal Katerina-777 and Leukocyte did.
Super simple for every day
Using the same simple pattern, you can sew many different bags, not only for shopping, but also for walking and even for the office, by sewing a zipper to the top edges and, if desired, sewing instead of two, one long handle on belt loops to the side seams. An example of such an easy to sew bag of the most basic cut is a magnificent model in the ethnic style from. The choice of material and fancy finishing in a certain style will give the bag a representative look.
To make the bag more spacious and look like a package, stitch the bottom corners diagonally, as described in. Then your bag will have a rectangular bottom, and things will not pile up.
Bag-package
Instead of stitching the edges, you can sew a real bag bag by stitching 3 more parts between the sides of the bag: side inserts and the bottom.
The size of the side inserts is calculated by the height of the side sections of the bag part, plus the required width is added, usually 6-8 cm. Folds can be sewn along the top of the side inserts for convenient flat folding. For the bottom, two parts are cut out; their width should be equal to the width of the side inserts, and at least one part of the bottom is duplicated with a gasket, preferably a rigid one (gasket materials can be used). If you don’t have a rigid pad at hand, strengthen both parts with a regular adhesive pad, and between the two parts insert a piece of cardboard cut exactly to the size of the bottom. The top of the bag can be fastened with a zipper. To do this, you need to cut out 2 more strips for facings along the top side of the bag and, on one side, stitch them to the top edge of the bag after hemming along the top edge, and on the other, stitch the zipper tape to them from below.
By the way, there is a simpler pattern for a bag-bag - it is given in. Or by .

Bag with flap
Using approximately the same pattern: front and back sides plus a handle, a standard bag with a one-piece flap is sewn. For the flap, you just need to increase the size of the back side of the bag and, accordingly, if desired, round the edges of the flap or draw them in the shape of a triangle. You can find a super simple pattern for a flap bag in.
Please note that if desired, the details of the bag can also be rounded, drawn in the shape of a trapezoid, or given any fancy shape, for example, the shape of a butterfly, flower or fruit. You will find the pattern for the curly side part, for example, in.
Bucket bag
A very convenient and popular pattern of a soft and comfortable bucket bag with a long, wide, one-piece handle is cut out of just two parts. For it, you can combine different fabrics, as in the master class on sewing a bag with turquoise decor, sew pockets, side linings, insert zippers, decorate with tassels, pendants, decorative stitches, etc. - see also the options below.
Lined bags
A bag with a flap (like many other models) must be lined with lining. The lining fabric pieces are cut out from the existing top pieces, with the exception of the handles, with the same seam allowances. When connecting the bag itself to its lining, a hole is left in one of the seams of the lining (the usual side seam) for turning inside out, which is then sewn up by hand using blind stitches.You can see a detailed description of sewing a bag with linings in.


Sewing your own bag for cycling is also not a problem, see the description. For active recreation and sports, a pocket bag on the belt is also useful - a small and roomy model, just like a backpack, leaves your hands free, it is better to familiarize yourself with the pattern and sewing in detail, and then choose the right model for yourself.
For relaxing on the beach
The beach bag-mat is sewn according to one of the very simple patterns described above. Its pattern consists of one large rectangle, folded 4 times, and a strip for two handles. A large rectangle will need to be cut out 3 times: 2 parts from fabric and 1 part from a thick pad or sheet of foam rubber. Ours offers an option to sew a beach bag from a terry towel. Another option for a beach holiday is: an original solution for two problems at once: you simply sew a valve for beach accessories and a carrying handle to the pillow.
And for those who like to relax on the beach doing their favorite handicraft, you just need to sew a model in which you can put everything you need: from scraps of fabric and patterns to scissors, needles, threads and a thimble.

City backpacks
Lately, women's city backpacks have been very popular; they are small, but roomy and comfortable. Details for fashionable backpacks or transformable bags (those that can be carried both in the hand and over the shoulders - see) can also be drawn yourself. Using a similar pattern, you can sew a variety of models: to sew a glamorous accessory, to where you can combine a tapestry with leather - a stylish addition to an image in an ethnic style.
Clutches and evening bags
And finally, evening handbags - primarily clutches, as well as handbags with a clasp clasp (see pattern and description of sewing in) - all their variety is based, as a rule, on the original finish. Handbags on a chain or a long handle that hang around the neck and hold nothing more than a powder compact and lipstick are a hit this season; they are super easy to sew according to the description in
To sew a couple of dozen different clutches, you can use just a few patterns: from the simplest one to the original clutch or the original soft clutches presented in the master class on sewing three models at once. When sewing such clutches, it is very important to carefully sew on the zipper or make another fastener.
Decor
So, we already realized that sewing a bag is not so difficult. However, to make your model different from others - after all, it is not for nothing that it is handmade, focus on the choice of memorable fabrics and materials and on the decor.
Appliqués made of fabric with embroidery, motifs cut out of leather (including logos), contrasting or tone-on-tone piping, tassels, patchwork techniques, voluminous patchwork (trapunto technique), huge rhinestones imitating precious stones and exquisite floral motifs lined with rhinestones, braid with pom-poms combined with mirror sequins, fringe, a patch pocket made of leather in a contrasting color with a beautiful clasp, a handle in a contrasting color, decorative belts with blocks or a row of blocks in the form of beads.
In youth fashion, a variety of inscriptions, funny bright applications are relevant; clutches in the form of boxes of sweets, books and other items have not gone out of fashion.
You can find it on our website.
Accessories made with imagination and taste will make your look unique!
Pattern
First of all, we build the carcass, the slope of the sides can be varied, the trapezoid can be inverted or at a right angle. The deflection of the upper cut can also be made more or less. There are 2 of these parts made from the outer fabric. Long part - bottom/side. Its length should be greater than the perimeter of the front part by about 3-4 cm, or even more, the width in the widest - lower part is 8-12 cm, in the narrow 3-3.5 cm = the width of the planned handle, in the area We draw the bottom parallel, and then smoothly narrow it towards the top. On the pattern, half of the part, fold in the wide part, cut 1 long part from the top fabric. The length of the facings for the zipper also exceeds the cut on the front part by the same amount as the side section. They can be made simply with straight planks, but I wanted to complicate the shape a little, so in the center of the part they are wider and slightly curved. There are 2 of these parts. made of outer fabric and 2 pcs. from lining fabric. You also need a long strip for the handle, if with an adjustment frame, then 90-100 cm in length and 9-12 cm in width. You don’t have to cut the bell yet, it will need to be specified locally. There will also be belt loops for attaching the handle rings; they are the same width as the handle, 10 cm long, but they can be cut out later. The lining can be cut according to the details of the top, but I like to use two parts, as I showed last time, and also insert a partition pocket there. But I got ahead of myself. So, we build a pattern and select the design and fabrics.
Let's start with lightning. There are four facing parts, two from the outer fabric, quilted with interfacing or simply backed with interlining/dublinin, and two parts from the lining fabric. Zip fastener of appropriate length.
We lay the zipper face to face with the facing of the top fabric, adjust it by installing a half-foot, or a special one for zippers, so that the stitch lies close enough to the zipper spiral. We cover with a lining facing and turn it over, getting into the previous line, and lay a second line. This operation can be carried out in one step with certain dexterity, or by sweeping/chipping first, but this is more familiar to me. Iron from face and back. Repeat the same on the other side of the zipper, add a finishing stitch. Sew along the perimeter to secure the lining, and cut off any excess lining.
Adjust the width of the resulting top part of the bag with the width of the side part.
Let's do the lining. I like to cut it this way, you can insert a partition pocket with a zipper into the seam, and the bag acquires three compartments, on each side of the lining I make another pocket - one with a zipper, one regular patch, which I also divide into two parts, for a mobile or keys and for other small things, but I won’t dwell on this pocket, it’s on the website. You can cut according to a paper pattern, placing a side piece bent along the sides. But I don’t always have a pattern; more often I improvise directly on the blank, so I cut the lining according to the details of the top. It is better not to get attached to the numbers in the photo, but to measure your parts, the principle is that from the cut of the part we set aside half the width of the side part minus the allowance. We design two darts on the curve, calculate their size based on the difference between the contours: subtract the smaller one from the larger one on the lining, divide it in half on the main part of the bag and set it aside evenly. Darts can be replaced with pleats.
Using the main part, we cut out two parts for the partition pocket. Its upper edge is 4-6 cm lower than the top of the bag. I duplicate them with non-woven fabric and cut out two more parts from furniture non-woven fabric (or from another thin sealant). I choose a thin zipper, maybe even a hidden dress zipper.
For the inner pocket with a zipper, cut out two rectangles. Their width should be 3-4 cm longer than the working part of the zipper, and the length of one part is measured along the bag - from the top to the bottom seam (we take into account the curvature of the top and give a margin), and the shorter one - from the location of the pocket to the bottom plus allowances. However, if the fabric allows, you can cut out the pocket lining in one long piece, then there will be a fold at the bottom. I used a shirt as the lining of my bag (you should have seen my husband’s eyes when he caught me cutting out his shirt
Welt pocket with zipper. We reinforce the location of the pocket with non-woven fabric, and draw the outline of the pocket along the non-woven fabric.
On the front side we place a rectangle of the pocket lining (smaller) so that it overlaps the intended entrance by 1-1.5 cm in height and symmetrically to the ends of the pocket in width. We pin it and sew a rectangle along the contour, the stitch length is short. Carefully cut between the lines, at the ends of the pocket we cut into a corner, without cutting a couple of threads to the line. We turn the lining inside out, make a slit, and iron it. We put a zipper under it, pin it or baste it. We lay a stitch, it is advisable to place the foot for sewing in the zipper, or move the needle so that the foot goes along the edge of the zipper, and the stitch is 1.5 mm from the edge. Turn it over and cover it with the second piece of the pocket lining, positioning it so that it fits into the top seam of the bag, this will strengthen the pocket. We pin and stitch both pieces of the pocket lining along the top edge of the frame without touching the bag lining. We trim the pocket around the perimeter and sew together both pieces of the lining. Sew the lining along the top edge to the lining of the bag, cut off the excess fabric. That's it, the pocket is ready.
Internal partition pocket. The processing of this pocket is similar to the processing of zipper strips. In the same way, in two steps we sew a zipper between the parts of the top and lining of the pocket.
We iron and sew a finishing stitch along the seam where the zipper is sewn in, be it straight or curly. Fold along the zipper and stitch around the perimeter of the pocket burlap, trimming off the excess fabric.
We take the details of the bag's lining, sew darts on them and iron the allowances so that on opposite parts they look in different directions, for example, on one part towards each other, and on the other in different directions. This is necessary in order to avoid thickening, because there will still be a partition between them. Then we fit our partition pocket onto one of the lining parts, aligning the cuts and the centers of the sides, while the lining itself will fold into a bag, as it were, there will be excess inside, this is normal, this is how it should be.
I'll torment you a little more with small details. I just don’t like to be distracted by them later, when it’s time to sew them onto the bag, the process starts to accelerate and I want to finish it quickly. And one more distraction, I don’t sew everything as sequentially as I show, it’s just so that you don’t get into trouble by shuffling everything into sections. But in reality everything looks like this, mixed
All the parts are first marked, pinned and sent in a heap to the machine, then she sat down, stitched, threw everything onto the ironing board, ironed it, transferred it to the cutting table, marked and pinned the next step, and again at the machine. If a large machine is set to thick, then it chews a thin lining, or you want a figured stitch, then I have both machines at work, Janomka and Protex. So, the handle-belt. I found such a braid, and it was exactly a meter long; I’ve been wanting to attach it somewhere for a long time. I no longer have the main fabric, I found polyester of a similar color and glued it with dublin. The width of the braid is 3.5 cm, since the fabric is thin, I decided to make a triple layer of fabric on the belt; if you have thick fabric, then two layers are enough. On the wrong side of the part I marked an ironing line equal to the width of the braid and equal to the width of the finished belt. I ironed it along this line, then folded it over and ironed it again. I ironed the remaining fabric again, leaving this cut open, it will be covered with braid. I pin the braid and double-stitch it on each side.
Let's continue with small details. Loops for attaching the handle. I still had a piece from the pen, there wasn’t enough tape for it, but that’s okay. I cut off one bend, the belt loop will fold in half again, we don’t need the extra thickness. Stitched with curly lines
We cut the strip into two belt loops. We will need metal fittings - rings or half rings and a frame with a jumper to adjust the length of the belt, the width should correspond to the length of the belt. If there is no frame, you can take two half rings, or find a buckle of this width and remove the needle from it. We thread the rings into the belt loops and sew them in half 2-2.5 cm from the ring.
If the belt loop is too thick and tight, then it is better to stitch it like this, with a step.
We put the frame on one side of the belt so that the jumper is on the wrong side, fold the seam allowance and sew it with a double tack stitch.
We thread the belt through the ring and tuck it into the frame. We sew a second ring onto the other end of the belt, folding the seam allowance to the wrong side and securing it with a double tack stitch.
The only small detail left is the bell, but we need to try it on the bag, so let's get to the bag. It’s better to sew the side part first, I did it differently and then it was inconvenient for me to sew the lining, so a bunch of photos went into the trash, I’ll fix this step in the next bag. So, we pin the sidewall-bottom to the main part, aligning the middle, making notches on the curves. We release the excess length upwards, making sure that this excess is the same on both sides. First, we attach one side and immediately make a finishing stitch, an allowance towards the sidewall. Then we sew on the second side, stitch the finishing side, it’s not entirely convenient, but it’s doable. Not all machines will agree to sew such a thickness, something like this can happen, well then we just iron or press the seam allowance, you can sew it from the inside out with your hands.
2.
In the place where the three seams will converge, we make a notch on the side part, and cut out the extra allowances.
Aligning the middles of the parts, we sew on the upper part - strips with zippers. When we pass the notch, we tighten it a little so that the notch and the end of the seam completely go under the stitching.
We sew the lining to the same seams. The side seams of the lining can be sewn in advance, just remember to leave a hole for turning the bag inside out, and not a very small one.
First, turn the bag with the lining outward and sew off the seam for sewing on the trims. If you open the zipper, it is very convenient to stitch from the beginning to the end of the seam.
We secure the zipper so that the slider does not run away, align the top and secure it with a stitch.
We sew up the hole in the lining, first from the inside, as far as possible, the remaining area with a seam along the edge or by hand.
One last push left! Now you can try on the paper pattern of the bell, it should not be stretched, but it should not stick out like a skirt, in my bag the side part came out a little wider and I had to add 1 cm at the bottom. There are already allowances on the pattern. We cut out 4 parts, two from the top fabric, two from the lining. We fold it face to face and grind along the rounded side, cutting the seam allowance to 0.3-05 cm, depending on the flowability of the fabric. Turn it onto the face and iron it with a small edge onto the lining.
Lay it out lengthwise, check the width at the top along the belt loop, sew one long seam, fold the seam allowance to the lining. Using the tip of the iron, on the edge of the board, so as not to wrinkle, iron the seam.
First turn it inside out, iron the edge again, and sew a finishing stitch along the edge. Turn it inside out, trim the top edge, and place the seam in the center.
On the belt loops, you can draw an auxiliary line at the distance of the foot from the stitching. We put the bell, turned inside out again on the lining, face to face with the belt loop, place the stitching seam of the bell on the wrong side of the belt, align the edge of the bell with the drawn line and attach it.
You can do this knot a little differently, it seemed easier to me. We bend the belt loops with a shift, leaving a step of 1.5 cm, and sew on the foot from the top edge. Then we put on the bell, align its cut with the stitching, and sew on the bell.
Now we take our design, insert the edge of the bag between the two sides of the belt loop, overlap 1-1.5 cm, and sew it back and forth several times. My Dzhanomka even reluctantly agreed to sew a zigzag along this place, but she will hold on even without the zigzag. Bend the bell over your face and admire it!
Alternative: We put the edge of the bag on the step of the belt loop, end-to-end with the smaller edge, adjust it, it turns out to be one less layer, but there are more open edges, you have to lay two zigzag lines.
In general, the bag is already ready, but I wanted to make one more useful thing, the fact is that the zipper goes somewhere under the bell, and the slider has to be pulled out from there every time, so I made another keychain. These are the scraps, quilted from the side, I folded two parts inside out, put a cord between them, and drew an arbitrary shape. Then, as with postcards, first a straight stitch, then cut off all the excess and went through a thick zigzag. I hung it on the slider.
Summer is in full swing and I want it so bad successfully update your wardrobe, adding original accessories that will attract attention and be useful every day. DIY bags are what you need if you want your accessory to be not only beautiful, convenient and functional, but also one of a kind!
Today we will learn how to make simple bags with our own hands at home. For work you may need special tools, like a sewing machine, old or new fabrics, small sewing accessories and, of course, imagination!
How to sew a shopping bag with your own hands
The simplest shopping bag, which will be an excellent alternative to disposable plastic bags, can be easily sewn from an old piece of material. To do this, you don’t need to have the talents of a seamstress at all, but just know how to operate a sewing machine.
To work you will need:
- 2 rectangular pieces of colored fabric of desired sizes
Ready-made dense tape of fabric about 1 meter long and 2 centimeters wide
Sewing machine
- Scissors

Let's get started:
1) Using a zigzag stitch, work around the top edge of the fabric and sew on the right side tape edge as shown in the photo.

2) Then bend the edge inward about 2 centimeters and stitch it two lines, while grabbing the tape.

3) Don't forget to attach second part of the tape so that it becomes a handle.

4) Do the same with the second piece of matter. You did it two halves future bag.

5) Place both halves together with right sides facing in and stitch around the edges zigzag or regular stitch.

6) Turn the bag inside out.

DIY summer bag made from T-shirts
A great idea is to use old unwanted items for something useful. If you have some lying around old T-shirts, which you haven’t worn for a long time, and you don’t want to waste them on rags, try turning them into light summer bags.

To work you will need:
- Old T-shirt
Pins
Sewing machine
- Scissors

Let's get started:
1) Cut off everything from the T-shirt unnecessary tags and labels.

2) Turn it inside out and fold across as shown in the photo.

3) Fold the bottom edges up and pin them in place. These will be internal pockets future bag.

4) Sew the bottom edge on the machine, and also make middle vertical seam on both sides so that there are 2 pockets on each side.

5) Turn the bag right side out.

DIY fabric bag (video)
DIY clutch bag
An interesting idea for making a bag from cardboard tea box. It would seem: how else can you use the box after the tea is finished? It turns out that it makes a very stylish and unusual clutch for small items, like cosmetics or keys.

To work you will need:
- 2 identical tea boxes or any other rectangular boxes
A piece of satin fabric
1 large bead
Thick chain with fastenings
- Scissors

Let's get started:
1) Take one of the boxes, open it completely and cut off the edges, as shown in the photo, to create a pattern consisting of five parts: three rectangles (one under the other) and two small rectangles on the sides. This will be the inside of the future clutch - its lining. The edges should be trimmed to fit the lining into the main box. On the sides, you should cut off a small rectangle at the side parts of the pattern in order to make it more convenient to attach the chain.
2) Attach the pattern to the fabric and cut the material along the contours, leaving approximately 1 centimeter each from each side.
3) Cut out the blank for the future lining. Make cuts in the corners.
4) Attach the fabric to the cardboard and glue the edges using glue.

5) Insert the lining inside the whole box.
6) Place the lining on the glue.
7) Before gluing the lining, glue the elastic at the top of the box. lace loop, with which the clutch will be closed.

8) Use glue to decorate the box rhinestones.

9) Attach the chain to both sides of the box, after making holes using an awl or other sharp object. It's better to choose chains with fastenings on the sides, which are specifically designed for such products.

10) On the front side, sew or glue a bead that will serve as decoration and at the same time clutch clasp. The clutch from the box is ready!

Updated DIY leather bag
Each of us most likely has some kind of old leather bag, which you no longer want to wear, but it’s a pity to throw it away. To solve the problem, you can update your old bag, repainting it in new unexpected colors. Use the advice of this master class to get a new original item.

To work you will need:
- Old leather bag
Paper tape
Acrylic paints
Brush
Ruler and pen
- Leather polish

Let's get started:
1) Make sure the surface of your bag is clean and dry. Use a ruler to measure at the top edge of the bag. 2 centimeters each, making marks with a pen. You can make the strips any other width you want. It is necessary to measure equal segments with a ruler so that future strips will turn out equal and even.

2) Apply strips of adhesive tape, guided by the marks. You can also put tape on the inside to the paint accidentally got into the wrong place.

3) Leaving the strip uncovered, paint it using white paint. It is better to apply several layers of paint to make sure there are no streaks. Let the paint dry thoroughly.

4) Make as many stripes as possible at regular intervals to create a striped pattern. You should be careful not to stick the tape in a place where the paint has not yet dried, otherwise you may ruin the strip.

5) After all the strips are dry, paint the handles white.

6) After drying, apply on top green paint. A white background is important so as not to lose color. It is better to do several layers so that the paint adheres well and there are no streaks.

7) After all layers of paint are dry, apply to the bag special varnish for leather to give it a finished look.

8) Beautiful new and very stylish striped leather bag ready!

How to decorate a bag with your own hands
Decorating your bags with your own hands to update them and make them more attractive is a great idea for the summer season. One of the options for decorating a rag handbag is to use a variety of felt flowers, which will make any handbag bright and very noticeable.

To work you will need:
- Cloth bag
Multicolored felt pieces
Paper and pencil
- Scissors
Let's get started:
1) Draw on a piece of paper flower of desired shape depending on the size of your bag. It is better if the flowers are small - about 5 centimeters in diameter, then the decoration will look much better. Cut out the pattern, apply it to felt and trace the flower with a pencil.

2) Cut many flowers from sheets of felt of different colors.

3) Place some glue in the center of the flower and glue two flowers together to make the flowers look more magnificent.

4) Start gluing pairs of flowers to the surface of the bag. Can also be used for this purpose needle and thread, to sew the flowers to the fabric, then there is less chance that they will fall off over time.

Bag decorated a piece of fur from an old collar, looks very rich and expensive. See for yourself:


When cutting fur, you should be extremely careful and use a knife rather than scissors so as not to damage the hairs.

From very small scraps of fur you can make something like this decorations for bags in the form of fluffy balls:

Another option for decorating a bag is to use an ordinary bright scarf, which can be tied on the handle in different ways:

Looks good as decoration fabric flowers:


Another popular option for decorating bags is laying out beads:


DIY string bag
You probably remember the original Soviet-era string bags, in which they carried food. We invite you to make a not quite familiar, but very comfortable and original shopping bag that will look very stylish. This handbag is very easy to sew from old T-shirt.

To work you will need:
- An old T-shirt made of stretch fabric
Sewing machine
Ruler and pencil
- Scissors
Let's get started:
1) Cut from an old stretch T-shirt semicircular top. To ensure that both sides are the same, fold the T-shirt in half and mark the cut line with a pencil, as shown in the photo.

2) You can make several blanks from different T-shirts.

3) From the wrong side, sew the edge on a machine, this will be the bottom of the future string bag.

4) Finish the wrong edge zigzag seam so that the fabric does not fray during use.

5) Using a ruler and pencil, draw straight rows of broken lines on one side, as well as a large line in the center at the top - these will be the handles.

6) Using scissors, make cuts along drawn lines, capturing the other side as well. Be careful with the edges to avoid damaging the seam.

7) The original string bag with slots is ready!

DIY beach bag
Very popular bags for going to the beach or pool that you can make with your own hands. We would like to offer you a very interesting option for sewing a beach bag, which is essentially not only an accessory in which you can carry everything you need for a vacation, but also bedding with pillow. You can sew such an original beach bag from two towels.

To work you will need:
- Two medium sized bath towels
A small pillow, slightly smaller than a towel
Pieces of cotton fabric
Pins
Buttons and loops
Sewing machine
- Scissors
Let's get started:
1) Prepare a small rectangular pillow, which would be slightly narrower than a towel.

2) Place the pillow on a towel and fold it together with the edge forward so that it forms a pocket for a pillow. Pin the edges and stitch them. Leave a little extra space at the bottom in order to sew on a second towel; cut off any excess.

3) The second towel must be trimmed on the sides long strip of colored cotton fabric. To do this, you need to cut a rectangle from the fabric with a length equal to the length of the towel and a width of about 10 centimeters. You can sew several scraps of material, or you can use the same fabric.

4) Fold the edges of the strip to the width 1 centimeter and go over the workpiece with an iron.

5) Sew the trim to the edge of the towel using a sewing machine. Then sew both pieces together - pillow and towel. When folded, the product will look like this:

6) It remains to add important details. Prepare two square pieces of cotton fabric to make front and back pocket. Pin the pocket in place using pins and then stitch along three sides, leaving one side untouched. The edge of this side should be machined in advance to prevent the fabric from fraying.

7) From the remaining piece of the first towel, sew two wide handles. To do this, cut two wide strips of the desired width, taking into account that you will fold them in half. Fold the edges and stitch along the entire length.

8) Pin the handles to the bag in the right places with pins, check that are you satisfied with their location, then unfold the product and sew on the handles using a sewing machine.

9) Sew two bright buttons in the place where the bag will close.

10) Sew matching buttons on the lid loops.

11) Beach bag-mat is ready!

DIY small bag from a book
Do you want to recycle old books? There's no need to rush! You can use their hard covers to make original small handbags with handles or handmade clutches.

To work you will need:
- Old book
Lining fabric
Bamboo handles (optional)
Paper and pencil
The easiest way to create a handbag


DIY bag

We sew a handbag


FOR THOSE WHO CAN'T KNIT... BUT SEWS WELL. SELECTION OF BAGS WITH PATTERNS


Step-by-step sewing of a sports bag. You will succeed!
The bag is made of thick canvas and faux leather, with shoulder straps and brass zippers. Nylon lining inside. This bag is perfect for packing your belongings for the gym, any sports activities or a trip out of town. Don't be scared...it's not as difficult to sew as it seems. Choose thick, high-quality fabric. 
Carefully study the master class and get down to business.


BAG TEMPLATES
PRINT 4 COPIES OF THE BAG TEMPLATE

IN TWO COPIES - POCKET TEMPLATE Each template consists of one 8″ x 11″ sheet

- Cut the pieces along the solid line.
- Place them together (not matching) and the four pattern segments form a circle as shown in the diagram, printed on the pattern.
- Place together (do not match), and the segments of the two side pieces of the pocket form a semicircle, as shown in the diagram, printed according to the template.
- outer fabrics (Nutmeg Canvas in our example), cut out the following dimensions:
Two "23" x 12" rectangles
One 10″ x 15″ rectangle
Two 1m" x 2" zipper strips, tabs
Using the assembled bag side segments, cut out two circle side panels
Using the assembled side pocket segments, cut out two side pocket panels - Bottom of outer fabric (Boca Cocoa Faux Leather in our example), cut one 14″ x 23″ rectangle.
- Made from lining fabric (Brown Rip-Stop, Nylon in our example), cut out
One 23″ x 36″ rectangle
Using the assembled pattern, cut out two side panels of circles
Using the assembled side pocket pattern, cut out two pocket side panels - Reduce the following interfaces:
Two "23" x 12" rectangles
Using the assembled bag side segments, cut out two side panels - Using the assembled side pocket segments, cut out two side pocket panels
- For the straps, cut out the dimensions:
- Two 36″
One 60″
Two 7″
LET'S START SEWING
Connect the cut nylon lining + cotton side + adhesive lining. Then cut 2 sides to measure two 23″ x 12″

Side pockets

Using a ½" seam allowance, seam along the top edge.


- Make a stitch on the right side along the top edge.
- Start a second line of stitching ¼" from the first

- Create a second pocket.
- sew on 2 outer circles (interaction).
- Place the finished pocket on each side of the circle, stitch around the circle

Front zip pocket
- Take one rectangle of two 23″ x 12″ outer panels (interlock), 10 x 15″ outer pocket panel, and 9″ zipper.
- On a 23″ x 12″ panel, on the back side, mark the center of the panel (11½” on either side).
- Using a pencil and a ruler, measure 4 and a half" to the left of the center point and make a mark, then measure 4 and a half" to the right of the center point. Measure 3 and a half" down from the top edge. Draw a 9" horizontal line.

Draw a second line ½" down from the first line and parallel, connect the lines at each end,
to create a rectangle

- Draw onto the 10″ x 15″ panel on the wrong side. Orient it correctly: 10″ (width) x 15″ (height).
- Draw on a block like the one you just drew on the top 10″, positioning it ½” from top to bottom

Place the outer panels and pocket panels with their right sides facing each other, aligning the two drawn parts.
secure in the corners


With the outer panel facing up, stitch around the marked margin through both layers.

Cut through the center of the box, then at each corner.

Pull the pocket inward through the opening, smoothing the corners and edges of the box as best you can. Click.

Sew in a 9″ zipper

Sew on all four sides.

Sew a second line of stitching ¼" from the first along the bottom of the opening window.

- Note: Don't worry too much about the turning angle and stitch ends not being perfect; the ends will be hidden behind the straps.

Turn over to the right side. and sew with 2 lines

Side handles
- Take two belts 36″ long
- Fold each length in half to find the exact center. Set a label.
- Mark 3 and a half" to the left of the center point and set the mark.
- mark 3 and a half" to the right of the center point and set the mark

- Remove the contact center.
- Fold the straps in half.
- Sew a zipper between the left and right straps.

- Find outer side panels, one with a zipper and a plain panel.
- On the panel there was a pocket, one length of the handle lay in place. The outer edge of the belt should be 5" on each side. The inner edge of the belt should just cover the end of the zipper "box". The ends of the straps should be installed flush with the bottom raw edges of the panel. Be careful to make sure the handles and hinges are not twisted.
- Measure 2 and a half" from top to bottom of the raw edge along each side of the strap and set a mark, placing it horizontally across the strap. This is where you'll be stop sewing and turn to go across and back, down the straps.

- Zip stitch each side of the handle as close to the edge as you can, also increasing the stitch.
- At each 2P" point, secure the belt with a 1H" "X Box."

Sew the position of the second handle strap in exactly the same way on the 2nd simple side of the bag, exactly matching this one, and repeat the steps

Attach to the bottom of the panel
- Take a 14″ x 23″ piece of faux leather.
- Sew the sides of the bag

- Sew from the outside ½" from the edge.
Add top zippers
- Take a 22″ zipper and two 1m″ x 2″ tabs.
- Sew one tab on each end of the zipper.


- Zip the two sides of the bag together


Make a second line

D-rings and tabs for side panels
- Take two 7″ long belts, two D-rings and side panel pockets.
- Pass the belt through ring D so that one end is 1H" lower than the others. flash
- Fold that extra 1H" on each tab, enclosing the top end of the raw edge.

Sew to pockets

To sew the side pockets neatly, you need to make even cuts to make it easier to sew the side pockets
A universal selection of gift ideas for any occasion and occasion. Surprise your friends and loved ones! ;)
Greetings to everyone gathered now on the blog! Today I will tell you how to decorate your life and the lives of those around you with the help of such a simple item as a handmade bag.
There are a lot of bags, handbags, clutches, etc., etc. sold in stores. But it’s so great to do something like this yourself, to experience the process of creating a product, right? Many will agree with me, I think. Therefore, today we will make a bunch of handbags, cute and funny)
How to sew a bag with your own hands
First of all, I suggest you sew a cute fluffy handbag that you can give to a little girl or girl.
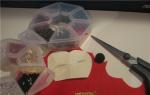
List of materials:
- faux fur (for the outer part of the bag);
- fleece (for lining and for covering buttons);
- threads in the color of the fabric;
- two round buttons;
- two small white rhinestones or half beads;
- padding polyester;
- paper for patterns;
- needle;
- second glue;
- pencil;
- pins (for pinning patterns);
- scissors.
You can download patterns for the future bag here: eyelet And the basis. Let's deal with them.
What kind of patterns are there:
- one-piece bag pattern (lid + back) - the entire pattern area;
- the front of the bag is everything below the side insert;
- width of the side insert - we will sew the side part into the bag, this is its width. The length is the length of the outline of the front (excluding the straight top).
As for the side insert: it should consist of two equal parts, the direction of the pile of which will be directed against each other. But this is only for fur! From fleece, simply cut one strip of the required width; you can ignore the direction of the pile.
How to sew a bag: a detailed master class
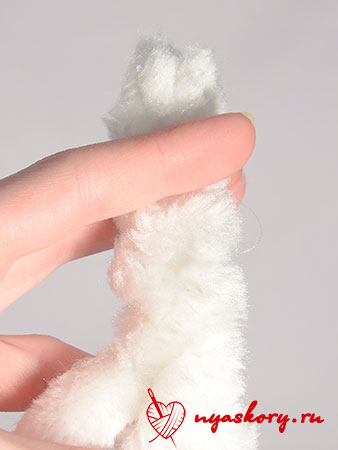
First of all, we will work on the side of our product.
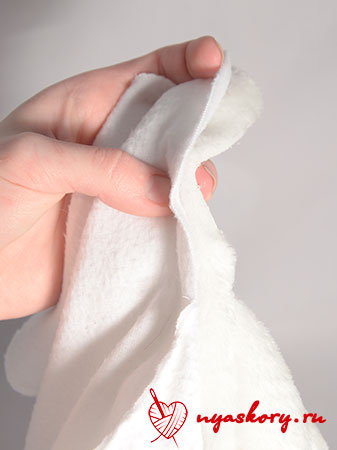
Take two pieces of fur side and sew them together along the edge. Sew them so that the pile of the pieces is directed towards each other.
Why do I suggest doing this? I answer: fur has a long pile, which should go in one direction. And this can be achieved just by sewing two pieces together
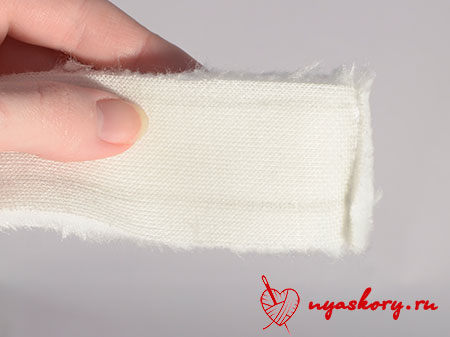
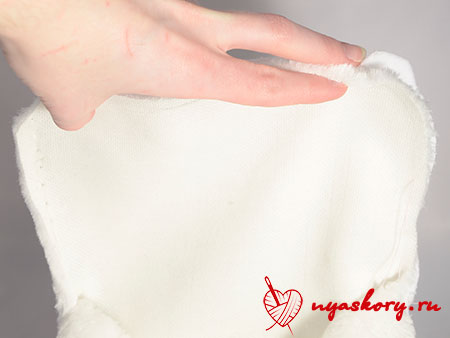
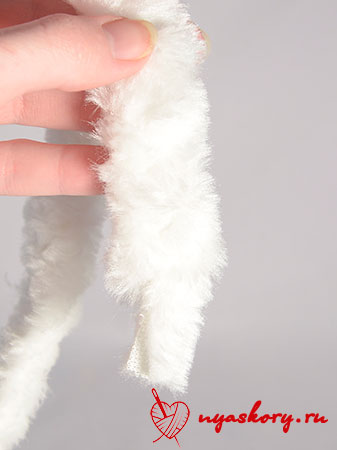
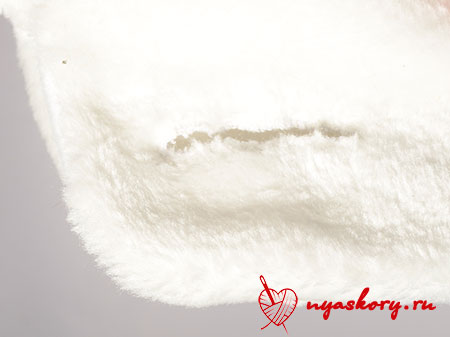
Trim off any excess. And sew the side part to the front of our future bag.
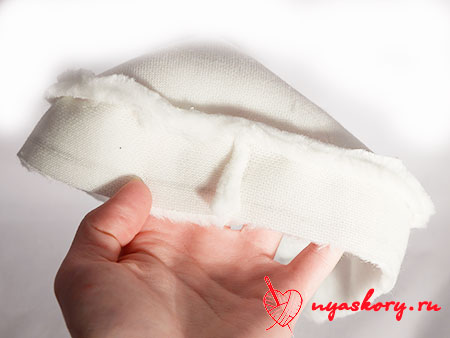
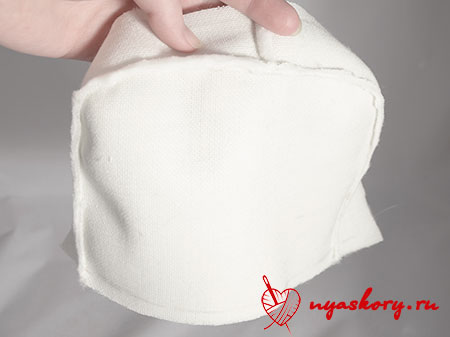
Now let’s sew on the back of the bag! The lid is already in sight

Trim the edges of the seam allowance. See why:
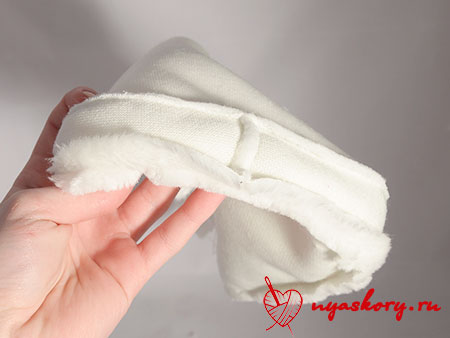
By the way, here's the back view of the bag:
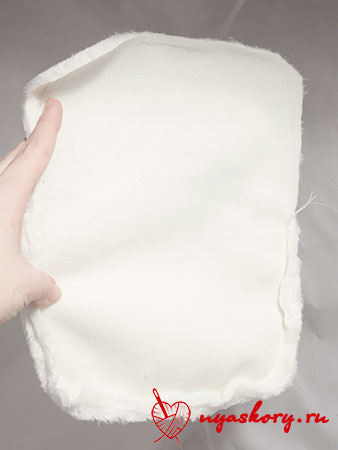
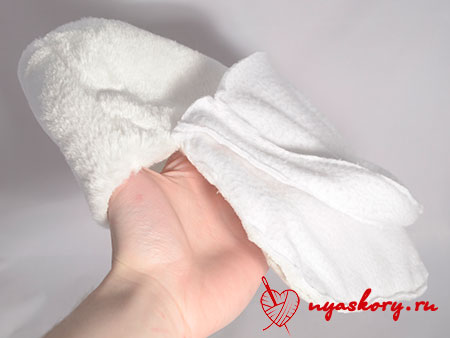
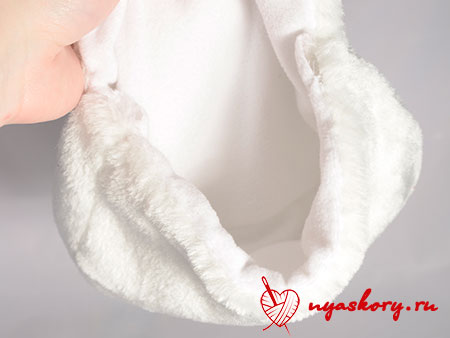
Sew a fleece “handbag” in exactly the same way. This will be the lining - the inside of the bag.

How to sew a lining to a bag? To begin, place the fleece and fur parts with the right sides facing inward.
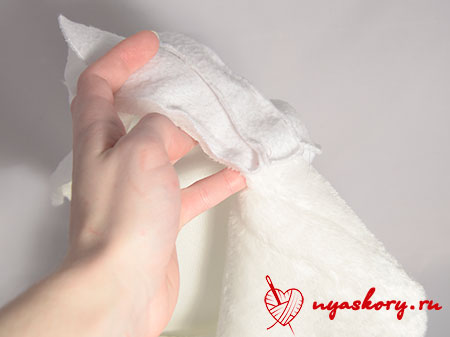
This photo seems to make it clearer
And just sew the covers of both parts together.
Screw the inside into the bag.
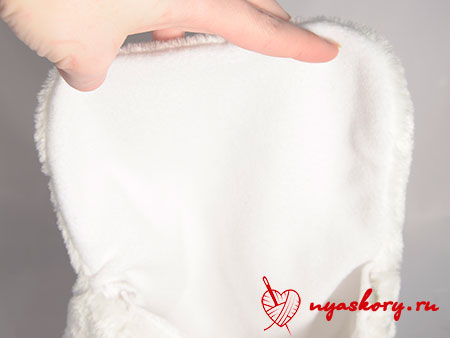
Sew the remaining edges with a blind stitch.
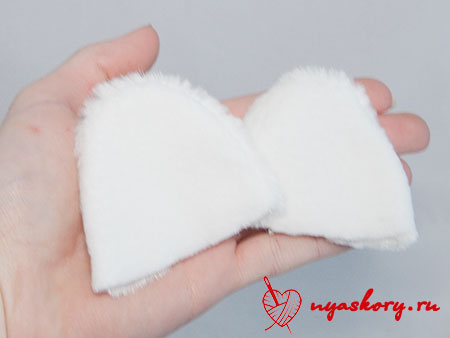
To decorate our bag, I suggest you cut out these ears:

This is how you should get them:
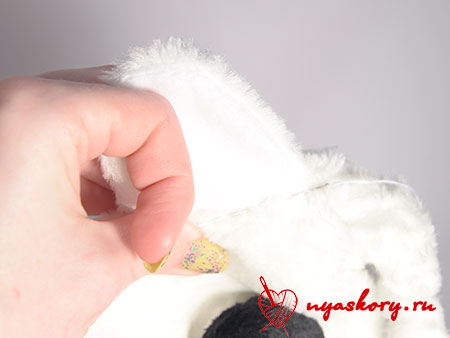
Now let's make a strap for the bag. To do this, cut three strips of fur of such length that it will be convenient for you to then put the strap on your shoulder. Weave them into a braid (tie at the end and at the beginning so that it does not come apart).
Remember we left holes for fasteners? Now you need to insert the resulting braid into them and carefully sew it up with a hidden seam.

But our bag doesn’t have fastenings yet! There are several options: you can sew in a zipper (which is better to do earlier), you can use Velcro and buttons.
I decided to go with the last option.
Cut two black circles larger in diameter than the button from black fleece and take the button.

Place a little padding polyester on the button.
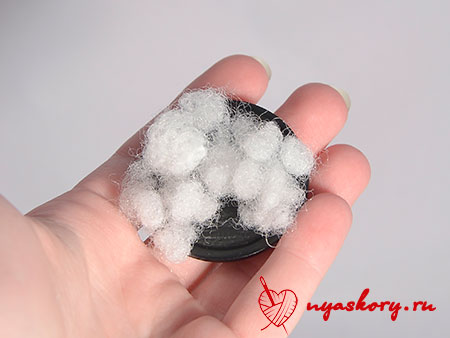
And into a fleece circle, along the edge of which run a running stitch without securing:

Put them together.
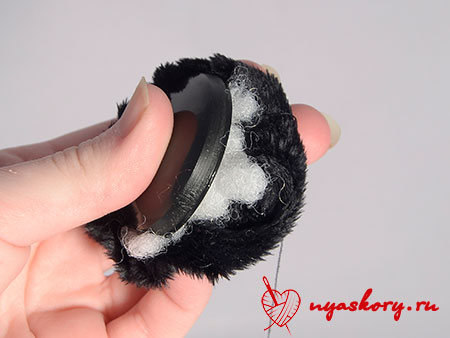
And pull the thread.
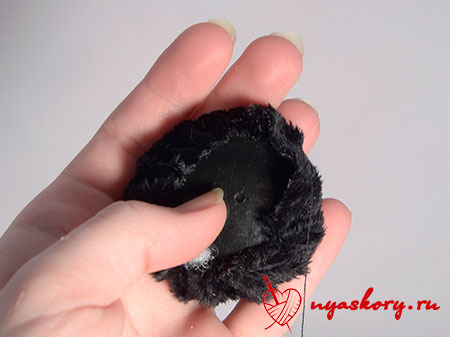
The button to secure the bag at the back should look something like this:

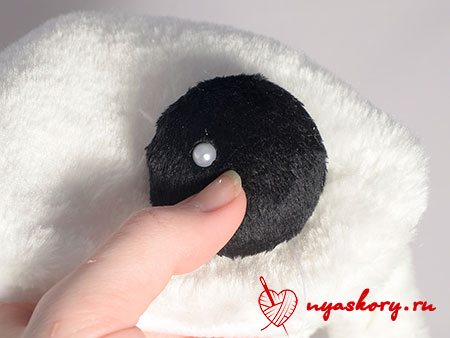
Glue a small rhinestone highlight on the front.

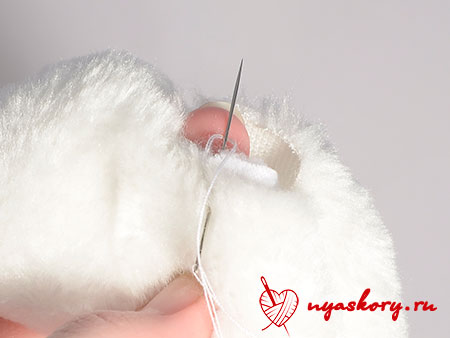
Now place the clasp on the lid of the bag to see where you will need to cut the loop.
Draw a line down the center of where you want the button to be. Make a cut along the drawn line.

To make the cut beautiful and neat, sew it with a buttonhole stitch so that each stitch fits as closely as possible to the previous one.
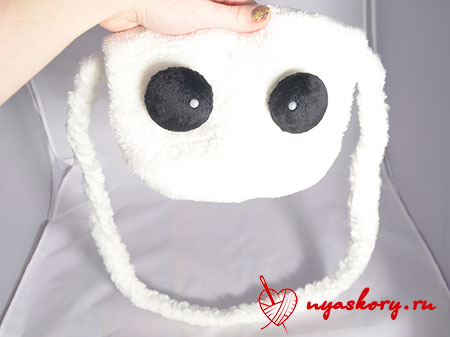
This is what the bag will look like after finishing:
Sew button eyes to the bag:
Well, now let's get back to the ears! Fold and hem their edges.

And sew them where you would like them to be.
Ta-dam! The bag is ready. It turned out to be a cute kitty)

DIY leather bags
Leather is one of the most interesting and durable materials for sewing bags. Therefore, I present to your attention several master classes using this material.
Bag - cat
For this simple but very cute model (somewhat reminiscent of the previous one), you will need leatherette, scissors, an awl, thread and a thick needle.
This can be worn by both a young girl and a small child.

The simplest leather bag
No, you definitely need to get one. You will need leather, scissors, a strap, tape, a marker and (optional) a special tool for cutting several holes in a row (you can get by with an awl). All you really need to do is cut out a circle, make holes, pull the ribbon through them and attach a strap. All)

Envelope
Reminds me of the processing method of a cat bag.

Chanterelle
A lovely model)) Prepare leather or thick leatherette, braid and rivets for it. You don’t have to sew the chanterelle, just glue it along the edges and hide these places under the braid.

DIY jeans bags
However, the following models can be made from both jeans and old jeans.
Network
For this, cut the jeans into strips and weave the fabric, as in the photo. Sew it together in a bag (folding a piece of fabric in half) and sew on the handles.

Simple Denim Bag
There is a denim leg - go to the production of a bag! You will also need a buckle, a leather strap, scissors and thread with a needle.

Elegant handbag made of jeans
Here you will need two trouser legs, scissors, thread with a needle and a zipper.

DIY fabric bags
Rectangular
For it, take several pieces of cotton fabric, a zipper and accessories.

Clutch
An interesting idea is to use thick pieces of processed cardboard for the lining. I would recommend using plastic boards from Fix Price or juice packaging as a thick base.
Present such a handbag to your mother - she will definitely be happy))

Clutch in a semicircle
Cut two round pieces of cotton fabric and a circle of padding polyester from the fabric. Fold them into a “sandwich” and sew several times at right angles. Sew around the edge with bias tape. Fold the piece in half and sew a zipper into the bag. Decorate.

Handbag
This is where cotton fabric, lining, fasteners and floral decorations come in handy. A young lady, say 17 years old, will definitely appreciate such a gift.

Sportswear bag
For it, prepare thick fabric, braid, scissors, pins, fasteners, zipper and thread. In addition to sportswear, you can also put camping things in this bag.

Mini handbag
Using the scheme described below, you can make both a very miniature accessory and a larger item.

Remaking old things
For the first of two photo workshops you will need a long soft cloth bag, and for the second - an old T-shirt.


Photos of handmade bags
I want to show you how using the same patterns you can get many bright and unusual products.
Sandwich bag
Cute handbag made of fleece. It's quite simple! And this design can easily be implemented into a cat bag.

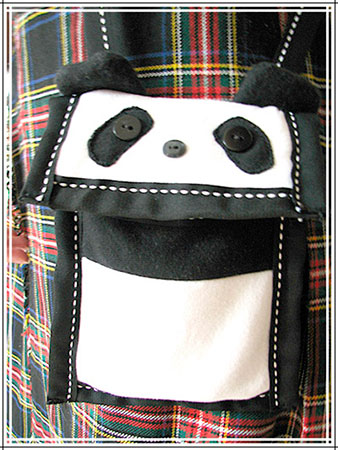
Panda bag
Cute panda design
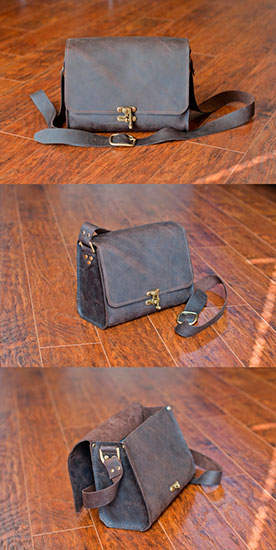
Simple and elegant bag
The handbag is quite simple and is made according to similar patterns from the very first one.

Knitted bag
Although this bag is knitted, its design can easily be implemented in fabric.

Leather bag
Octopus bag
The bag, again, is knitted. But it is very similar to the first one (at the beginning of the article). You just need to add tentacles to it and remove the ears.

By the way, I bought fleece for the eyes of the “cat” bag Here. You're unlikely to see one like this in a store.
This concludes the article. I hope you enjoyed looking at all the bags and took something interesting for yourself. See you soon!
P.S. Subscribe to updates!
Sincerely, Anastasia Skoracheva