How to knit a shawl collar. Shawl collar with knitting needles: the principle and options for knitting on various necklines How to knit a shawl collar with knitting needles
In this publication, we will look at knitting one-piece shawl collars on jackets and pullovers. This detail of the needlewoman is also called the shawl collar. This element gives a more sophisticated look to a particular knitted product. Every needlewoman who skillfully owns knitting needles can knit it. Most craftswomen, wanting to complement knitted clothes with a similar collar, face problems when knitting it, since there are quite a few ways to create it. We offer you several options for work.
This collar is knitted from the bottom up along with the strap. To get such a detail, it is necessary to knit eleven loops according to the following scheme: 1 person., 1 out. in this case, you should start with the edge and one person. Twenty-five to thirty centimeters before the shoulder line, you can start making extensions for the shawl collar. In this case, it is necessary to knit the buttonholes of the strap, the subsequent loop of the faces. and next to it, dial 1 out. cross sts from a transverse thread (= thirteen sts of a one-on-one pattern). Similar increases in loops are carried out further in all sixth rows (p.) And each time in a one-on-one pattern, you need to knit two more stitches with knitting needles. They do this until the shawl collar reaches thirty-one stitches in width. After that, you can knit directly to the shoulder line.
At the next stage, you can fasten or remove the shoulder buttonholes on the additional knitting needle and continue knitting the planochka with knitting needles, typing in the first p. at the level of the cut of the shoulder, an additional edge. Subsequently, this edge will be hemmed to the neckline of the back. To tie the desired width of the shawl collar, follow the outer edge on all sides after every four p. knit with knitting needles five six times shortened p. - approximately three-fourths of all loops. In a specific example, this is twenty-four p. Such shortened p. you need to knit with a crochet or with a broach of loops. In the photo, the shawl collar and beveled shoulders were made on the basis of the broach. Thus, knitting goes to the middle of the back neckline. Then, all links must be removed on an additional knitting needle. The second half of the front is performed similarly. At the final stage, the buttonholes of both halves on the right and left sides must be transferred to two knitting needles, respectively, and sewn using a loop-to-loop seam. Further, the side edge of the collar of the shawl is hemmed to the neckline of the back. One-piece knitted shawl on a pullover In our next training part of the article, we will analyze another way to knit a shawl collar, this time for pullovers.
In the photo below, we see an example of a knitted pullover with a fairly wide shawl collar. In the process of knitting, to achieve this effect, doubling the middle twelve buttonholes was used. At the same time, knitting such a collar can be started with six, eight or fourteen or more loops. At the beginning, you should mark the central twelve points of the front of the product. In the case when the left plank needs to go to the right one, it is necessary to knit the fabric up to these twelve sts. After that, knit 1 out of 1 with knitting needles eleven times. cross item from a transverse thread and 1 person. p., the final p. will be edge (= twenty-three p. of the one-on-one pattern). Then continue to knit in height fabric directly. Consider another case when, on the contrary, the right planochka comes to the left. To do this, you should also knit the fabric up to these twelve points, the first of which is a new edge. Next, eleven times alternately knit 1 p. Persons with knitting needles. and make an increase of 1 out. cross n. from a transverse thread. Then you can continue knitting the main pattern.
After that, as in the first case with a jacket, the pattern should be expanded in all sixth p. on two buttonholes: knit a loop next to the links of the plank., next to it add 1 out. cross n. from a transverse thread. On the presented example of a pullover, a similar increase in loops was performed nine times (= eighteen additional p.) Or a total of forty-one p. planochki. Knitting continues until the middle of the neckline. Here it is necessary to knit forty-one points and a nearby person. p. Then, along the inner edge, dial 1 more additional hem (in order to sew) = forty-three p. To make extensions, starting from the shoulders, after four p. knit the outer thirty stitches six times. For the next strap, dial twenty-three stitches along the inner edge of the upper strap. At the final stage, the finished shawl collar is sewn to the neckline of the back.
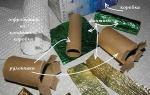
You will need: yarn(100% wool, 100 m / 50 g) -250 (300) 350 (400) 450 (500) khaki, circular and toe knitting needles No. 3 and No. 3.5; 1 button.
Pearl knitting: knit alternately 1 persons. n. and 1 out. p., shifting the pattern by 1 p. in each row.
Facial surface: persons. rows - persons. loops, out. rds - out. loops; with circular knitting only persons. loops.
Knitting density: 22 sts in satin stitch on needles No. 3 = 10 cm.
Pullover for a boy with a shawl collar - job description
Front and back: on circular needles No. 3, dial 132 (140) 148 (156) 164 (172) p. Knit in a round with pearl knitting 5 (5) 6 (7) 8 (8) cm. 154)162(170)178(186). On the sides, make marks, designating 73 (77) 81 (85) 89 (93) sts of the front and back. Change the knitting needles to No. 3.5 and knit as follows: * 14 (15) 16 (17) 1809) p. persons. stockinette stitch, pattern A, 27(29)31(33)35(37) sts pearl viscous, pattern B, 14(15)16(17)18(19) sts faces, stitch *, repeat* -*. Knit in this way to a height of 26 (29) 32 (35) 38 (39) cm. Close for armholes on both sides 4 sts (2 sts on both sides of each mark). Then knit each part separately.
Back: on the needle 69(73)77(81)85(89) p. Knit in straight and reverse rows, closing for armholes 2,2,1,1,1 p. on both sides = 55(59)63(67)71 (75) p. At a height of 36 (40) 44 (48) 52 (54) cm, remove the middle 23 (25) 27 (29) 31 (33) p. for the neck for additional. knitting needle and then knit each side separately. To round the neck, close from the inside in each 2nd row 1 p., 1 p.
At a height of 38(42)46(50)54(56) cm cast off the remaining 14(15)16(17)18(19) sts of the shoulder. Knit the other side symmetrically. Before: on the needle 69 (73) 77 (81) 85 (89) p. Knit in straight and reverse rows, knitting armholes similarly to the back.
Attention! When knitted for 3 rows, close the middle 27 (29) 31 (33) 35 (37) stitches for the neckline and then knit the shoulders separately to the end. Right Half: Continue in pattern until piece measures 38(42)46(50)54(56) cm. Bind off. Tie the second half symmetrically.
Sleeves: on toe knitting needles No. 3, dial 36 (38) 40 (42) 44 (46) p. Knit in a round with pearl knitting 5 (5) 6 (7) 8 (8) cm. row (middle from the inside). At the same time, in the 1st row, evenly add 4 sts. At a height of 7 (7) 8 (8) 8 (9) cm, add 1 st for the sleeves on both sides of the mark. Repeat the additions every 2.5 cm, until in work will not be 52 (56) 60 (66) 70 (74) p. At a height of 24 (27) 30 (33) 36 (40) cm, close the sleeves 4 p each in the middle. Next, knit in straight and reverse rows, decreasing for an okat sleeves on both sides in each 2nd row 2 p., 2 p. Then close 1 p, on both sides, until the height of the eye is 5 (6) 7 (8) 9 (10) cm. After that, close in each 2nd row 2,3,4 (2,3, 4) 2,3,4 (2,3,4,5) 2,3,4,5 (2,3,4,5) p Cast off the remaining loops in one go.
Assembly: complete the shoulder seams. For a collar on the front side of the neckline on knitting needles No. 3.5, evenly dial, starting from the right edge, 91 (97) 103 (111) 117 (123) p. (Including loops from additional knitting needles). Knit in stockinette stitch, knitting along the edges of the chrome. n. (always persons. n.). Turn work over and work short row: work right half, neck, left shoulder, turn work, slip 1 st without knitting, work right shoulder*, turn work, slip 1 st without knitting, work 5 sts after previous turn*. Repeat *-*, almost to the bottom edge of the front neckline.
Attention! To prevent holes in the work at the turning points, knit the thread between the two loops along with the next. loop.
Continue knitting with all loops until the length of the product is the same as in the place of the closed loops of the front neck. At the same time, on the left side, work 1 buttonhole at a height of 2 cm to the end of knitting and at a distance of 3 (3) 4 (4) 4 (5) cm from the bottom edge of the neck. Sew on the sleeves. Sew on a button.
Pattern and pattern for a knitted pullover for a boy:

A shawl collar will add sophistication to any of your knitted products. Every needlewoman who skillfully knows knitting needles can knit a one-piece knitted shawl collar. Well, for those who begin their steps in knitting, we will tell you which side to approach this beautiful collar, how to build a pattern and calculate all the increases and decreases so that the model of your product is beautiful and fashionable.
Types of shawl collar
A distinction is made between a sewn-on and one-piece collar, which can have a variety of shapes, but a rounded, smooth shape is mainly used.
In order to tie a collar on a round neckline, you need:
1) Pick up loops along the entire length of the neckline + additional loops for the ends that will be on top of each other. This is a one-piece knitted collar. It is knitted in short rows.
2) Knit the collar separately and sew it to the product. To do this, you need to dial all the loops for the shawl collar, and then tie a kind of trapezoid in short rows, where the upper short side is the width of the back neckline, the height is equal to the height of the collar, and the inclined lines are the sides that will be sewn to the front of the neckline.
 For a square-shaped cutout, you need to knit a separate rectangular collar, where the width is the full length of the “shawl”, and the height is the width of the overlapping parts when sewing. Often such a gate is made with a 1x1 rubber band.
You can also knit a shawl collar with knitting needles on a v-neck. To do this, you need to pick up loops only on the back, work using partial knitting to cast on loops along the front of the collar, and then decrease the loops on one of the sides (which will be on top) to form the desired neckline.
There is also a double version of the collar in question. It is necessary to separately tie a part whose height \u003d 2x the height of the collar, fold it in half and carefully sew it to the product.

The shawl is performed as a one-piece knit with a shelf - they are knitted together with the shelves at the same time, in the vertical direction;
as well as in the transverse direction - they collect loops along the connected shelves, and separately connected and then glued to the shelves.
 The neckline has a deep V-cut, starting almost from the waist, and the strap for the fastener is wider than usual - up to 8 cm. Knit the collar and fastener in a horizontal direction. On the pattern, mark the neckline and the width of the fastener strap (Fig. a). Tie the details of the jacket, sew them, and only after that proceed to knitting the fastener and collar.
On the front side of the right shelf, on which there will be buttonholes, dial loops for the strap, starting from the bottom of the shelf and ending with the middle of the neck of the back:
- Knit 3 front loops from every 2 edge loops. The needles are the same with which the model was made.
- To make the line neat, insert the knitting needle into the edge loops as follows: take one edge loop for both walls, following it once for both walls, the second - only for the front.
In this rhythm, knit the entire row. Count the loops on the knitting needle, so that later for the left shelf, dial the same number of loops. From the next row, start knitting an elastic band 2 × 2, its height is equal to the width of the strap for the fastener. Don't forget to sew buttonholes.
From the shoulder seam to the middle of the neck of the back, knit the placket very tightly so that the collar fits better. After tying the strap, close the loops to the beginning of the collar.
Continue knitting only the collar, giving it the shape of a shawl. To do this, close 2 loops on the front side of the work at the beginning of each row until the height of the connected collar is 18-20 cm. After that, close all the loops. In the same way, knit the strap and collar for the left shelf, dial the loops along the front side of the work, starting from the middle of the back neck. When finished knitting, sew both halves of the collar.
The shawl collar is a one-piece knitted collar
can be of various shapes: classic and shaped shawl. There are several options for knitting a collar: a collar and a fastener can be knitted simultaneously with a shelf (vertical knitting direction, lobar) or done in the transverse (horizontal) direction by picking up loops from the edge shelves; can be knitted separately and then sewn on.

For example:
After the shelves and back are tied and sewn along the side and shoulder seams, we collect a number of loops along the front line and the neckline and knit the strap and shawl collar as follows: first we knit 2 rows of elastic on all loops, then we knit only the collar (from the place the location of the top button, according to the pattern) using short rows, gradually decreasing in each row, i.e. without knitting from 2 sides for 2 - 4 loops. Having thus knitted the collar by 7 - 8 cm, we put into operation all the loops and knit together the edge of the collar and both strips for the fastener with a width of 4 - 5 cm. On the right shelf, in the process of knitting, do not forget the loops for the fastener.

If the shawl is single, then measure the height of the collar along the back. They knit a sample with this pattern and count how many rows fall on the measured collar height.
Knit the central part of the loops corresponding to the loops of the neck of the back. The loops of one and the second part, which fall on the neck of the front, are put into work for the number of calculated rows up to the entire height of the collar, but the number of loops picked up on the sides of the loops of the neck of the back and the frequency of their introduction into work. The collar itself is limited by two values - the height (number) of rows, and the number of loops on the rounded part, and the Shape - the frequency of their introduction into work.
Types of shawls and pattern construction
 The neckline can start almost at the waist. On jackets with buttons, the strap width for them is usually wider than the standard one, sometimes reaching 8 cm. The direction of knitting can be vertical (together with the product detail) and horizontal (when working loops are picked up along the edge of the knitted fabric and a collar is knitted on them).
You need to start work by building a pattern, determining the desired width of the bar. From the center line of the front, half the width of the bar should be set aside in two directions. If the jacket is supposed to be buttoned, then only half of the shelf will be displayed on the pattern. In this case, half the width of the bar is deposited inside the part, the bar itself must be extended by the same distance in the opposite direction.
The beginning of the shawl collar is the location of the top button, which depends on the chosen style. In order to determine the location of the remaining buttons, you need to divide the distance between the top button and the bottom edge of the product into equal parts. Their number depends on how many buttons the jacket provides.
Sew-on shawl collar
 The collar is made separately according to the pattern. Take half the width of the back neckline (aB = 6 cm). On the pattern of the shelf, mark the location of the first button. It depends on how the product will be opened. From point a lay down 14 cm and mark the location of the first loop (point b). A horizontal line is drawn through point b until it intersects with the bead line, the intersection point is denoted by the letter b1. Connect straight points B and b1. This is the collar sewing line. It is measured: Wb1 \u003d 24 cm.
Construct a rectangle ABGD. Its sides AB and DG are equal: 6 cm + 24 cm = 30 cm.
The sides AD and WG are equal to the width of the collar - 9 cm (or any other of your choice).
From point A, a segment is laid to the right, equal to half the width of the neckline of the back (6 cm), point a is set.
Points a and D are connected by a straight line and then divided in half. From the point of division, lay 1.5 cm upward along the perpendicular. A smooth line is drawn through the resulting point, connecting points a and D.
An example of loop calculation.
In 1 cm - 3 loops, in 30 cm there will be: 3 loops * 30 \u003d 90 loops.
For the whole collar: 9;
loops * 2 \u003d 180 loops + 2 extreme loops \u003d 182 loops.
To knit a collar, 182 loops are cast on and gradually decrease the loops on both sides of the pattern.
Along the line Ah collar loops close all at once. Since the decrease in loops creates an uneven edge of the product, the collar is sewn along the line aavg, the edge of the collar is even.
Knitting a shawl and strap at the same time as a shelf
 On the pattern-based of the right shelf, mark the width of the fastener strap and the size of the collar (Fig. 3). Leave the back pattern unchanged. Tie the right shelf at the same time as the strap before the collar begins to expand - point A. Work the strap in garter stitch. From this point, start adding stitches between the front and back pattern on every 4th to 6th rows (see "+" signs in fig. 3). Make new loops with the yarn over, throwing it in the wrong side, and in the next knit the front one behind the back wall, then the places of the increase are less noticeable. Knit the newly formed loops with a strap pattern, in this case, knit.
Having knitted to point B, type air loops on the knitting needle to expand the collar (4-5 cm) and do not make any more additions. Start decreasing: between the patterns of the shelf and the collar in each 4th row (on the front side of the work), knit 2 loops together from the wrong side, reducing the loops of the shelf pattern. The number of collar loops should remain unchanged. Make the last decrease at point B and after that knit the collar to a height of 6-7 cm using partial knitting: divide the collar loops (mentally) into 3 equal parts and every 3-4 rows do not knit one third from the side that will be sewn to back neck. Having connected the collar, knit a few more rows with an auxiliary thread; without closing the loops of the last row, remove the knitting from the knitting needle and iron. In the same way, tie the left shelf. Sew the model, remove the auxiliary thread, connect the open loops of the halves of the collar with a loop-in-loop seam and sew it to the neck of the back with a knitted seam.

Knitting shawls and straps in the transverse direction
 On the pattern-based of the right shelf, mark the width of the bar (6 cm) and the place of the top button (for example, on the waist line, Fig. 4). Connect point A with the width of the neck (point B). Straight AB - new neck line. Leave the back pattern unchanged.
Tie the back and shelves, sew them. Now, on the front side of the right shelf, starting from the bottom and ending with the middle of the back, dial loops from the hem for knitting the strap and collar. The number of needles is the same as for the main work. Count the loops on the knitting needle to dial the same number for the left shelf. From the next row, start with a double-sided pattern (for example, with a 2X2 elastic band) to knit a bar (6 cm). Don't forget to make buttonholes in the middle of the placket. From the shoulder to the middle of the back, knit the placket as tight as possible for a snug fit around the neck. Then close the loops to the place of the top button and continue to knit only the collar, giving it the shape of a shawl. To do this, at the beginning of each row from the side of the strap, close 2-3 loops until the height of the collar is 18-20 cm. At the same time, add loops from the side of the seam (every 3-4 rows, 1 loop).
Having connected the collar of the required size, close all the loops in a row. In the same way, knit the strap and the collar of the left shelf (pick on the loops along the front side of the shelf, starting from the middle of the back). When finished, connect both halves of the collar with a knitted vertical seam.
When making one-piece collars, it must be borne in mind that on the figure the main part of the collar (departure) lies on the back and front much lower than the neckline, so the edge of the collar must be knitted more loosely so that it is not pulled together. Otherwise, it will not be possible to create a well-fitting collar - the tightened edge will not allow it to fall and the collar will lie ugly. This is the main difficulty when making one-piece knitted collars.
How to attach a shawl collar to a product
 Consider how to knit a shawl collar with knitting needles and how to connect it with a jacket or sweater along the neckline of the shelf and back.
The first thing to say is that the width of the shawl collar along the neckline of the back should be wider than along the neckline of the shelf. In order for this to happen when knitting, we use shortened rows.
In order to make the correct calculation, it is necessary to outline where the lowest point of the shawl collar will be on the shelf. Now, at a certain height, it will be necessary to count the same number of loops in both directions from the middle of the shelf and close. In this example, this is only 16 loops (that is, from the center of the shelf to each side, 8 loops). And then continue to knit the cutout of the shelf separately.
The loops decrease along the bevel, knitting two loops in front of the edge loop with one loop so that the decrease of the loops is in the direction of the cutout.
Before knitting the shawl collar, the shoulder seams are sewn together and can be slightly steamed through the iron.
How to knit a shawl collar on a product
Along the beveled lines of the neckline of the shelf and along the neckline of the back, we collect an odd number of loops with circular knitting needles in case of further knitting with an elastic band 1 * 1 on the front side.
In the next wrong row, knit with an elastic band to the second shoulder seam. Turn the work and remove the 1st loop (as an edge loop).
 We knit to the first shoulder seam and turn, remove the 1st p.
At the end of each subsequent row, knit a few loops (about 1-2 cm) more than was knitted in the previous row.
Repeat the process until all loops are in the work.
Then knit straight on all loops until the width of the ends of the collar is equal to the length of the lower edge of the neckline with closed loops. Then close all the loops of the shawl collar.
Now you need to connect the free ends of the collar in the middle of the shelf. For this, the edges of the shawl collar must be sewn to the lower edge of the neckline: the outer end of the collar is sewn with a mattress knitted seam, and the inner one with an edge stitch.
This is how a beautiful shawl collar is created on any sweaters: women's, men's and children's.
Shawl collar from bottom to top - examples
 9 strap stitches are knitted together with collar stitches. As edge loops choose a Swiss edge (smooth, without knots)
On the shelves for the V-shaped bevel in each 6 row, 1 loop is reduced. At the same time, in the same rows, to expand the collar, 1 crossed front is added from the inside. The looped rhythm must be preserved. At the same time, at the front edge of the collar, add six times in every 2nd row and twice in every 4th 1 front crossed or 1 purl crossed next to the edge loop. These additions are made on the front side of the collar.
 After fixing the shoulder seams, loops are added on the inside of the back of the collar. The inner edge of the back of the collar is later sewn to the edge of the neck of the back. To make the shawl collar wider on the outside than on the inside, after the last addition of loops, short rows are made. To do this, leave 4 times 7 loops on the inside of the collar. After each short row, knit 4 full rows. The loops of the back connected to the middle of the neck are not fixed, but left on the pin.
To connect the back of both halves of the collar, the open loops of each are distributed on 2 knitting needles: facial loops on one, purl on the other. Both halves of the collar with two knitting needles each are placed opposite each other. First, the front loops on one side, then the front loops on the other, are connected with a knitted seam.
The scheme for the pattern of the jacket shelf with a one-piece knitted shawl collar is attached above.
Double shawl collar
 On the wrong side (shelf, back neck, second shelf), cast on loops for the straps and collar along the entire length and knit with an elastic band to the desired width of the strap, then stop knitting the strap to the desired height (before the beginning of the collar) (for convenience, these loops can be removed on pins), and continue to knit the collar in short rows to the desired width. Then connect all the loops together with the shelves and knit a row with purl loops (this is for a more embossed edge design, it turns out a very neat edge) and then continue to knit the collar, only in the reverse order - where it was shortened - increase by the same number, until reached the bar and then finished with the bar together. When you finish knitting the bar, then knit a couple of rows with another thread, then remove everything neatly from the knitting needles and steam with an iron along these two rows, then unravel these two rows, which were knitted with other threads and open the loops. It comes out very neat. If the jacket has a clasp, then on one of the strips of the shelf it is necessary to knit loops and when folding the strip in half, just sweep them together.
Schalka round
 How to dial such a collar - it does not matter. You can also separately, you can also along the edge, as it is more convenient. It is more convenient for me along the edge, so as not to sew later.
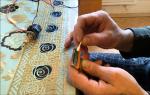
Shortened rows are knitted like this: knit a row as usual, but without knitting a certain number of loops to the end, stop, yarn over, turn knitting and knit further. So on both sides, for symmetry. The number of short rows is as required by the drawing.
In the first "long" row, that is, when you knit all the loops, the yarns are knitted together with the next loop. If done carefully, then they are not visible at all on the front side, and the edge turns out to be so interestingly rounded, as in the picture.
Then close the loops all together - Just after knitting in short rows, then knit a few centimeters long.
How to knit shawl collarsIn this publication, we will look at knitting one-piece shawl collars on jackets and pullovers. This detail of the needlewoman is also called the shawl collar. This element gives a more sophisticated look to a particular knitted product. Every needlewoman who skillfully owns knitting needles can knit it. Most craftswomen, wanting to complement knitted clothes with a similar collar, face problems when knitting it, since there are quite a few ways to create it. We offer you several options to work with.
Knitted shawl on jackets

This collar is knitted from the bottom up along with the strap. To get such a detail, it is necessary to knit eleven loops according to the following scheme: 1 person., 1 out. in this case, you should start with the edge and one person.
Twenty-five to thirty centimeters before the shoulder line, you can start making extensions for the shawl collar. In this case, it is necessary to knit the buttonholes of the strap, the subsequent loop of the faces. and next to it, dial 1 out. cross sts from a transverse thread (= thirteen sts of a one-on-one pattern). Similar increases in loops are carried out further in all sixth rows (p.) And each time in a one-on-one pattern, you need to knit two more stitches with knitting needles. They do this until the shawl collar reaches thirty-one stitches in width. After that, you can knit directly to the shoulder line.
At the next stage, you can fasten or remove the shoulder buttonholes on the additional knitting needle and continue knitting the planochka with knitting needles, typing in the first p. at the level of the cut of the shoulder, an additional edge. Subsequently, this edge will be hemmed to the neckline of the back.
To tie the desired width of the shawl collar, follow the outer edge on all sides after every four p. knit with knitting needles five six times shortened p. - about three-fourths of all loops. In a specific example, this is twenty-four p. Such shortened p. you need to knit with a crochet or with a broach of loops. In the photo, the shawl collar and beveled shoulders were made on the basis of the broach.
Thus, knitting goes to the middle of the back neckline. Then, all links must be removed on an additional knitting needle. The second half of the front is performed similarly.
At the final stage, the buttonholes of both halves on the right and left sides must be transferred to two knitting needles, respectively, and sewn using a loop-to-loop seam. Further, the side edge of the collar of the shawl is hemmed to the neckline of the back.
One-piece knitted shawl on a pullover
In our next training part of the article, we will analyze another way to knit a shawl collar, this time for pullovers.

In the photo below, we see an example of a knitted pullover with a fairly wide shawl collar. In the process of knitting, to achieve this effect, doubling the middle twelve buttonholes was used. At the same time, knitting such a collar can be started with six, eight or fourteen or more loops.
At the beginning, you should mark the central twelve points of the front of the product. In the case when the left plank needs to go to the right one, it is necessary to knit the fabric up to these twelve sts. After that, knit 1 out of 1 with knitting needles eleven times. cross item from a transverse thread and 1 person. p., the final p. will be edge (= twenty-three p. of the one-on-one pattern). Then continue to knit in height fabric directly.
Consider another case when, on the contrary, the right planochka comes to the left. To do this, you should also knit the fabric up to these twelve points, the first of which is a new edge. Next, eleven times alternately knit 1 p. Persons with knitting needles. and make an increase of 1 out. cross n. from a transverse thread. Then you can continue knitting the main pattern.
After that, as in the first case with a jacket, the pattern should be expanded in all sixth p. on two buttonholes: knit a loop next to the links of the plank., next to it add 1 out. cross n. from a transverse thread. On the presented example of a pullover, a similar increase in loops was performed nine times (= eighteen additional p.) Or a total of forty-one p. planochki.
Knitting continues until the middle of the neckline. Here it is necessary to knit forty-one points and a nearby person. p. Then, along the inner edge, dial 1 more additional hem (in order to sew) = forty-three p. To make extensions, starting from the shoulders, after four p. knit outer thirty stitches six times.
For the next strip, cast on twenty-three sts along the inner edge of the top strip.
The buttonholes of the two halves of the collar on both sides must be transferred, respectively, to two knitting needles and sewn on the basis of the “loop to loop” seam. At the final stage, the finished shawl collar is sewn to the neckline of the back.