Homemade leather at home. What can be made from an old leather jacket. What is the leather made of
Look into the far corners of your wardrobe, where “no man's foot has stepped” - a joke, where you have not looked for a long time, it is possible that there are many things that you are no longer going to wear. Surely, among all this rubbish, there are several items of clothing, accessories or shoes made of leather or a substitute - it can be gloves, a bag, boots, or even a whole jacket.
If you are definitely not going to wear them, then you can make a new unique little thing out of them, which will gain new life and you will enjoy using it.

Making leather crafts is very easy, especially if you have imagination and creativity. Look at the photo of leather crafts and you will definitely choose what you need most now.

As ideas, we advise you to consider options such as wall panels, souvenirs and gifts, flowers, various additions to the wardrobe and even decorations. In order to make the craft, you only need free time, attentiveness and a great desire to do something with your own hands.


If you are a beginner in creating leather goods, then we recommend that you choose the final version, which is simpler, so you can learn how to make a product, and screw up your first "hand made". For example, you can make flowers for a wall or a small decoration.

It is not necessary to invent something new, it is enough to find step by step instructions to create a certain thing and follow it inside and out. Once you learn this craft, you will be able to create your own masterpieces and share them with the world.

Leather bracelet
What could be easier than leather bracelet hand made? Today, such an accessory is considered very fashionable, and it is made in just a few hours at the right attitude to the diagram.

Materials and tools
- Leather cord 0.8m long
- Chain 3x0.25m
- Scissors
- Thread with a needle
- Button the same color as the chain

Such simple craft from leather, like a bracelet for beginners, it is not difficult to make it. Mentally divide the leather cord into three equal parts, and then cut one of them. Prepare chains. The whole process will consist in weaving a braid from a lace and chain.

When the weaving is over, it is necessary to tie the ends with a thread of the same color so that it cannot be seen. Try to do everything neatly so that the product looks decent.

At one end, you need to sew a button, and on the other, make a loop that will be put on the button so that the bracelet can be closed. Please be aware that the best option there will be a unity of colors of the chain and buttons.


Now your bracelet is ready and can safely show it to your friends.

Leather brooch
Let's analyze step by step instructions on how to make such a leather craft. You can form a brooch pattern in the form of a flower.

Materials and tools
- Colored leather elements
- Cardboard
- Scissors
- Pin
- Tweezers
- PVA glue and Moment
- Candle


First of all, you need to make templates for sheets for a flower from cardboard. Then, according to the prepared template, it is necessary to cut out about ten such leaves from the skin. Further on back side of each sheet you need to go through the Moment glue along its entire length and make a hall along the glue line.

Next, dilute PVA glue with water, but not too much and process the wrong side of each sheet. When the glue dries, it is important to carefully take the leaf with tweezers and hold it on a burning candle, try it, you will understand what it is for, but seriously, the leaf will acquire a natural volume and you will be surprised how beautiful it will look.


Attention, the leaf over the fire should be processed only on the wrong side, so as not to damage the skin itself.

Further making leather crafts with your own hands is to create a basis for the leaves. To do this, you need to cut a circle of leather with a diameter of about 4-5 cm.

Then we proceed to glue the petals to it. If you made leaves of different sizes, then we put large ones in the first row, then medium ones and, finally, the smallest ones.

After that, it is necessary to make several blanks for the center of the flower and glue them to the center of the base. The last step is to glue the pin to the back of the base. When the glue is dry, you can wear this jewelry immediately.

What else can be made from pieces of leather?
For example, it can be a leather bag in japanese style... To do this, it is necessary to make a bag of leather so that it resembles a cylinder with a bottom.


The upper edge of such a bag is folded back and properly stitched with a beautiful stitching. A lace with a clip is inserted into the hole, which has been bent and stitched, then the bag can be simply tightened and the contents will not fall out of it.

You can sew handles or straps to this bag, then it will be convenient to carry it on the back or shoulder.

Lunch bag
Try to take a rectangular piece of leather and sew on the sides of the long side, right down the middle, for additional walls. On the smaller edges, it is important to equip the clasp.

If you did it right, then when you connect the long edges, you should have a small carry-on bag, which is convenient for storing your portable lunch.

Yes, the bag is not easy to make, but you will catch enough views of yourself and the bag to make you feel proud of yourself.


Leather package
Have you seen the paper bags in which food is placed in fast food restaurants? Try to sew two equal pieces of leather together to create the same bag. Such a product is convenient to store, carry and can be used for a variety of purposes from carrying food to storing money in it.

Stand
Do not want to spoil new table hot dishes? Cut a bizarre shape out of the skin, or vice versa, a recognizable figure and you can safely put hot glasses and plates on it. Nothing will happen to the coda, so don't worry.

Notebook
Wrap your notebook in real leather from an old jacket you no longer wear. Take a good look at the dimensions and get a grip on the edges of your new notebook cover.

In addition to all of the above, there are thousands of master classes on leather crafts. You just have to choose what you like the most and make such a product. Leather has always been and will remain in fashion, so feel free to start creating a unique thing.

Photo of leather crafts


Leather production in Morocco takes place in hellish conditions: under the rays of the scorching sun, workers manually process the leather, standing knee-deep in water with lime and the addition of dog / bird droppings. Unlike factory processing, they are used exclusively natural dyes... No tour operator will offer you such excursions, so they usually go to see these productions on their own and, as a rule, everyone goes to Fez for this. But we decided to find a production in Marrakech.
All production is done by hand and under the scorching sun, while there is such a hellish stench here (you will find out why later). At first, we wandered for a long time through the narrow streets of the medina (the old part of the city) in search of these very factories. As a result, we found a man who offered to show us the production. He even called himself the owner of this factory (but it seems he was just lying).
# 03. On the way, we come across carts on which skins are taken to the factory (usually cow, sheep or goat skins): 
# 04. The received skin goes through the sorting stage: 
# 05. Further, the skin undergoes primary processing - it is soaked in bathrooms with a solution of lime and water, and so that the skin is soft, dog, chicken or pigeon droppings are added here. That is why there is a hellish smell here (well, of course, the skin itself also adds flavor) 
# 06. On the way to the factory, we bought a small bunch of mint so as not to suffocate here. But for the workers it looks like this smell is not at all scary: 
# 07. This is how one of the shops of a tannery in Marrakech looks like: 
# 08. In this solution, the skin is soaked from several days to several weeks. If necessary, it can be soaked several times: 
# 09. The factory does not use any chemicals, all natural 
#ten. After soaking, the leather is sent to the apprentice, here it is manually cleaned of wool residues: 
#eleven. And then the skin is soaked in clean water (lime can be added) and dried: 
#12.
#13.
#14.
#15. Leather production in Marrakech 
#16. There are also workshops nearby where they sew bags, slippers and other things and sell them here. 
# 17. At the next stage, the skin is painted in the desired color. To do this, the skin is again placed in a bath with the desired dye and kept there for several weeks. To make the color uniform, knead it periodically: 
# 18.Again, no chemical dyes, everything is purely natural. For example, to get yellow saffron is used, and paprika is used for red.
This photo is from another factory, these are natural dyes for dyeing fabrics: 
#19. Leather production in Marrakech 
#twenty. After seeing the first shop, they took us to the store and tried to sell something. We immediately began to say that it was not interesting. But then the seller said that they would not let us go further. In the end, we still persuaded him, and we looked and took the photos that were above. And this is another general plan: 
# 21. The smell of tin! Alena is ready to run away :) 
# 22. Well finished leather goes to the workshops, where they will sew a bag or ottoman or grandmothers (Moroccan slippers) 
# 23. The guy wants money for a photo :) 
# 24. And here is the finished product, Moroccan grandmothers: 
Working all day in the hot sun, standing in a solution with droppings and other mixtures, naturally does not add to health. But local residents need to earn money somehow, so they have to endure all this.
P.S.
Something like that today. What do you think about the post?
Original taken from
Leather is a great craft material. From such a soft and pleasant base, you can make and sew a lot of designer products: brooches, belts, original bracelets, hairpins, etc. Of course, all these accessories self made can be purchased ready-made in the store. But it's much more interesting to make them with your own hands. Let's look at what author's crafts and leather goods you can create with your own hands.
Leather basics
Let's start with basic knowledge and concepts about this material, namely, with the features of working with it:
- In work, you can use any leather and its small parts.
- You can effectively remove stains from the skin surface with running water and a sponge.
Important! Using stain removers or detergents detrimental to the material, as they make the skin very rough, moreover, brittle.
- If you need to soften the skin, increase its elasticity, treat the front side with glycerin.
- Various rivets, special clips and threads will help to connect the elements of leather products with each other. Seams are best done with a sewing machine, but be sure to select only the right needles to keep the holes neat.
- High-quality work can be done using special tools. Therefore, make sure you have at least a minimum of them: a hammer, punch, vise, tongs, etc.
- It is extremely convenient to cut out elements from leather on a dense surface. For example, a regular cutting board is perfect for these purposes.
- From decorative ornaments for leather goods, you can distinguish bright beads and beads, shiny rhinestones, sequins, metal clips, buttons and laces, etc.
- To keep the edges of the skin even, treat them gently with fire.
Another important step in getting acquainted with working with leather is familiarization with its types.
Types of genuine leather
Like any material, leather has Various types... It is classified according to the quality of the dressing, it differs in the type of raw material, and the age of the animals is also important. The material has a dense front side and a loose seamy side, which is called bakhtarma.
So, what types of material can be distinguished, from which you can make leather crafts with your own hands:
- Yuft. This type The material is made from the skins of pigs, horses or deer, which are impregnated with willow bark. In addition, this thick skin is treated with oil. Suitable for making shoes.
- Kid. This soft leather is made from goat skins. Chrome tanning makes the leather durable and elastic, which is why it is used for the top of elegant women's shoes.
- Suede leather . A popular type of leather made from the skins of goats and calves. The material is fat-tanned. In the process of leather dressing, the face layer of the skin is cut off. The peculiarity of the material is its low pile, fabric softness and high elongation. Suede has found its application in leather haberdashery and footwear production.
- Chevret. Fairly loose leather made from sheep skins. Also has good stretchability. For its processing, chrome tannins were used. Suits are sewn from such leather and outerwear(various jackets and coats).
- Ooek. Elastic and soft leather fabric made from the skins of dairy calves.
- Velours. Another type of leather with a pile surface, but unlike suede, this material is slightly rougher, and the thick and even pile is slightly lower. In addition, the hides are chrome tanned. Used for sewing coats.
- Laika. Incredibly thin and soft skin with excellent elasticity. Business card such leather are kid gloves.
- Morocco. Thin and soft leather obtained from the skins of goats, calves, foals or sheep. Vegetable tanned.
Important! Most often, the hide of cattle is used for the production of leather, however, you can purchase more exclusive material: from the skins of snakes or lizards.
DIY leather homemade products can be made from the remnants of leather things, the service life of which has come to an end. For example, handbags, old gloves, boot tops or belts. New pieces of leather for small items can be purchased from a tailor shop or tannery. Its cost will be low, since, in fact, it is material trimming. For larger items, you will have to spend money and purchase a whole piece of leather.
How to apply old leather in work?
For small do-it-yourself leather products or miniature gizmos, as well as individual elements of the composition, you can and should use old leather material. Wallets, boot parts, handbags - all of these will fit your creative ideas.
Step 1
First of all, cut the leather at the seams. The front side of the skin is smooth and dense, shines pleasantly, as it is most often covered with nitro paint. We advise you to rinse it or wipe it with soapy foam.
Important! It is impossible to wash leather products, since you can wash off the fat-tanning substances of the material, then it will lose its appearance, begin to puff up and shrink.
Step 2
Then rinse the product with salt water and vinegar. To do this, connect:
- One liter of water.
- 50 grams of table salt.
- One glass of 9% table vinegar.
Important! This mixture gives the skin its elasticity. This characteristic can be improved if the surface is lubricated with glycerin. After that, the old material will become quite suitable for do-it-yourself leather goods.
Other ways to wash your skin are:
- Unboiled milk or coffee grounds. The only exception for the second remedy is white skin.
- But suede can be washed in warm water. washing powder with the addition of ammonia. If there are greasy spots on it, then refined gasoline, chloroform or another solvent will help get rid of them. Soak a piece of clean cloth in liquid, and wipe off the dirt.
Important! In order for the pile to look impressive and like new, walk over the surface of the material with a rubber brush, fine sandpaper or foam rubber. After that, rub the skin with this mixture:
- One glass of warm milk.
- One teaspoon of baking soda.

Step 3
The wet material should be stretched on a backing, thick board or plywood sheet. Dry small parts under a press, placing them between dry pieces of cloth. After such procedures, the skin will acquire an even and smooth surface.
In the meantime, the leather is drying, treat it with one of the impregnation options:
- Castor oil.
- A mixture of butter and warm water, plus a little ammonia.
Important! Carefully and gently cover the surface of the skin with the compound. This is best done with a soft brush or thick cotton swab. Remove excess with a clean cloth.
As a result, you will get an excellent basis for crafts. What can be made from pieces of leather? Cute accessories and little things: a keychain for keys, stylish jewelry, jewelry, etc. And the leftovers of leather are interestingly used in the design of rooms in the form of original fittings: handles for drawers, strips of leather can be used as fasteners for shelves, handles for wooden storage boxes.
Essential tools for working with leather
Professionals have a great variety of them. However, if you plan to make leather crafts with your own hands for novice craftsmen, then only a few of them will be enough.
Important! In the course of your creative activity, you will replenish your set of tools, as experience will suggest the most practical and convenient tools at hand.
There are the following tools for working with leather, which will definitely come in handy initially:
- Scissors. You should stock up on several types. For small parts made of thin fabric, manicure is perfect, and for larger items made of dense leather, tailors. Curly scissors "zigzag" will help to decorate the scalloped edge.
Important! Scissors should be sharpened to cut through the skin, not crush it.
- Awl. Designed for sewing together product details.
- Hammer. It is necessary for punching holes in the material, drawing a pattern and installing rivets.
- Ruler. It is optimal if it is metal, since it is necessary for a smooth cut of the edges. In addition, using a knife and such a ruler, you can cut cords or parts from straight lines.
- Substrate. It is useful if you cut out parts with a knife, as well as if you are performing actions with force. An example would be a wooden board, a plexiglass plate, a thick rubber sheet.
- Punches. With the help of such means, holes are punched in the skin of the required diameter. The principle of their operation is quite simple: the tool is applied vertically to the skin and hit on the other end with a hammer.
- Figured stamps. The purpose of such tools is to create patterns on the surface of the skin, which can be various geometric shapes or ornaments. The technique is the same as for punches: striking the stamp. Most often they are made of metal or hardwood. You can make the stamp yourself. To do this, take a nail and turn it head down. Round drawings are ready to use And you can also give another shape with the help of a file: a square, a rhombus, etc.
Important! For a more embossed ornament, place a soft substrate under the skin: felt or a piece of linoleum.
- Ball pen. With its help, it is convenient to apply a pattern to the skin or a pattern. It is necessary to draw from the wrong side.
These tools will be enough for DIY leather crafts to become one of your favorite activities.
Master class with video - a convenient method of self-study
DIY leather goods - a master class for beginners and more experienced craftswomen. You can choose the most suitable option and embody your own creative ideas... So, let's learn how to make copyrighted things, and here are some of them.
Simple and stylish necklace
To create leather jewelry, prepare the following tools:
- Revolving hole punch.
- Glue.
- Sharp scissors.
- A piece of skin.
The creation process consists of the following stages:
- With scissors we cut out a number of triangles from the skin - their shape and size may be different. This will make your jewelry look more interesting.
- Then, using glue, connect all the elements together in a chaotic creative mess - as your imagination and sense of taste tell you.
- Wait for the glue to dry completely.
- After that, in the resulting workpiece, make two holes at the edges and pass a chain or decorative lace through them.
- Secure and wear your jewelry with pleasure.
Leather earrings
One more interesting crafts DIY leather for beginners, for whom you will need:
- Leather. Preferably painted in bright colors.
- Stud earring base.
- Glue and scissors.
The creation process itself is quite simple and fast:
- Determine the design of your earrings, and then use scissors to cut out the required shapes. They can be arbitrary or geometric.
- Glue each of the elements to the base of the earring.
- We are waiting for a certain period of time until the glue dries.
You are a happy owner of new earrings!

Keychain and vase for keys made of leather
This unusual set will become an incredibly practical and stylish item. In addition, these do-it-yourself leather gifts will surprise you with their originality.
You will need the following things:
- A piece of leather.
- Sharp scissors and a utility knife.
- 6 rivets.
- Key ring.
Stages of creating a vase for keys:
- Cut a rectangle out of the leather. Determine the parameters yourself - it can be a neat-sized vase just for storing keys, or you can make it wider to add some more little things.
- Clamp one corner and make a hole in it. To do this, you can use a hole punch or a sharp knife, or even a nail. Insert the rivet.
- We do the same manipulations with the rest of the corners.
The vase is ready!
Now let's move on to making the keychain:
- We cut out a small rectangle from the skin, and on one side of it we leave a horizontal strip about 1 cm wide.It turns out a kind of rectangle with a ponytail.
- We bend this section in half and fasten it with a rivet, thus creating a loop.
- On the surface of the rectangle, using a ruler and a pencil, outline the lines along which we cut the fringe with scissors, not reaching the edge of the material about 1-1.5 cm.
- We twist the resulting fringe around the loop, fasten the entire structure with glue.
- The last step: we pass a key ring, chain or decorative cord through the loop.
Important! Such an elegant keychain can be used not only for storing keys, but also for decorating a handbag.
Hair bow
You need the following materials:
- Skin stripes.
- Thin wire.
- Regular hair tie.
- Scissors with a ruler.
So what do we do:
- With a ruler we draw a strip on a piece of leather. Length - about 40 cm and width - 4 cm. Cut out.
- Sharpen both ends of the strip with scissors.
- Attach the leather strip to the elastic, and fasten them together with a wire. In this case, the elastic should be placed in the middle of the leather band.
- Tie your hair as usual with an elastic band, and wrap the leather tape around the ponytail, elegantly decorate the bow.
Stylish leather clutch with your own hands
A bag is an accessory for every young lady, and how nice it is if you have created such a product yourself. Everyone will certainly pay close attention to your handbag. That is why DIY leather crafts are so necessary!
Let's start the process by preparing the necessary materials:
- A piece of leather of the required size and color.
- Scissors and a stationery knife.
- Clips.
- Flat plate.
- A sewing machine and needles of the appropriate size, nylon threads are also required.
The sequence of the creative process:
- Cut a rectangle 40 by 28 cm from a piece of leather.
- We begin the design of the front of the clutch. How it's done? Cut out pieces 12 cm long and 1.5 cm wide on the sides of the rectangle. The lines should be smooth.
- Now we apply a regular plate to the upper part of the product and mark the lines of roundness, along which we further cut off the excess.
Important! Make such rounded cuts as symmetrical as possible.
- The following steps: bend the bottom of the bag to the places of smooth cutouts on the sides of the product. Secure the joints with clips.
- We sew the resulting seams along the edges of the bag on a sewing machine. We remove the clamps.
- We turn the bag onto the front side.
- We bend the upper part of the workpiece, make a small longitudinal cut at a distance of about 2.5 cm from the edge.
- Now we need a separate piece of leather, from which we cut out a strip of material 70 cm long and 1-1.5 cm wide.
- We tie one end into a knot, and thread the opposite end into the hole on the bag.
- We gracefully wrap the excess strip around the clutch and tie a bow or a beautiful knot.

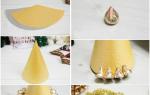
Leather flower
What can be made from pieces of leather? An incredibly beautiful rose!
You need:
- Leather.
- Glue.
- Candle.
- Ball pen.
Manufacturing steps:
- On the seamy side of the skin, draw with a pen rose petals of 10 small and large, and cut out the details.
- Burn the elements over the candle fire. You need to keep the skin upside down. Hold the petals with a clamp or tweezers. In the process of processing by fire, the parts are slightly bent inward.
- Apply glue to the inside of the petal and roll it up. This is how the core of the flower turned out.
- Apply glue to the next element and connect it to the middle. The petal should "hug" her.
- And now we gradually paste over the resulting bud with petals. We start with small elements and then move on to large ones.
Important! Place the rose petals on the same level. To create an even more dramatic appearance of the flower, spray the surface with a shiny spray.
Leather belts
Such accessories are used by men, women and children. Therefore, do-it-yourself gifts made of leather in this design will be very useful.
For production you need:
- Leather strip.
- Rivet or button.
- Sharp scissors.
- Stationery or carved knife.
And now the manufacturing sequence:
- Determine the length of the belt by wrapping a strip of material around your waist and marking the intersection of the two ends. You can even make it a little longer.
- Make a rivet hole in the marked place.
- Use a knife to make a small incision about 5-6 mm in size. Then the rivet will go right through.
- If you want, you can make the ends of the strap rounded by simply smoothing them with scissors.
The original belt is ready!
Or another version of such a leather product with your own hands. To make it you will need:
- Hammer.
- Sharp knife, clerical can be used.
- A strip of leather.
- Two rivets.
- D-shaped metal ring.
Getting started:
- Cut off a strip of leather of the required length, and the width of the belt should match the width of the ring.
- Mark the location of the rivets, punch four holes.
- We thread one end of our belt through the D-ring, and then install the rivets with a hammer.
This is how quickly and easily you can make original leather accessories that are particularly exclusive.
DIY leather needlework is an incredibly creative and entertaining process. You will love to create unique accessories and hand-made items. In addition, such products are currently at their peak of popularity. And gifts made of leather with your own hands will amaze your family and friends, and your efforts will be highly appreciated.
More experienced craftsmen make complex designs, and those who are just starting or do it for a short time can make beautiful things that are simpler in structure.
Here are just a few of the interesting and simple products that you can make from leather, even if you don't have much experience:
Handmade leather goods: leather necklace
You will need:
Puncher revolving
Scissors
1.Use scissors to cut the piece of leather into several differently shaped triangles.

2. Use glue to hold all the triangles together as you like and wait for the glue to dry.

3. Hole punch with make holes in the workpiece. Insert the chain into these holes.

* If some of the leather parts are bent, place the product under a heavy book for several hours.
4. Using pliers, you can bend one ring in the chain and connect the ends.


Leather master class: keychain and vase for keys


You will need:
Small piece of leather
6 rivets
Key ring
Stationery knife
Scissors.

Making a vase
1. Prepare a small leather rectangle - in this example, it measures 22 cm x 30 cm.
2. Clamp one corner, make a hole in it and insert a rivet. The hole can be made with a hole punch or a sharp object (knife, nail).

3. Repeat step 2 for the other three corners.

Making a keychain
1. Prepare a small leather rectangle and cut a small part out of it as shown in the image below. You will get a rectangle with a "tail".
2. Bend the ponytail and fasten it with a rivet to create a small loop.

* For those who are not familiar with how to work with rivets, there is a video:
How to put a rivet (video)
3. Using a pencil and ruler, mark the lines along which you will cut the fringe.
4. Start cutting the lines with a utility knife or scissors.
* In this example, a rivet is attached to the center of the product, but it is much easier to use leather glue or superglue to twist and fasten the parts later.

5. Roll your leather blank around the loop and secure it with glue.
6. You can put the chain through the loop and use the key chain not only for a bunch of keys, but also to decorate your purse.

A similar keychain, which is attached with glue and adorns the purse:


What can be made from leather: a hair bow

You will need:
Scrunchy
Scissors
Ruler
Thin wire.
1. Using a ruler, cut a strip of leather. The strip is about 40 cm long and about 4 cm wide.


2. Make the ends of the strip sharp by cutting them slightly with scissors.

3. Place the strip on top of the hair tie and secure the pieces together using fine wire. The hair tie should be in the middle of the strip.

4. Put the blank on the ponytail and tie double knot from the ends of the leather strip (see image).

How to make earrings from leather


You will need:
Leather (large pieces)
Stud pins (with a hat on which a leather blank will be glued)
Superglue or leather glue
Scissors.

1. Cut small pieces of different geometric shapes out of the leather.

2. Glue each piece to a stud hat.

3. Wait for the glue to dry.


Leather belt. Option 1.

You will need:
Leather stripe
Button (or rivet, hairpin, stud)
Paints, brush and olive oil(if desired)
Scissors
Stationery knife or carved knife.

* In this example, the leather strip was dyed in blue color... This is not necessary, you can leave the natural color.
* If you decide to dye your skin, then apply several layers each time, as the previous layer dries. After that, apply olive oil for smoothing.
1. Wrap the leather strip around your waist and use a pencil to mark where the two ends of the strip meet. You can make the strap a little longer.
2. Make a hole at the marked location to insert the rivet.

3. Use a utility knife to make a small incision (5-6 mm). This will allow the rivet to go through.

4. It remains to fasten the ends of the leather blank and the belt is ready.

* If desired, you can use scissors to round the ends of the belt.

How to sew a leather belt with your own hands. Option 2.

You will need:
Hammer
Knife (can be clerical)
2 rivets
D-ring

1. Cut off a long piece of leather. Its width is equal to that of the D-ring.
2. Mark the place where the rivets will be and make 4 holes in it.
3. Now thread the belt through the D-ring and hammer in the rivets.
DIY leather bracelet
If you have scraps of leather lying around or have a leather bag that you are not going to wear, then you can easily make a beautiful bracelet with your own hands.

All you need to do is measure your wrist and cut a rectangular piece to the correct size.
Also, cut out circles from leather to decorate the bracelet.
In addition, you will need:
Closure or Velcro
Decorative items.
Photo instructions for making a bracelet:


Mini wallet (purse) made of genuine leather

You will need:
2 pieces of leather in different shades
Stationery knife
Ruler
Cutting area (old table or special cover for a regular table)
* Cut the leather piece so as not to spoil or damage the coating on which you are doing it.
Thread and needle (or sewing machine)
1. Cut two rectangles of different colors from different pieces of leather. In this example, they are 10 cm x 8 cm.


2. Take the rectangle that will be in front of the wallet and make 3 cuts on it (in this example, they are 6 cm long). The first incision should be made 1 cm from the top and each subsequent incision is 0.5 cm from the previous one.

3.Using a sewing machine, join the two pieces of leather by stitching around the perimeter except for the top.

Handmade leather: jewelry pouch

You will need:
Hole punch (eyelet pliers)
Eyelets
Thin ribbon
Scissors
Small bowl
Amulet or bead
1. Place a bowl on a piece of leather and circle it.
2. Cut off the drawn circle.

3. Use a hole punch to make holes around the perimeter as shown in the image. In this example, the holes are approximately 2.5 cm apart.


Who does not know how to install eyelets with special pliers, watch the video:
How to install eyelets
4. Begin to install the eyelets in all the holes made.

5. Pass a thin tape through each hole.


6. З pull the tape and dAdd a bead or amulet to it, and then tie a ribbon with a knot or bow.


7. You can cut off excess pieces of tape.


Ladies handbag made of leather with your own hands

Leather is the shell of the body. Surprisingly resilient and durable, it protects us from germs and external influences, helps maintain a constant body temperature, flushes out some of the body's waste through the pores, and renews itself regularly. In addition, the skin contains receptors that send signals to the spinal cord, ensuring its tactile function. So we can distinguish between cold and hot, smooth and rough.
What is the leather made of?
The skin is the largest organ in our body, it covers an area of at least 2 square meters. m!
In the skin, two main layers are distinguished - the epidermis and the dermis (the skin itself), as well as a thinner layer - the hypodermis or subcutaneous tissue. Epidermis: The outer layer of the skin containing melanocytes - cells that produce melanin that act when we sunbathe. This layer also contains the stratum corneum keratin, a protein also present in hair, nails and body hairs. When exposed to sunlight, vitamin D is produced in the epidermis, which retains calcium in the bones. The epidermis is regularly renewed: dead cells on the surface of the skin are replaced with new ones. Dermis: A thick inner layer provides firmness and firmness to the skin. The dermis is riddled with blood vessels, sebaceous glands that secrete a fatty substance - sebum, sweat glands that are responsible for perspiration, sensitive receptors that respond to touch or pressure, and nerve endings that send information about the outside temperature to the brain. Hypodermis: A thin layer of fat, located under the dermis, acts as an insulating material. With age, the skin becomes wrinkled due to the gradual wear and tear of the dermis.
There are three layers in the skin: epidermis, dermis (skin itself) and hypodermis (subcutaneous tissue)
1. The surface of the skin is covered with hairs
2. The outer layer of the skin is called the epidermis.
3. The inner layer of the skin is called the dermis
4. Under the layer of the dermis is the hypodermis
What is leather for?
It is a natural barrier that protects against aggressive external environment and microbes. The skin also contributes to the regulation of core body temperature: if we are hot, we sweat, thus refreshing the body. If we are cold, we shiver or become covered with "goose bumps" - this helps the body to keep warm.
Leather in all colors
Melanin is responsible for skin color. But the amount of this pigment is different for everyone. If there is a lot of melanin in all layers of the skin, then the skin is black. If melanin is present only in the deep layers of the epidermis, the skin is light. If melanin is combined with another substance - carotene, the skin has a yellow honeydew. Fair-haired people, whose skin produces little melanin, usually sunburn if they do not protect their skin with special means. But the skin of a dark-haired person can also "burn" if he is under the sun without protection.
Skin weight ranges from 3 to 5 kg in different people.