How to replace zipper in the jacket. Insert (replace) zipper in a jacket. How to choose a right runner to different types of lightning: Types of lightning and labeling runners
Lightning replacement, as well as other procedures for small clothing repair can be done at home. Of course, to replace lightning in any case, you need a sewing machine, but also the availability of a machine, knowledge bases, how to replace zipper on a jacket, will not help new zipper Beautiful and unnoticed.
To begin with, before replacing lightning, you need to determine how difficult this process is. We define how to sew the zipper to the jacket. If a jacket without a plastron, that is, such a protective plank that closes the castle from the wind, then it is not completely difficult to replace zipper in it. Before replacing lightning in a jacket, practice on a simpler model. You need to take a thicker needle for the machine so that there are no passages. Sometimes there is a fabric that misses, regardless of which needle you use. In this case, the fabric looks too soft and thin. If you came across such a fabric to replace lightning straight through paper.
We bury the old zipper from the jacket
To replace the lightning on the jacket to begin with, you need to flop the old zipper. To do this, you will need thin little scissors and malicious eyes. Failure zipper from the jacket is easier from the wrong side. To do this, turn the jacket and move the lightning as much as possible from the fabric so that you see the threads, which are shooting lightning. You can cut all the threads chaotically, you can cut one stitch, and the remaining stitches just pull the loop of the loop. In any case, the procedure is not complicated, the main thing is not to cut something that needs something necessary and to take up something that you do not need to break.
Now pull out the remaining threads from the jacket, which was shown lightning and the jacket ready for the appearance of a new zipper. Often, when wearing a zipper on a jacket at the end, it can be found that the horizontal of the bottom line or the coquette line did not coincide. Such work looks inactively and ugly. Therefore, at the stage of winding the other part of the castle, mark with chalk horizontal seams or finishing lines, or the shutching line of the collar. When swinging the second part of the zipper lock on the jacket, simply pay attention and check, buttoning zipper, whether all the marks match.
How to replace zipper on a jacket without problems?
The main thing is to consider and measure. Punch lightning is convenient for a special paw for a sewing machine. It is called - "foot for zipper". This foot can appeal not only braid, but also the teeth, the braid presses tightly, so there are no passs in the line.
To finally shoot the zip in the jacket, it remains only to shoot it to the boards of the product, not a touch of details, then turn inside out and with inner Send the weld. To do this, you need a resurrection of 15 cm stitching suture sleeves lining. Through this hole, you can unscrew the jacket, after launching the fees. You can do this: sew the weld to board with the lock. Schedule on board, there is a stitching line of zipper, on it and need to scribble.
After that, squeeze the second side, remove the jacket through the lining sleeve. The rifle rush also needs to be sewed, pave the finishing lines.
If in a jacket with a zipper, the finishing line went in a circle - on the collar, board, bottom, then when zipping lightning, the collar line was to be damaged and it should also be restored. To do this, finish the stitches a bit above the line to capture and its damaged end.
To replace zipper on a jacket, make sure that you have everything you need to replace it. After all, for example, not every machine can take a zipper on leather jacket. And sometimes, the zipper is not needed at all. You can simply replace the slider.
Lightning replacement can be not only a way to repair a jacket, but also a spectacular way of updating the design - for this you can replace zipper on the jacket, using bright color Or an unusual slider.
Good day! We want to express the words of gratitude to everyone who reads us leaves comments under articles, be it praise and instructions for errors! Thank you, our dear reader!
Today we will look at very important (as it turned out after the bulkhead of things in the closet) the topic of the stake in the jacket. The task is not quite simple. No wonder this is one of the most expensive repairs for the repair of clothing, which workers face Atelier almost every day. Although the lining shift in the leather jacket is much more expensive)
In order to replace lightning in the jacket you will need:
- actually zipper itself;
- evaporator
- threads are suitable for color to the product or snapping on it;
- eye protection tools - construction plastic glasses;
- patience; time; Readiness to redo the result is good.
And we, in turn, will try to do everything to facilitate this difficult task.
So, proceed!
1. We need to replace the snake in the children's jacket, the complexity is that there are also the buttons. We, of course, the old buttons will replace new, and those who do not have such an opportunity at the end of the post will tell you how to get away from this problem at home, if you do not have a special machine at hand. Installation 5-10 buttons can be more expensive than high-quality metal snake and its replacement in the studio.
2. First of all, with the help of pliers, remove the buttons and burst the finishing line. Do not hurry, actually verified and sequentially, take care of your fingers - you will work them.

3. On the sleeve lining there is an outdoor seam (twist both sleeves and find it, most often it is there, if not, pour from any side)), which we break. If not, I propose just a suture suture. Usually I sip the lining from the weld. But here she is a decorative seam, and the jacket itself is small, so I just resolve side almost all over the entire length.


4. Go to the snake, first we embarrass the fee, then the snake itself. The same with the bar, first the decorative line, sometimes, then the one that holds the bar.
5. We plan from where we will sew a snake, in the case of the accuracy buttons, then what is striving for, because the holes must come together at the maximum. Ideally, everything will fall into place and it will look like only from the workshop.

6. We begin to sew one side of the snake one-sided paw, we try to get into the old seams. If it does not work, work at the minimum speed, help yourself by manually by the side wheel of the typewriter or practice on an unnecessary fabric: Purchase, reflect and renovate. When you are satisfied with the result - proceed to the main product.

7. Out and sew the edge of the snake along the sewn side and we conceal the decorative seams so that they come together and on the second side. If you suddenly do not have such seams, draw yourself a chalk mark after certain distances on both sides.


8. Send the second side of the snake, focusing on the notes.

9. Waste a snake and look at all the notes and seams to converge, if not, we sip and shift, we specify the backbone.

10. Now we sew the weld in the same seam, follow the uniform location of the tissue from below, so as not to sit down, be sure to try to go along the old line. Fix the layers with pins - facilitate your work.

11. If the seams of the jacket are fixed between themselves, they will restore the distance with which it will be easier to connect the weld with the top of the transfer. Before turning, shove this edge into the inside.


12. That's how we look like a seamy snake outside.


13. We change the paw on the usual and make a decorative snack on the paw.


14. Put the bar so that the holes from the buttons are connected to the maximum, we apply the chalk mark in the place where the decorative seams.

15. Send the bar and check the connection locations of the buttons.


17. Facade))) Jackets are ready, now sewing the side of the lining as much as possible, leaving the gap on the sleeve.

18. Now we are sewing the rest of the hole, folding the lips of the cloth among themselves, alas, it turned out not so carefully as I wanted the fabric over time socks reached, the main thing is to fix it, it is not visible.

19. Now we have ready jacketNow I will tell you what to do if you do not have the ability to install the buttons.

20. Complete all stages of the sewing snake, and the velcro sew buttons. The photo specifically lined with blue so that it is better clear.

21. Outside the bar (to hide the tracks of holes from the buttons), the decorative tape is adopted. Here is the reflective. In my opinion the best solution for the safety of your child. In the keeine case, the sew decorative buttons or small artificial flowers (girl)

Sewing and photos: M.Y. Workshop. Code. Group B.
You don't want to buy or sew at the end of the season, you don't want another thing, especially if it is a children's jacket or "victim" still in excellent condition and still like you. Just replace zipper in it.
Many are not taken for such a rework, believing that it will not be easy to do in the finished thing. The most difficult and time-time step in this case - Carefully spoil the old zipper and pick up a new desired length and color.
On the example of a children's jacket, let's look at how to replace zipper with your own hands.
You will need:
Closure-zip;Dispasser (buy in the Burda store);
Threads and needle for sewing;
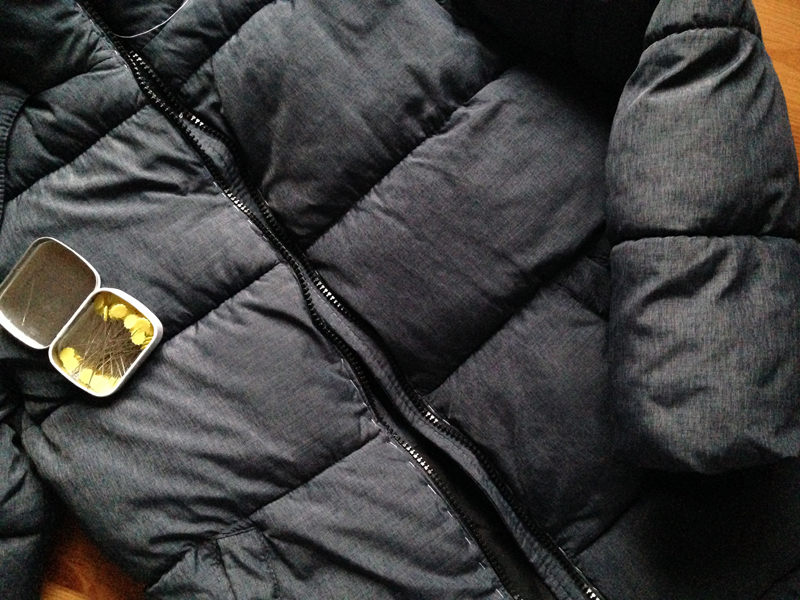
Portnovo pins ();
Scissors ()
Step 1


Excult your old zipper and remove all the strings from the former lines.
Step 2.

Shuffle a new zipper and a bar under it from the jacket.
Step 3.

Note the right litter of the zipper in place for the same.

Make sure that the fabric is located close to the tooth, but did not come on them.

When you go to the top "tail" zipper ", unscrew it back and slightly diagonally.

Secure the pin.

Before shooting this area of \u200b\u200bzipper, remove the pin.
Step 4.

Plottroy pins are brushing the bar under the zipper on the left shelf.
Step 5.
Note the left flashes of the zipper in place for the same together with the bar.
Step 6.


With the help of a universal or special foot, import a zipper.
Admin 2012-08-09 at 5:02 pp
Hello, dear readers. Today I want to show you how you can insert lightning In the jacket from the cloak, if the lightning repair itself is not subject to repair. How to replace the castle in a leather jacket
If the jacket does not have a plane, such a protective plank, closing the castle from the wind, then Replace the castle In any jacket, even in the nursery, even in the male, even in a female, absolutely there is nothing complicated.
For all the work, I have exactly one hour-verified, the customer brought, said, after an hour I will take, I said okay, and even at the appointed time I took. True, I had to hurry, and the jacket is simple.
To make it easier for you change lights, practice to start on a simple model. Ilu for the machine Take the thoroughly, No. 100 or 110, and then there will be skipping.
Sometimes there is a fabric, quite a tricky, skipping, although crazy, but it is very thin and soft cloak, it rarely come across, if you have to meet with it, screaming through paper-without problems.
Well, started:
It is necessary to clean the old zipper, clean the threads - Figure 1.
Then not set the right side of the lightning to the shelf, starting below. Make sure that the zipper's cloves are close to the collar, but not close, and then the slider will then be stuck when it is stubbing (Fig. 3).
If the lightning is longer than the jacket itself, then excessive in the side of the cutting of the clashes at an angle of 45 degrees, as in photo 4 and fix aims.

Very often, when the lightning is sewn, at the end of the work, such a jamb is found: the mismatch horizontally the line of Niza, or the coquettes did not coincide, it turns out ugly.
To exclude these all having to exclude, at the stage of winding the second part of the lock, mark all horizontal seams, or finishing lines, or the shutting line of the collar and everything that is melted (photo 5, 6).
When bulging the second (left) part of the lock of the lock is compatible and check by buttoning zipper (photo 7, 8).

Putting the lock is convenient for a special slap - I have such as in photo 9, but in any set of paws for sewing machines there is a similar foot, called: "For zipping lightning." Such a foot presses only a lightning flasher and does not touch the teeth, the braid is pressed tight, therefore there are no pass in the line.
To insert zip in a jacket Finally, it remains only to shoot it to the sides of the jacket, that is, not the touch of the weld, then turn out to be inside and from the inside to sew the weld, but how to do it, because the jacket is sewn?
Split 15 cm Sleeve Sleeves Sleeve (Figure 19). Through this hole it will be possible to turn the jacket when the welded to the jacket will be sewn. For those who do not know: Borf is the edge of the clashes, located in the center of the shelves, and the weld is the same, only from the side of the subflade.

It can be done like this: the receipt fell to board with a lock. Schedule on board - there is already a stitching line of zipper, right on it and go (Fig. 20)

The second side of the squeeze, and then turn the jacket on the front side through the sleeve in the slender sleeve

Swelling the sprinkle rush in the slender sleeve at the top of 0.1 cm from the edge (photo 21).
Route finishing lines, as it was in this jacket by 0.7 cm from the edge (photo 22).
Do not forget if in your jacket in your jacket walked around the collar, board and bottom, then when you break the lightning, the line of the belt collar was damaged, and they should be restored (photo 17, 18). That is, the finishing line start to lay a little higher than that line that broke out and end up.

Any procedures relating to small clothing repair can be performed at home, the main thing is to have the necessary equipment for this. It often happens that locks break on things and the need arises to replace them. In most cases, this concerns children's clothing, so today we will tell how to enter the jacket lightning, as this is the most common problem. The most important condition for performing such manipulations is the presence of a sewing machine.
Features of the replacement of lightning on clothes
Before inserting zip in the jacket, you need to decide how difficult this process is:
- First thing is selected the most suitable option. So, for example, if there is no plastron on the jacket, that is, a special protective film hiding the castle, then perform the work will not be difficult. Better after all, first work on a simpler thing.
- It is better to use the most thick needle to miss anything, because it often comes across the material that skips through the paw.
Important! Such fabrics look too thin and soft. If you need to replace the clasp on things from such a material, it is better to scatter through paper.
How to throw old zipper?
Naturally, before entering a new zipper, it is necessary to remove the old, broken or partially spoiled:
- You will need only sharp scissors and good eyesight for this.
- It is easier to do it from the wrong side.
- It is enough to turn the jacket, maximize the fastener from the fabric, so that the threads with which it is attributed to.
- It is possible to remove the threads chaotically, or cut off one stitch, then just pull the loops.
- The procedure itself is quite simple, the main thing is to closely monitor your actions so as not to fret what it is not necessary.
- Then the remnants of the threads are just getting and you can start working on the replacement.
Important! It often happens that in the process of sewing a new zipper at the end, the horizontal of the coquette or bottom line does not coincide. And looks outwardly, it is ugly. That is why even at the stage of the locking of the lock, it is necessary to mark the finishing lines or horizontal seams, or the timing line of the collar. Then, during the feeding process, it is necessary to ensure that all markers are clearly coincided in the button.
How to independently replace ordinary zipper?
It is important to measure well and take into account. It is more convenient to pump lightning with a special foot on the sewing machine. By the way, she wears just such a name, so you will not be mistaken, it allows you to press not only braid, but also the teeth. The braid is pressed as close as possible, due to which the pass does not occur in the line.
Read more Instructions, how to enter a zip in the jacket, looks like this:
- To shoot lightning, you should shoot it to the sides of the thing, while not touching the fees.
- Then the product turns inside out, the welds are sewn from the inside. To do this, it is enough to stretch about 15 cm lining lining of the sleeper.
- After sewing the weld through this hole, you can turn out clothes. To board with the lock of the Silver. Schedule follows on board, because there is a stitching line for shutting, here it is screaming.
- Sweeze the product, remove through the hole in the lining sleeve.
- Be sure to squeeze the hole, launch the finishing line.
The work is completed, as you can see everything much easily. The main thing is not forget to check whether there is a special foot on your sewing machine, otherwise it is easy to see, for example, the leather product you cannot.
It happens that the replacement is not at all, it is not necessary to establish a new slider. And this is an easy task.
How to replace zipper on a jacket with a private collar?
Many are interested in how to sew lightning on a jacket with an unusual collar having a rack shape. The main difficulties arise in the process of assembling the product: Someone is simply afraid to work with such models, others in the progitation places make too much thickness. In fact, having understood in the style of sewing, you can do everything on your own. In such products, fasteners in several ways are sewn. At first it is better to use the product layout.
Let's look at the option with a collar-rack and fee:
- Put the details of the collar, back, pass, belt, weld.
- Mark the middle on the details of the belt, collar and pass.
- Take the collar, cover it in the neck along the lower cut. Running seams for swinging.
- Fold inside the front sides of the belt with the details of the handle and the back, then dodge. Repeat the seams again.
- Note, then cut the zipper on the front cut. The string to start at the same time follows from the collar fold to the bending belt.
- Note and dR in short cutting part of the weld to the collar and the belt so that the resulting length coincides with the length of the transfer item.
- Repeat again and appreciate with the collar and the belt, the weld to the details are transmitted with the already fastened clasp. It is necessary to use for this special foot, the pre-edge of the open selection of the fee is cooled.
- Cut the allowance, remove, turn the product. Process the product.
This is not the only option of zipper with lightning, but it is considered the easiest even among experienced Shvent.