Modeling from plasticine on the theme of autumn: junior group, middle group, senior group, preparatory group for kindergarten. Plasticinography Autumn for elementary school children. Master class with step-by-step photos Plasticine figurines on the theme of autumn
Do-it-yourself plasticine painting. Master class: Autumn palette
The target audience: children 6-9 years old
Purpose: making a picture as a gift
The purpose of the master class: execution of decorative and applied work in the "Plasticine painting" technique.
Tasks:
1. Teach:
Learn new techniques for working with plasticine (pressing, smearing, etc.)
2. To develop:
Develop emotional sphere, creative thinking, imagination and fantasy.
Develop fine motor skills.
3. Educational:
To educate children in independence, creativity, aesthetic feelings.
Plasticinography are classified as unconventional artistic techniques, it consists in drawing with plasticine on cardboard or any other dense base. The background and characters are depicted not by drawing, but by sculpting, while objects can be more or less convex, semi-volumetric. Working with plasticine helps the child express emotions, his vision of the world around him and his attitude to it, form an aesthetic taste, develop flexibility, coordination, fine motor skills of the fingers (which in turn contributes to speech development). The child gradually learns perseverance, patience, accuracy, the ability to always bring work to the end. When working with plasticine, it is necessary to take into account its properties: softness, plasticity, stickiness, the ability to soften under the influence of heat, fragility, the ability to preserve the given shape, water resistance.
Reminder when working with plasticine:
1. For the base, it is necessary to use dense cardboard so that it does not deform when performing the techniques of pressing, smearing, smoothing, flattening.
2. To work with a volumetric form, stacks are needed to highlight the characteristic features of a decorative object.
3. Working with plasticine is time consuming, requires effort, therefore, in the process of doing it, children need rest in the form of thematic physical exercises and warm-ups.
4. The child's desk must be damp. cloth napkin for hands so that he can use it at any time, and after work done, first wipe his hands with a napkin, and then wash his hands with soap and water.
Plasticineography develops children's creativity (primarily visual) - after all, with the help of this technique, you can create an original, unique image with vivid expressiveness.
Master Class
Early autumn is the most beautiful time of the year! That is why many artists and poets tried to glorify her beauty in their works. We, inspired by the variety of autumn colors, will also create our own picture, which will resemble the artist's palette.
For work we need the following tools and materials:
1. Plasticine
2. Stacks
3. Thick cardboard
4. Simple pencil
5. Paper napkin

Before starting work, with light strokes, we sketch the conceived drawing on thick cardboard with minimal elaboration.

We begin to work with the distant plan. Paint over the forest using paint green color two shades - light and dark. To do this, we apply strokes with our fingers. We apply pressure and smear techniques.


Moving on to the foreground forest. For this we need green and yellow plasticine. To obtain the desired yellow-green hue, we use the technique of infusing one color into another. For this we use two methods. First, we mix plasticine directly on the base, applying strokes alternately. Second - we take several pieces of plasticine of different colors, knead, mix in one ball and draw.

In order to emphasize the colors of the autumn forest, selectively add orange color using the same technique.

To draw the houses, we take white, red and black plasticine. The roofs of the houses will be as bright as the foliage of the trees. We will emphasize the shape of the houses with black color, give clarity to the contours. Use blue and dark gray to define the shadow.

We draw the road. For its image, we need a smooth texture of the strokes. We apply the smoothing technique. We use the following colors: yellow, brown, orange.

On the left and right, paint over the ground with yellow and green colors. To do this, we again use the technique of infusing one color into another. Place the strokes in a certain direction. To emphasize the relief of the land, hills and lowlands, in some places we add a dark green color.

Use white and blue plasticine to fill the sky. First, cover the entire area with light in blue... To make it, you need to mix white and blue plasticine into one ball. Then selectively add a dark blue color, smearing it in circular motions, giving shape to the air clouds.

Moving on to a more detailed study of the picture. We return to the forest. To show the structure of the foliage of trees, it is necessary to make the texture more embossed. To do this, with the help of stacks, we introduce various strokes and convolutions. In the right places, add plasticine of the required color, using the techniques of pinching, flattening, pulling and applying. To add depth to the crown, pour in black. Also dark color we denote the shadow from the trees.

Draw the grass in the foreground. We need green plasticine of different shades. To depict the grass, we will use the rolling technique and the adhesion technique. On the left is the shadow side, therefore the grass will be darker. On the right is the sunny side, which means that for the grass we use a color that is lighter. Then we apply glare with white plasticine, in order to emphasize the autumn season, here and there we add yellow strokes. Stack the grass in shape.
The picture is ready.
Autumn forest, playing with colors,
Weaves wreaths from the crown of trees,
With your sunny caresses
Warm days indulge.
Close-up of the sky.

The close plan of houses.

The close-up plan of the road.

The technique of drawing with plasticine is fascinating not only for children, but also for adults. Creativity should bring joy of communication, knowledge, work and rest. I wish you creative success!
Gloomy, rainy sky, faded sunbeams that peep through gray clouds, dark trees and shrubs that are mercilessly bending the wind, lonely flocks of birds flying away, a carpet of yellowed and dry leaves on the ground, sparse vegetation. Imagine this picture? Of course, this is a description of late autumn, when nature falls asleep and does not please us with warm weather. Nevertheless, this time of the year is also romantic, rich in fruits, and has its own charms. Someone likes to watch the rain drops from the window of a warm apartment, and someone even walks through the puddles with a dog. The season autumn can not only be described in words, but also draw, or rather, make an application from plasticine. In this lesson, it is shown how to make exactly the deep autumn, which we have already described. And you will definitely like this work, you will see how easy and simple it is to wield plasticine, mix colors in order to achieve a true result.
To complete the autumn applique, prepare:
Cardboard (preferably gray, cut out of a box, with a rough surface);
- plasticine (partly here you can use a color spoiled by a child, if it suits you in terms of color);
- a stack or a toothpick.
How to make an application from plasticine on cardboard
Let's consider step by step how to create all the variety of dark colors that we see through the window in late autumn. Prepare the base, cardboard and tools.

To draw a heavy leaden sky, take dark colors plasticine and mix with brighter ones. Combine gray and black, yellow and purple, blue and black, also leave a piece of blue untouched. Thus, one has to experiment with paints in order to achieve a believable result.

Now start using your fingers to spread the soft mass on the surface of the paper. Apply a piece of yellow-purple color, make a blue stripe underneath. A little dirty yellow can also be smeared on top by stretching the plasticine with your fingers in different directions - these are scant sun rays.

Continue to add the second part of the visible firmament to the painting. Use the gray-black and blue-black pieces to show the overhanging cloud, and continue the lower part with light blue. It is the blue stripe that will show the contrast and make the sky truly autumnal.

Now prepare the mixed clay for the ground, use brown, yellow, white colors... Knead the mass in your hands and start spreading on the cardboard from below.

Fill in the rest of the painting with brown pigment. Dock at the top with the blue stripe. 
Now prepare thin dark brown branches, yellow and orange leaves. 
Glue the branches in the form of a shrub and a tree, moving the branches to the side, as if they were bending with force in the wind. 
Stick the yellow leaves on the tree, under the tree. 
Press down each on top with a stack. 
Also add leaves to the shrub. 
Make additional details to fill the picture: tree stump, mushrooms, silhouettes of black birds. 
Glue it all onto the picture. You can also add red rose hips to the bush. 
The autumn picture is ready. Isn't that so, you got a real oil painting. 
"Autumn" is a fertile theme for children's creativity. This theme is used not only in drawings and applications, but also in modeling from plasticine. Autumn nature gives interesting stories and vivid landscapes, opens up space for imagination and fantasy. What will your child want to fashion? A cute hedgehog making supplies? Or maybe an autumn park, a forest or a mushroom meadow? In any case, the work should be interesting and expressive. Plots and ideas of volumetric and plane sculpting "Autumn" for different groups kindergarten with detailed explanations - in our article.
Autumn tree made of plasticine and dried oak leaves

Plasticine panel "Autumn"

Plasticine application "Hedgehog in the autumn forest"

Composition from plasticine "Autumn meadow"

Autumn landscape, plasticine
Modeling the younger group on the theme of autumn, in detail with a photo
According to the methodology, teaching modeling in the younger group of the kindergarten (2-3 years old) has a subject orientation. At first, kids are just learning to feel the material, to give a piece of plasticine simple forms: disc, cylinder, ball, cube, etc. Individual objects and figures (also simple at first) children try to sculpt when the basics of sculpting are mastered. However, with your help, the baby will be happy to cope with simple modeling for autumn themes.
Talk to your baby, ask what he imagines when he thinks about autumn. While walking in the park or in the forest, pay attention to the child, how beautifully the shades of the foliage change in autumn, how bright the rowan berries become, how many mushrooms appear at this time of the year. Offer to create something "autumnal" together. For instance, autumn leaves, autumn tree, hedgehog, mushroom.
autumn leaves

What to prepare for sculpting:
- a set of plasticine (red, terracotta, yellow, green);
- a sheet of thick cardboard;
- flexible board for modeling;
- plastic spatula;
- plastic or wooden stack.

Stacks and spatulas for sculpting
The sequence of sculpting autumn leaves:
Walking in the autumn park, together with the child, we will collect several beautiful, bright leaves of different shades. They will serve as a model for plasticine crafts. Better to choose leaves simple oval with a smooth or finely toothed edge. We will lay them out on the table, ask the kid what colors of plasticine will be needed to mold the autumn leaves.

Let's make blanks of leaves. Let's ask the child to roll up small plasticine balls: dark red, orange, yellow, green. To make the leaves look beautiful, for some balls, you can mix pieces of plasticine of different colors. For example, red with yellow or terracotta, green and yellow.
We will offer the baby to gently flatten the blank balls with his fingers, trying to give them the shape of leaves. Let's slightly correct the result: flatten the resulting cakes in two sides, slightly sharpen the upper edge.

The next stage of work - drawing veins and denticles on autumn leaves - can be quite difficult for a 2-3-year-old baby. So let him just watch how we do it. Consider, together with your child, the streaks on the leaves. First, draw the central vein with a stack, and then the side ones.

Using a spatula, cut out the cloves along the edges. We will definitely invite the kid to try 2-3 leaflets on their own.

Expand the finished plasticine leaves, alternating colors on a sheet of cardboard. It is better to place them to the outer edge with the upper, pointed side. Pressing lightly with your finger, fasten the leaves together and fix them on cardboard. Let's decorate the "picture" with acorns or a branch of mountain ash.
hedgehog made of plasticine and seeds (applique)

What to prepare for sculpting:
- a handful of large seeds (sunflower, watermelon);
- plasticine (brown, light gray, black);
- plastic spatula, stack;
- a convenient sculpting board;
- a sheet of white (or other light) cardboard;
- a sheet of light yellow or green cardboard;
- dried or plasticine autumn leaves for decoration of the composition.
Sequence of work:
Draw the outline of the hedgehog on white cardboard. You can print a ready-made template. Cut out the figure along the outer edge of the contour, stick it on colored cardboard, dry it. It is important to leave distinct dark outlines to make it easier for the baby to work on the applique.

We knead and warm up pieces of gray plasticine in our palms. Let's put them on the image of a hedgehog. We will offer the baby to flatten them and fill in the contours of the muzzle and tummy. We will also prepare brown plasticine. Fill in the contours of the back. To simplify the work, plasticine can be smeared only on the back of the hedgehog, and leave the muzzle cardboard and draw the eyes and nose with paints or felt-tip pens.
Let's make needles from sunflower or watermelon seeds. We immerse the pointed part in brown plasticine on the back of the hedgehog, slightly press it in. So we will consistently fill the entire space with seeds.
Let's ask the child to roll three small balls from black plasticine. Two smaller ones - for the hedgehog's eye, one slightly larger - for the nose. Let's attach them to the face. Draw the mouth with a stack. Let's supplement the composition with plasticine leaves, apples, mushrooms, etc.

autumn mushroom and caterpillar - video tutorial
Modeling 2 younger group on the theme of autumn, photo
Considering that younger preschoolers it is quite difficult to independently decide on the topic of work, they are not offered tasks to sculpt something according to their own design. Educators and parents can help with the ideas of modeling from plasticine for the autumn theme. It is better to teach modeling to children under 4 years old in an interesting way.
autumn branch of mountain ash

What to prepare for sculpting:
- a set of plasticine (red-orange, brown, green, yellow);
- a sheet of colored cardboard;
- sculpting board;
- plastic spatula, stacks;
- pencil;
- scissors.
Sequence of work:
Draw a rowan branch on a piece of cardboard. You can print, cut and paste the finished template.

Let's make the blanks. For small parts, pre-cut the red, green and yellow plasticine into approximately equal small pieces. From the red-orange ones, we roll up small balls-berries (according to the number of rowan berries in the picture). From green and yellow (colors can be mixed) - larger balls. Flatten them and form leaves. From brown - thin laces. They will become the basis for the branch.

Let the child attach twigs, leaves and berries to the drawing. With the help of a stack, we mark the relief of the bark, apply cruciform indentations on rowan berries, and veins on the leaves. Correct the unevenness of the contours.
mushrooms in the meadow

What to prepare for the craft:
- plasticine (dark brown, green, beige / white);
- sculpting board;
- a toothpick or thin stack;
- plastic spatula.
Modeling sequence:
Let's prepare the details. You only need two of them, and they are very simple. Cut pieces from plasticine bars suitable size... We will offer the kid to roll large balls of dark brown and green plasticine, as well as smaller balls and long cylinders of beige.


The number of blanks depends on how many mushrooms in the autumn meadow you and your child decide to "plant". What if there is no beige plasticine in the set? Mash, warming in the palms of your hands, and then mix white and brown.
Place the brown ball on the sculpting board. Press lightly from above, after which, softening, pressing the edges along the circumference, give it the shape of a mushroom cap. We will do the same with the rest of the blanks.

Flip the hat flat side up. Put on the board and flatten a beige ball into a thin cake. With a spatula, carefully fix the cake on the flat side of the mushroom cap. Using a toothpick or a stack to simulate a porous surface, we will make frequent holes.


Draw the beige cylinder into a drop-shaped volumetric leg. Let's make a small brown plasticine cake. Attach the stem of the mushroom to the base, then stretch it slightly and spread it upwards. Apply thin vertical stripes with a toothpick or stack.


In the same sequence, we will make the rest of the mushrooms. Let's finish the autumn composition. Put the green ball on a sheet of cardboard, flatten it into a cake, press the edges well and slightly smear it. We put in a clearing and fix the ready-made plasticine mushrooms.

Decorate the meadow with plasticine grass, dried autumn leaves or others natural materials: needles, acorns, cones.
application from plasticine "Autumn birch" - video tutorial
Modeling in the middle group on the theme of autumn
panel "Autumn Trees" from plasticine spirals

What to prepare for sculpting:
- a sheet of white cardboard;
- watercolors or pastels;
- simple pencil;
- a set of plasticine (brown, orange-red, terracotta, green, yellow);
- sculpting board;
- stacks and spatulas.
Sequence of work:
Prepare the background of the picture - paint the entire space of the sheet of cardboard with blue watercolor (dissolved in water) or pastel crayons. Draw the clouds at the top. To do this, in several places, lightly wash and blend the blue tone with a cotton pad moistened with water.
Ask the child to draw trees with a lush crown with a pencil. At this stage, the baby can and should be helped. To simplify the work, download, cut and paste on the cardboard templates of trees without leaves.

Let's prepare the plasticine parts for the applique. We cut plasticine (brown - for the trunk, red, terracotta, green, yellow - for leaves; green - for decorating the root part of the tree) into strips, then roll each into a thin rope on a modeling board.
We divide the plasticine flagella into parts, roll them in an average spiral density. Plasticine colors in one spiral can be combined. The work is quite painstaking, you may have to help the child.

We consistently fix the flagella of the corresponding colors on the trunk and crown of the tree. Press lightly with a spatula for better fixation to the sheet. Draw the bark relief with a stack. To simplify the work, the tree trunk can be painted with oil pastels or watercolors, and only the crown can be pasted over with plasticine spirals.
bouquet of autumn leaves

- several leaves with embossed veins - maple, oak, chestnut, etc.;
- flexible board for working with plasticine;
- a set of hardening plasticine (burgundy, lemon, green, terracotta);
- plastic rolling pin, spatulas and stacks for modeling;
- large plastic cup or a curly bottle;
- scissors, glue, a sheet of colored cardboard.
How to make a bouquet:
From plasticine of different colors ( better fit hardening) roll up balls of medium diameter. The bouquet will look more interesting if you mix plasticine of two or three shades. Add additional colors at the end of the balls to get beautiful transitions of tones. The color of the plasticine mass should be uneven.

We put the blanks on a flexible sculpting board, flatten them into flat cakes with a diameter of 7-12 cm (according to the size of the collected leaves). Lay the prepared autumn leaves on top with the embossed side down. Let's press them to the plasticine. It is convenient to do this with a plastic roller.

We outline the contours of each leaf with a thin stack. Cut out plasticine leaves with imprinted veins with a spatula. We remove the excess plasticine from the board. Correct the edges. We will continue the work in a day, when the plasticine hardens. By the way, crafts made from such plasticine, after hardening, can be additionally painted with pastel or gouache.
With a spatula, carefully remove the leaves from the board. You can complete your composition in different ways. For example, put a bouquet in a pretty vase. In this case, do not forget to attach the leaves to wooden skewers or dry twigs even before the plasticine hardens.
Another interesting design option: pin autumn bouquet on a sheet of cardboard with a glue gun, and draw a vase, make it out of paper or from a half of a curly plastic bottle.

You can decorate a voluminous plastic vase with a jute or hemp rope or in any other way you like.
application "Autumn tree" - video tutorial
Modeling in the senior group on the theme of autumn
basket with autumn harvest

What to prepare:
- a set of plasticine (green, purple, brown, terracotta, red);
- sculpting board;
- a set of plastic spatulas and stacks.
Modeling sequence:
Let's make plasticine blanks for sculpting autumn vegetables. Cylinders in purple, green and terracotta colors for carrots and eggplant. Red and terracotta balls of the right size - for pumpkin and tomato. Green flagella - for onion feathers. Thin cakes of light green color (it can be obtained by mixing green and white) - for cabbage.
Let's give the blanks the shape of vegetables. We attach the stalks, molded from small balls of green and gray-brown plasticine. In a stack we will make pimples on cucumbers, horizontal strokes on carrots, embossed stripes on a pumpkin.


Let's make a basket. We make a flat cake from brown plasticine - the base - and roll up 12 thin strips. Twist them in twos into flagella. We connect in a circle and successively attach to the base.

Let's complete the composition: we will beautifully arrange the vegetables in the basket, correct the irregularities. We attach the base of the basket to a curly stand made of cardboard or thin plastic.
autumn tree in the wind (plasticineography)

What to prepare for creativity:
- a set of plasticine (brown, orange, blue, yellow, red);
- a sheet of light blue cardboard (you can - ordinary white);
- pencil, markers for drawing details;
- sculpting board;
- a set of stacks, spatulas.
The sequence of "drawing" a tree in the wind with plasticine:
As a basis for the plasticine picture, we will print and transfer to cardboard the template of an autumn tree bent under the gusts of wind with flying foliage.

Put the plasticine of the desired shades in a bowl. We put it in warm water for a couple of minutes - the plasticine will become malleable and easy to work with. Let's prepare plasticine blanks. Several brown plaits of different widths - for the trunk and branches. Small orange, yellow, red balls - for foliage. To make the color of the foliage in the picture beautiful and similar to the real one, it is better to mix plasticine of different colors (but not to homogeneity).
Let's prepare the background - thinly smear the warmed up pale blue plasticine on the cardboard. The strokes can be made non-uniform, so the picture will look "livelier". In some places, we will leave spaces to simulate clouds.
Sequentially paint over the trunk and branches with plasticine, which are still left on the tree and leaves flying in the wind. We will not give a clear form to the sheets. On the contrary, we will slightly smear their edges.
With a stack we draw the relief of the bark, the veins of some leaves. We will make a picture frame from plasticine flagella.
plasticine painting "Golden Autumn" - video tutorial
Preparatory group modeling on the theme of autumn
oak branch with acorns (plasticineography)

What you need for sculpting:
- plasticine (gray-blue, beige, light brown, light green, white);
- flexible sculpting board;
- thick cardboard;
- pattern "Oak branch with acorns";
- pencils, felt-tip pens for drawing details of the panel;
- a set of stacks and spatulas for plasticine.
Sequence of work:
Let's draw the outlines of an oak branch on a sheet of thick cardboard (white or light blue). To simplify the work, we use a ready-made template of an oak branch with acorns.

We soften the pieces of blue-gray plasticine, distribute them in a thin layer over the cardboard - we will make the background of the picture. To make the material more pliable, warm it up a little in lukewarm water. "Color" the upper third of the sheet with a more saturated tone, the lower third with a lighter one. Of white plasticine roll up 3-4 small cylinders, flatten them and stretch them on cardboard, cut them off with a stack, giving the shape of clouds.

Sequentially fill in brown and gray-green plasticine outlines of branches, leaves, acorns. It is convenient to "draw" with pre-prepared small balls of plasticine of different colors. The layer of material should be sufficient for a volumetric effect, but not too dense. To obtain the required shades, plasticine can be mixed while kneading.

Correct the contours of the drawing with a spatula and a stack. We will draw or make veins of leaves from thin plasticine flagella. Let's do the shading on the caps of the acorns and the bark of the oak branch.
picture from plasticine "Autumn mood"

What set to prepare for creativity:
- a set of plasticine (gray, dark orange, blue, yellow, red, etc.);
- sculpting board;
- cardboard sheet for the base;
- drawing template;
- pencil;
- a set of stacks, spatulas.
How to "draw" with plasticine:
We will draw the contours of the picture on the cardboard. We use a ready-made template. If a suitable drawing is not found on the network, you can compose a similar one from individual parts: a girl under an umbrella, a dog, etc.


Let's decorate the background of the picture - we will smear slightly warmed gray plasticine on the cardboard, in some areas we will designate sections of the brick wall with dark orange plasticine. With a stack (deep pressing), draw the distinct outlines of the bricks. For plasticine, it is better to choose hardening or wax plasticine.
At the bottom of the sheet we attach small cakes of dark gray plasticine, flatten, slightly smear along the edges, draw the contours of the paving stones. With pale blue plasticine (if there is no such in the set, mix blue with white) we will depict puddles. To simulate water with a thin stack, draw concentric circles on them.
Sequentially fill in all the elements of the picture with plasticine of the desired shades - the girl's face, hair, arms, legs, cloak, boots. Let's paint a dog and an umbrella with plasticine. Let's "depict" raindrops. For work, it is convenient to use pre-prepared small balls of plasticine of suitable colors. Before filling in the contours of the picture, it is better to slightly warm them in warm water.
We outline the contours of the finished drawing with a stack. Remove excess plasticine, correct the details. Let's leave the picture for a day, until the plasticine hardens.
painting "Autumn" in the technique of plasticineography - video tutorial
We wish you inspiration and interesting "autumn" ideas for exciting joint creativity with your child!
Print Thanks, great lesson +3
If you do not yet know that there is such a method as drawing with plasticine, and have never tried to create volumetric applications so this photo tutorial is for you. Perhaps the easiest way to create landscapes is by adding different color elements and creating a believable stack effect. Explore with us the creation of an autumn tree from plasticine. This natural site will be an excellent exhibit on the fall, at school or in kindergarten.
Other lessons on trees:Step-by-step photo lesson:
The work should begin not only with the selection of plasticine colors: green, brown and orange, but also a suitable canvas for painting. Take white or blue cardboard as the basis of the picture. In the first case, it will be necessary to decorate the background, in the second, the blue color will look like a real autumn sky. It is convenient to draw a relief on a soft mass using a stack. To create the sky on white cardboard, you will also need blue plasticine.

Mash up some blue plasticine. For a more believable effect, mix it with a drop of white and black. Spread warm, soft paste over the top of the painting. Try to move your fingers along the rectangle.

On the bottom of the sheet, spread green plasticine, casually mixed with orange.

Use brown plasticine to create a variety of elongated sausages.

Make the resulting sausages the base of the tree trunk. Stick them in a row, docking tightly to each other.

Create lots of small orange leaves from soft plasticine. Also, the leaves can be yellow or reddish.

Start attaching the leaves to the tree branches in a chaotic manner.

Form a dense canopy of many yellowed leaves. Be sure to add an orange blanket to the foot of the tree and fix some leaves frozen in the air.

The autumn plasticine tree is ready. In this way, you can mold a green tree with fruits, as well as a whole garden or forest.

DIY autumn crafts from plasticine in elementary school
Plasticine master class on the theme "Amazing Autumn".
Stepanova Oksana Yurievna, teacher of additional education, MBOU DOD Arts Center, Salavat
Purpose: This work can be done both individually and with a group of children 8-10 years old and older. Recommended for teachers, interested parents who want not only to teach the child something new, but also to enjoy joint creative activities.
Purpose: Learn to sculpt from plasticine "Autumn", conveying the characteristic features of the structure and color.
Tasks:
- teach to apply various sculpting techniques (rolling, flattening);
- develop creative thinking, imagination, fantasy, sense of color;
- to cultivate perseverance, the desire to bring the work to the end;
- to consolidate the skills of sculpting from several parts;
Material:
- plasticine;
- stack;
- cardboard of A-4 format;
-scissors, ruler, pencil, PVA glue;
- board.
Crafts from plasticine on the theme of autumn are always interesting and exciting to do. Today I propose to you to make a craft from plasticine on the theme "Amazing Autumn".
Autumn gives miracles
And what a lot!
The forests are unloaded
The caps are gold.
They sit on a stump in a crowd
Red honey mushrooms,
And a spider - what a dodger! -
Pulls the network somewhere.
Rain and dead grass
Sleepy more often at night
Incomprehensible words
They mutter until the morning
Step by step description:
Step 1. For the craft, we used materials such as plasticine, a sculpting board, stacks, cardboard, scissors.
Step 2. On the cardboard we draw a circle with approximately a radius of 15 centimeters. We need a piece of the circle.

Step 3. We glue half of the circle so that we get a cone.

Step 4. We glue the cone with any plasticine color.

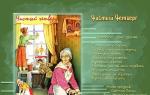
Before dazzling the head, the children wrote their desires on small pieces of paper and hiding the leaf in a ball, after that they sculpt the head.

Step 5. Preparing leaves for the Autumn dress. We make a ball, from it an oval, flatten and give the shape of a leaf. The veins on a leaf can be cut with a stack, or you can print with a leaf from a tree.


Step 6. Autumn is like a sorceress, she paints the trees in different colors. We will decorate her dress with colorful leaves. The prepared plasticine parts can be fixed on the cone. It is best to start at the bottom of the cone. Continue to the very top. The cone can be pasted over with plasticine, and for a younger age, you can simply fix the leaves on the cone.


Step 7. And then we stick the eyes, nose and mouth, then blind the hairstyle from yellow plasticine and stick it to the head. Then blind 2 hands.