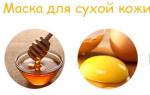
Topicia from living colors Tree of happiness. Topiary do it yourself master class. Kitchen - the territory of appetite and good mood
The village of happiness, which can be made with your own hands. It is so called Topiari, the photos of which decorate numerous online pages dedicated to needlework and design. Each master class is interesting in its own way, the process can be spacked on video and instructions with photos. But where to start? What to do the first toopiary? What do you need to prepare?
Topiary is a church with a round crown. And the choice of a ball is not accidental. From a long time, the circle symbolizes infinity, movement, life. And these people were considered happiness. Therefore, the village was considered a symbol of happiness, a souvenir that can materialize a cherished desire.

Almost any master class says that the crown is based on the very ball. Today you can not do it with your own hands, ready-made foamballs are sold in needlework stores.

But if you are not available, how to make a ball? The easiest way is a lump of newspapers. You just take the newspaper, the many of them, until a dense lump is formed. And then this lumps tied up with threads until the surface is smoothed.
For the basis of the base can also be used:
- Children's little rubber balls;
- Tennis ball;
- Ball from Paper Masha;
- Plastic ball from a set of children's cubes, etc.

Also, almost every tree has a trunk. In the photo and video, you can see that a variety of materials are used to create the trunk.
The simplest option is a wire or aluminum cable. Such a trunk can be beautifully bend. In addition, the trunk can be made of sticks for sushi, drum sticks, pencils and markers, tubes from under paper towels, etc ..
What you need to do is to reorganize the foundation for the trunk. Most often, the master class suggests it with its braid, twine, twine, satin ribbon, etc.
Express Topiary do it yourself: Basics for beginners (video)
Simple Topiary for beginners: Marine Topics
Step-by-step instructions - a good assistant for beginners. It is possible to disassemble this by the example of a simple Topiaria. Such can be considered a toopiary from seashells. On the shelf, where there is a photo resembling a maritime rest, such a thematic topic may appear.

For its manufacture, you need to prepare:
- Shells;
- Ball base;
- Acrylic paint, brushes;
- Vazonchik;
- Blue and white fatin;
- Decorative elements of marine subjects;
- Fat pencil;
- Blue satin ribbon.
The master class suggests adjustments. You can change the topiary with your own hands, having an additional decor and interesting ideas.

What you need to do:
- Shar-foundation Color light acrylic paint in the tone of shells;
- While the paint dries, cook seashells. They can be left in kind, and you can also transform a little. For example, covered with varnish or silver sprays.
- Bowl need to make a hole for the trunk. The trunk itself, that is, a pencil, you can wind up a blue-colored satin ribbon or a weave of white or blue fate. Alternatively, light blue braid, decorative white cord. After the trunk has been decorated, it is necessary on the hot glue to fix in the ball.
- Now the master class has reached the point, when you can do the crown. You simply in order, rows, from top to bottom need to glue shells so that the lumens are minimal. Video and photo tips will help understand the principle of gluing. It is impossible to glue it! Only from top to bottom, rows.
- Of course, when Crohn is ready, you can see what lacks something. If you want a little decor and in this part, you can glue a small souvenir starfish.
- Next, your own hands you have to make a pot. The pot must also somehow reflect marine themes. Wonderful if from the sea you brought a cup with photos of those places where you had to rest. In the decor of the nostalgic tree, it will fit as it is impossible. But there are other options. For example, the pot can be written with acrylic paints, and to create the effect of the waves, it is possible to use white paint, PVA glue and a large seaside salt.
- In the pot you need to pour the gypsum where the tree is fixed. From above the gypsum layer you also need to decorate with your own hands. It may be white sea sand, pebbles or shells of another structure. At the stem of the tree, you can put a large maritime shell.

Master class, as you can see, simple - a newcomer will cope with it, a step-by-step instruction can be changed by you at will.
Marine Topiary (Master Class Video)
Master Class: Topicia for beginners
And another thought about the creation of Topiary often comes to those who love coffee and at least once admired the miniature coffee tre. Moreover, it is not necessary to see it in front of me - it can be an inspiring photo or video.
To make such a tree, wash on the following tips:
- Almost every master class offers to lay the grains in two layers - small and uneven under, and large and beautiful - top;
- You can decorate such a tree with cinnamon sticks, especially if you are a fan of cinnamon coffee - the fragrance will stand incredible;
- You can do not only a spherical crown, with your own hands you can create a blank in the form of a heart, and then such a coffee gift can be destined to beloved;
- Instead of a pot, take a coffee cup, it will be natural.

The original work is a caring cup. A frame instead of the trunk here will be a jet of coffee beans or colors that leak out of it seems to be a weightless cup. Of course, under this jet there is a frame in the form of a wire or fork.
Topiary do it yourself: soaring cup (video)
Lessons: Topicia for beginners
If you intend to create not one souvenir tree with your own hands, listen to the tips of the masters.
Tips for beginners:
- First, create a special folder on the computer., Keep all the photos, instructions in it, every master class interested you.
- Secondly, reserve materials. You can build almost everything with your own hands, but there must be resources for this. A small piece of organza, and a polymer clay, and old notes, and coins, and watermelon seeds, and beautiful spikelets are useful.
- Thirdly, buy or make several balls-blanks for the crown. Save time, yes, and such a blank is reliable, durable, will not let down.

Finally, experiment with the theme. Newbies often brings the color gamut - either a bust, or the mismatch of colors. It is possible to spit the perfect combination of nature - flowers, color leaves, nuances of landscapes. Use peeped in your work, repeat natural patterns with your own hands.
Lessons for beginners: Topiary "Harmony Tree" (video)
Topiary is a really interesting occupation. Infinity of themes and variations, ideas are forced to take on new works. And if you first repeat someone's idea, then soon the other newcomers can be inspired by your work.
Topiary do it yourself for beginners (photo)


After making a decision that flowers should stand on the table, I thought about the question, how to make a topiary with my own hands, because Constantly changing floral compositions in January.
Topiaria came to us from the times of Palace Luxury. When the gardeners cut the crowns of trees and bushes in the form of balls, figures, birds. In floristry, also giving a perfect form by trimming is very popular. Well, our hostesses learned how to create a cozy atmosphere in the apartment with the help of mini trees. They shade the interior if made in the appropriate colors and look unusual.
Such a church looks rather unusual, ideal for the kitchen, because It interrupts the smells of food and refreshes the air.

We need:
- Any vertical base for the barrel (wand)
- Ball from foaming
- Pot, Cache, Cup or Vase
- Coffee beans
- Twine
- Ribbons of different widths
- Sackcloth
- Thermopystole
- Building plaster
First you need to wind the twine wand. For this, the thermopystole is failed one edge of the sticks and glue the end of the twine.

Choose the length of the sticks yourself, depending on which the height of the topiary you want to get.
The end of the twine should also be fastened with glue.

We proceed with the design of the pot. To do this, we take our burlap and begin to wipe the pot.

Fracting the pot of glue, and windbraas.

You can cut extra on the edges.

In order not to be white lumen, foam ball painting black.

In the ball cut the hole under the trunk. The end of the trunk is abundantly lubricating glue.

Getting Started with a bowl of coffee beans. You can do it differently.

For example, the glue is applied to the ball, and then we bring a lot of coffee beans to the surface.

But all the grains that were not fixed will scatter in all directions.
You can do otherwise. Glue one grain, which will turn out longer, but carefully.
It is necessary to work quickly, because the glue quickly cools.

For stability, we will fill it with plaster. To do this, pour water in plaster and stir.

After filling with gypsum pot, you need to insert a tree into it and hold a little to be fixed.

Gypsum dry in ten o'clock.
We begin to decorate the finished composition. From the tapes make bows and glue to the trunk.

You can use beads, bows from the twine, dried lemon, cinnamon wand and other decorative materials.

Instead of a stick for the trunk, you can use spanks, they are sold in food and household stores.
Master class: Topicia from napkins
Napkins are always at hand. And they have a huge set of functions, and why not make decoration for Topiaria from them? Let's consider an easy way and spectacular master class.

We will need:
- Kashpo
- Cable Channel Round (wand, ships)
- Newspaper
- Thermopystole
- Slippet.
- Decor
- Alabaster
For the Topiaria ball will use newspapers.

For starters, you need sheets of size A4. The first sheet is fermented in a lump.

The second and subsequent turn around it.

The big ball must be wrapped with threads so that the edges of the newspaper are not overwhelmed.

Now we make a hole with scissors in the newspapers and insert the trunk in it, fastening the hot glue.

The ball of such a diameter from the foam in the store will cost rubles in 50.
We take napkins, fold in half.

And again in half. And on the second fold line cut.

In the middle we fasten the stapler.

Each workpiece is cut in the form of a circle and a frame layer bend to the middle, so we form a flower.

Winding the trunk of Topiaria with ribbon, for this one end of the tape is attached to glue and wind around the spiral barrel.

On a bowl of glue flowers. To do this, the hot glue is applied to each flower.

You can decorate with ribbon rings. For this, the tape is winding around the finger, you can twice and glue at the base. You can use a needle for fastening a ribbon ring to topiary.

Alabaster lay out in Kashpo, insert in the middle of the toopiary and waiting for drying.

The alabaster can be closed by the same flower with napkins. Barrel wind ribbon and make a beautiful bow.

In the pot, if the place remains you can lay out candy.
Topiary from satin tapes step by step
Ribbons allow you to give Topiaria a festive look, but beautiful roses will also work. Ways how to make flowers from satin ribbons a lot and art is called Kanzashi. We will consider only one option, but the easiest.

The ball of foam can be purchased in Chinese online stores, in fishing stores, for needlework.
- Ribbons
- Glue gun
- Kashpo
- Pencil, branch for trunk
- Alabaster

Take a pencil and define the middle in a bowl. We make a deepening and fix a pencil on glue.

Watch the ribbon trunk Topiaria. Periodically lubricating the trunk with hot glue.

For roses from ribbons, we use satin ribbons with a width of 5 cm and a length of 2 meters. This length is enough for 4 flower.
Flowers glue on hot glue. The gaps between them, fill with ribps, ribbons of other colors and textures.
We make roses from satin ribbon
For the manufacture of roses, we take the ribbon, the edge of the bending an angle.

From the end of the tape we turn inside the tape, forming a bud.

At the bottom, add glue so that the rose does not break.

After that, we bring the ribbon to yourself and it turns out the petal.

So it turns out a rose, lubricate the edge of the edge more often. Make sure that the flower does not get square.
 It turns out very gentle roses.
Corrugated paper topiary
Corrugated paper allows you to make extraordinary beauty flowers. Bare each leaflet.
- Polyfoam ball
- Kashpo
- Glue gun
- Basis for trunk
- Corrugated paper
- Decor
- Alabaster

As in the previous instructions, it is necessary to wind the trunk and glue the ball.
We make billets for flowers. Cut the petals from corrugated paper. Rocking them across, so that they take a beautiful bend.

Glue flower to the ball and decorate the design.

Topiary for beginners of artificial flowers
Topiary can be made from purchased colors. This is the fastest vehicle manufacturer. The main thing is to choose the flowers of the desired shades that are combined with each other.

It is not a familiar barrel very beautifully, but a crystal candlestick.
- Polyfoam ball
- Kashpo
- Glue gun
- Candlestick (Glass)
- Corrugated paper
- Decor

To do this, simply cut off the buds and insert into the ball.

Izal Masters began to use not so long ago, it is great for the decoration of Topiaria, gives an unusual look and style to your tre.

- Sisal
- Artificial flowers
- Barrel (wand)
- Glue Pistol (thermopystoletole)
- Newspaper
- Decor

From the newspaper made a ball, wrapped it with a rope. From the sisal we wake balls of one size.

Artificial flowers divide and cut off the buds, insert into the ball.

Fix all glue. 
For decoration, pot can use any decor, rhinestones, braid, glue tapes from rhinestones, various suspensions and keychains are perfectly suitable.
The ideas of Topiaria
In the manufacture of Topiary, you can combine several decoration options, for example, to use purchased artificial flowers and organza.

Topicia from coffee can be glued to the candlestick.

Topiaria from sweets can be given to the holiday for women of all ages!

The main thing is to use dear and delicious treats.

You can make a tree not round and non-standard form. Just using half from the ball.


Topiary from organza looks very easy.

Topiary from flowers made from polymer clay looks luxurious and very realistic.

Topiary from Beads looks very gently, a great gift for a wedding.

Video how to make topicia do it yourself
Refresh the interior of the room, to make notes of dreaminess and tenderness in it, you can easily - making topiary with your own hands for beginners from natural or decorative materials. Above the tree, happiness will have to work a little, but the result is definitely worth it. The caretaker will greatly decorate any room, will be a good gift for a holiday for a friend or relative.
Refresh the interior of the room, to make notes of dreaminess and tenderness in it, you can easily - making topiary with your own hands
Initially, Topiarii was called figure cropped trees and green shrubs in the yards of rich people. Over time, this art has changed. Now you can decorate your accommodation like a cute décor. The car's size often does not exceed the half meter, and the diversity of its forms, colors and used for the manufacture of materials is almost limitless.
To create this craft, modern needlewomen use almost everything.
Here is just a small list of the most popular items for decoration:
- Artificial flowers from Foamirama, satin and rapeseed ribbons, salt dough, plastic, napkins, organza, and so on.
- Decorative berries, twigs, leaves.
- Large and small beads, beads, buttons.
- Coins of different dignity.
- Souvenir paper bills.
- Old gears, bolts, scissing and other small tools.
- Pompons of thread.
- Balls for decorating Christmas trees.
- Paper squares and much more.
Synthetic trifles, of course, allow to do topiary of delightful beauty that long do not lose appearance, while maintaining attractiveness for many years. But no less interesting products are obtained from natural, natural materials, such as:
- Cones, chestnuts, nuts, shells from pistachios, zhöldy.
- Sea pebbles, shells, sand.
- Citrus slices dried by slices, roses made from their crusts.
- Rowan berries, Physalis inflorescences, Yellow leaves of any trees.
- Coffee beans, cinnamon sticks, badyana stars, cloves and other spicy plants.
The choice remains only for the needlewoman and its fantasy. In each craft, from which it would be done, there is a specialist and heat that fills the interior harmony.
Gallery: Topicia with your own hands (25 photos)


Classic Happiness Tree: Master Class (Video)
How to make the easiest topiary from beads with your own hands: Instruction
Of the sets of options are undoubtedly the easiest of the desires of desires from beads or artificial pearls. Consider a detailed master class on its creation.

It turns out very beautiful
What you need to have:
- Polyfoam ball base.
- Bunch of beads, pearls of one or more colors. In needlework stores, you can buy several low beads at once so as not to glue them individually each.
- Two segments of durable steel wire of the desired length, to which the depth of the pot and half of the diameter of the ball is added, since the stem of the tree will be based on half, and in the pot - until the bottom.
- Satin ribbons, preferably thin, tone the main colors.
- Satin roses, a little felt for the bottom of the bottom of the pot.
- Corrugated paper, organza, satin ribbon or rape medium thickness.
- Quick-drying glue or adhesive gun.
- Pebbles for filling pot, plaster for fill.
- Paint and pebbles for soil decor.
- Plastic pot.
Start the manufacture of the simplest tree of desires
- We begin with what we do in a hole hole for fastening steel wires trying on them. We wind the wire flying so that at the top it was back to the ball, and below - by 5 cm below the alleged height of the soil. Put aside.
- Then we take low beads and gently, starting from the very top smoothly above the holes for the trunk, the first bead. Then it is gradually putting transparent glue and immediately fix the beads without removing the thread. When only a pair of three turns remain to the holes, we insert the wires for the trunk, pre-abundantly groaning them with glue, and end the winding, closing the whole ball tightly.
- We proceed to work on the pot. Wrap it with corrugated paper, we cover up the organ from above and grabbing the ribbon. Shakes are sizing. On the bottom glue a circle of felt.
- Now Sadim tree. First, put the trunk in the pot. We fall asleep pebbles and immediately pour the cooked plaster. Pay attention to the gypsum when drying expands, so do not pour it to the top, leave a little space. He dries over for a few minutes.
- It remains only to re-establish the ball itself, its bottom and the surface of the plaster in the pot. That's so simple, you create a beauty with your own hands.

Options can be different
Council for a beginner: in the manufacture of the most convenient to use the thermo pistol. The glue in it is always transparent, dries very quickly and reliably holds.
Topiaria from Natural Materials: Step-by-Step Master Class
Beginner needlewomen will also easily cope with work on a tree from cones, acorns, chestnuts, walnuts or hazelnuts. This is a great idea for classes with a child, allowing you to teach crumb to see beautiful even in the most ordinary and simple things. In addition, many kids love to collect such things, walking on the street. For the stem, you can even take a conventional twig, which will give even more naturalness, ecology.

Beginner needlewomen will also easily cope with work on a tree from cones, acorns, chestnuts, walnuts or hazelnuts
What will take:
- Foam ball for the base.
- Corses, chestnuts or other nuts.
- Wire or strong branch for the trunk.
- The container in which the tree will put.
- Stones and plaster.
- Adhesive pistol or dragon type glue.
- Acrylic colorless varnish, there are in construction stores.
- Decorations at will.
How to make topicia from cones
As in the previous MK, the first thing pumped the hole under the trunk, trying to decorate it and decorate. If you took a simple twig, then it can be left unchanged.
- We take the basis and glue on it the selected nuts or bumps, tightly adding them to the side with each other.
- Shortly before the end of the work insert the barrel into the hole and end the ball. If you cover pine cones with artificial snow, then a wonderful New Year version will be released.
- Chestnuts and acorns are perfectly complemented by autumn leaves. And walnuts and forest nuts look better if they combine them together and decorate with bright berries of rowan.
- The last step is the landland of the tree in the prepared capacity, for example, the brown flower pot will be very appropriate here.
Council for a beginner: the finished craft of nuts for durability should be covered with acrylic varnish or paint. Gold and silver colors are best suited.
Memories of the sea or where to children brought from seashelling
Very aesthetically looks like an exterior of seashells and burlap with elements from the twine. She embodies dreams of a new trip to Besleless Sea. Recalls the time spent. Yes, and the collected gifts of the bays marine will not lie without a business.
For maritime Topiary, it is necessary:
- Foam base: ball or heart.
- Porcelain white or transparent cup, vase, glass.
- Steel wire.
- Thermopystole.
- Shells, marine pebbles.
- Artificial pearls.
- Burlakovina, twine.
- Gypsum or pebble to fill the capacity.

Crafts and burlap with elements from the twine
Detailed instructions for creating simple and uncomplicated:
- We determine the center of the base and we do the already familiar hole for the trunk. We try the wire, decorating it with the twine, lay down for the time.
- Carefully and gently glue the foam base with seashells, pebbles and pearls in random order. We make flowers from the twine, simple or lush bows. We cling them between the main details. Insert the finished trunk to the place and make the bottom of the foundation.
- We place the craft in a cup of a vase, poured with plaster. Not yet frozen gypsum sprinkle with sea or decorative sand. Capacity adorn multiple twine twists. Another option is to wind completely burlap and fix it with a satin ribbon pastel, light tones.
- If there is no desire to use gypsum, and the topicarium itself is a small size and weight, it is preferable to land into a transparent glass or a cup, falling asleep there remaining pebbles and shells. Thus, a delicate decorative element is obtained, which at any time will remind you of a summer holiday, charges with positive and energy.
Tip for beginner: Thin bamboo sticks are perfectly suitable as a trunk for a seashed tree. You need to take 5-7 pieces, for reliability.
Coffee Topiary: Master Class (video)
Create Topiaria with your own hands, do not be afraid to experiment and create. And may always be inspiration!
The Great Roman Empire left humanity in her legacy not only aqueduct and baths. Large aesthetes and masters of landscape design, Hellena were proud of their decorative places - Topia, Topiari, or skillfully striated wood-shrub compositions.
Modern Topiary is a thumbnail imitating a neatly littered village. Compositions decorate the interior formed in a completely any style. Create a miniature toopiary with their own hands from paper, living flowers, bird feathers, beads, rhinestones, coins, and even coffee beans.
The meaning of the European floral tree of happiness is so called Topiary, is not only in the decorative load. Miniature symbolizes wealth, fertility and strong spirit, pouring the stream of the energy of happiness. A small trees tend to enhance the energetic potential of the whole house, in whatever the rooms it is not installed.
Manufacturing technique
In European countries, it is customary to give Topiaria for any occasion - to the wedding and the names, Novoseli and the New Year. Friends give a miniature church and at all without reason, but from a pure heart, causing another visit. And all crafts are made personally.

Topiaria is quite simple in the manufacture. The mini-trees consist of three parts are crowns and trunk, bonded between themselves, and installed in the container. As a base, the pots, stands or baskets of all kinds of forms are used.
Crown can be round, oval, in the shape of a heart, letters or numbers. But most often make topiary with a spherical crown.
The trunk is a durable thick wire or a branch, clutching raw, bright floral ribbons or color plastic. In some cases, boron is used in the form of a barrel. With it removed the bark, we are treated with a veil and covered with varnish.
Thematic decor
Ideas for Topiaria can be a variety of and fantastically beautiful, reflecting all sorts of artistic ideas of the author, and most importantly, created by their own hands. For example, a paper mini-tree, decorated with candy, alive flowers or fruits, uses a festive table setting. On the New Year's table makes thematic topiaries. Their crown consists of cones, organza, satin ribbons, artificial colors.
Contrast shades of blue, green and red in decorative elements of Topiary perfectly emphasize silver and golden threads. And flowers or figures in pastel colors wonderfully shade shiny elements in Krone Topiaria.
It is important to come up with the topic and pick up a beautiful material. The miniature should reflect its purpose and express the idea that pushed to its creation. Shells, feathers, bead threads and minor coins allow you to create tender, filled with mini Topiaria. Grains of coffee and cereals, artificial flowers, lace and organza are suitable for creating compositions designed to decorate the kitchen space.
For classicalStructured in the gray tones of the interior of the house, perfectly suit the topiary created from satin ribbons of blue or blue cold shades. For rooms decorated with solar colors, compositions in dark colors are manufactured.
Details and elements
The barrel of the mini-tree is given not only the carrying role. In general terms, the composition of the trunk must be set aside in one spirit, both with the basis and emphasize the magnificence of the crown. Therefore, the trunk should be paid to the appropriate attention - the material is carefully selected for its finishing. If the bit is elected, then the tone of the veil, which it will be impregnated and matte or glossy varnish. The coating is completely dependent on the composition of the composition.
The base can be of various shapes and created from any material - a small ceramic vase or a glass cup of bizarre. In some cases, Topiaria is placed in baskets, such as decorations for the Easter table.
All parts are firmly attached to each other. The crown is glued, and the barrel is fixed in the vessel with pieces of foam and poured an alabaster for the fortress. It should be remembered that the alabaster works very quickly. Therefore, the consistency of the gypsum solution must resemble liquid sour cream. Then the material will work easier.
The crown is fixed on the trunk only after the gypsum solution is completely dry. During this time, Krona is made. To form crowns, hot glue uses to secure flowers, pins and spanks. After that, Topiary is finally going.
Festive Topiari
Topiaria is made to the holiday and as a decorative home interior decoration. For example, interesting ideas for the decoration of the child's child's birthday. Sweet big topicia in the form of a candy tree with funny souvenirs. In addition to the pleasure of pleasure, each kid will be able to pick up a small gift with him:

The autumn holiday Halloween indulges abundant crops. The pumpkin is considered symbol. Topiary, imitating pumpkin, created from pumpkin seeds, leaves, sweets and tapes installed in a tin can, will be a great decoration of kitchen space on holidays. The lower part decorate a cold cloth, and the figure of the witch is located in the top of the Topiaria, reminding about the mysticity of the holiday:

Christmas Topiaria form from cones, berries of ostolist, organza, pine needles and silk ribbons. They decorate the fireplace shelves and coffee tables in the living rooms, as well as bedside tables in bedrooms:

For Valentine's Day, lovers prepare each other gifts. Topiary in the form of a strap-pink heart, decorated with valentines, rods and satin ribbons, will bring the taste of romantics:

On the eve of the Easter week, you can create an Easter tree decorated with colored eggs, artificial colors and satin ribbons. It can be the main decoration of the Easter Table. And miniature topiaries, fortified in pots in the form of egg shells, will become wonderful gifts for guests invited to the holiday:

Topiaria in the interior
The fragrant coffee tocture, decorated with straw, slices of canvas and thick twine will find its place in the kitchen room. For the kitchen is also a wonderful mini-tree, created from napkins:

Unusual to the beauty of Topiaria, composed of living flowers, will decorate a festive table in the living room. Create a unique style of guest rooms for guests will help elegant miniatures in bright colors, made in accordance with the style of the room:

For the bedroom form tender, as feelings, original decorative compositions from ribbons and beads, lace and organza in light pastel colors resembling spring haze. The base for the composition usually serve transparent small capacity of unusual forms:

In the girl's bedroom, you can install a fabulous mini-tree created from corrugated paper. The boy, football fan, delivers the pleasure to see the Topiary photo from the nursery, where the mini tree is made in the form of a large soccer ball. For decorative decoration of Topiaria, butterflies, colored and pearl beads, decorative bugs and ladybugs are used. The base is usually covered with a floral mesh or artificial colored cloth:

For newcomers, a pleasant gift will be a tree collected from forest and walnuts, large seeds of pumpkin, beans and peas, symbolizing wealth. Such Topiary decorate with twine, slices of canvas, buttons:

A composition of gentle real roses is formed on a gift to a close girlfriend. Decorate with satin ribbons in tone of inflorescence, silk cloth, corrugated paper:

Wedding Topiaria - real works of art. Traditionally created from large pearl beads, decorated with satin ribbons, lace and sisal, fabulous compositions have long stored memories of the most important day in life:

Of course, you know the feeling when you are trying to find a pretty "house" for your Topiaria, but, as purpose, you come across mostly monophonic plastic pots of small colors, without drawings and decor. In such a colorless pot, of course, Topiary do not put, so I want to offer you several ways to decorate a pot or porridge for Topiaria.
I think the ability to decorate the pot you will need not only to complete the composition with Topiarium, but also for ordinary room colors. Decorating Kashpo and pots into manual - very interesting pastime, allowing boring, imperceptible clay and plastic pots to turn into amazing decor nuances.

For unusual designs of pots and Kashpo, all handmade options are suitable - this is the painting, and mosaic, and decoupage and such an amazing technique as Krakle.
Believe me, your limitless fantasy, prudence and skill are able to embody the most wonderful dreams! Now turn on your favorite music, take paints, glue, napkins, beads, ribbons and other decor in the house, do not forget about the plastic pots actually - and create, attracting Mart!

Decoration Pot for Topiaria Mosaic
To lad out a mosaic, color pebbles, glass or pebbles, thermocons or plow glue, tiled grout, colorless varnish.
- Draw a conceived pattern on paper, then apply markup on the pot and only then lay out the pattern with pebbles.
- First lay out the main drawing, and then the background.
- When pebbles are grabbed, we apply a grout for tiles. After 10-15 minutes, carefully wipe the flashes with a mosaic with cotton chopsticks or a rag.
- After about 24 hours, the grout will dry. Sometimes the mixture dries down and the decorations are formed between it and the decor, in this case, it is necessary to apply an additional layer, and wait another day.
- The finished pot will only be treated with lacquer coating.

If you decide to completely cover the pot of pebbles, it is not necessary to use the grout. The wonderful mosaic will come out of pieces of ceramics, a bit of dishes, christmas toys, shells, seeds and another similar decor.

Decoring Pot for Topiaria Decoupage Style
Beautiful paintings on the decorated subject will help create interesting stories taken and carved from napkins. For coating, use acrylic paint, better in color, then napkin motifs will look most bright.

It is necessary to decompose the napkin on separate layers and cut the area of \u200b\u200binterest. We need only the topmost layer with our image. We apply a dry pattern to a dry surface of the pot, we grow out all the folds and gently cover the PVA glue, diluted with water in proportion 1: 1, heading from the center to the periphery so that wrinkles and grips are not formed.

When the glue dries off will remain covered with a pot of colorless varnish. The top edge can be decorated with beads, lace, satin ribbon or decorative straw.

In decoupage, not only napkins, but also any polygraphy, including fabric, lace and other decor.

Sizal decoration
The charming design for the pot can be colored sisal.
Surface trees with construction glue and gently wrap the sisal threads. Perfectly on such a pot will look like an applique of artificial grass and felt colors.

A few more ways to design pots
Consider the most, probably, an affordable way to ennoble a pot or porridge for Topiaria is to portray something with paints. To do this, you can use gouache, acrylic or oil paint. Treat the surface with emery paper in the event that the paint is bad on it.

Take advantage of your rich fantasy or borrow the idea of \u200b\u200bchildren's coloring. You will be surprised how much they will come to your place on your pot, because they are such simple and bright. Cover the lacquer ready and already filled with a drawing, it will give him shine and durability.

It is also possible to decorate the pot with colored threads. On an attached bilateral scotch, the pot neatly waters the threads using different colors. Also, the threads can be passed on to pebbles or seashells, we will have beautiful waves. This drawing will look most attractive if you use threads of different textures and colors, but similar shades.

From multicolored threads, you can link the "wrapper" for a pot in the shape of a pipe or hats. It will be especially just for masters in crochet. A ready-made "sock" for a pot can be decorated with anything: beads, shells, appliqués, dried and other decor.

Be fabulously brave, let new beautiful things are born in your home!