How to secure the crocheted bracelet on your arm. Crochet bracelets. Composition of three bracelets
- book publishing house "Eksmo" - “Fashion bracelets. We knit crochet " Stephanie Brich, Jennifer Stiller.

To get started with an air loop
Work two chain stitches. After that, close the ring by passing the thread through the second loop from the hook, and knit a single crochet.
You can pull off the hole in the middle of the ring with the starting thread at the end of the job.
To get started with a loop of air loops
In some cases, for example when knitting flowers, a hole in the middle of the loop of the loops is even desirable. Then the work must be started with a ring of air loops.
Knit a chain of stitches and close it into a ring. To do this, pass the hook through the first loop of the chain and knit a connecting post. The start and end of the chain are now linked.
Knit one lifting chain loop. Now pass the crochet hook straight into the center of the ring from front to back and work into a single crochet.

Knit the required number of stitches by passing the hook through the center of the chain loop. Finish the circle with a connecting crochet to the first single crochet.
Long loops
To knit such a pattern, you need to thread the hook not into the loop of the previous row, but into the corresponding loop of one of the lower rows of knitting. Depending on the pattern, this can be the second, third or even fourth row from the top edge of the canvas. With this method of knitting, interesting effects arise.
If you need to go down three rows, then count the loops vertically down, starting from the last row knitted. Pass your hook through this loop, pick up the thread, and pull it to the top of the work.

After that, knit the post as usual. A long buttonhole will be visible on the front and back of the knit.
Knitting with beads
Pass the hook into the loop of the previous row, pick up the thread and pull it through the loop. Now slide one of the pre-stringed beads, grab the thread behind it and finish crocheting the single crochet.
Knitting in a circle
First, you need to knit a chain of air loops and close it in a ring by tying a connecting post. For the first row, knit a single crochet stitch and then single crochet stitches. In order to knit a single crochet, insert the hook into the center of the air loop from front to back, pick up the thread and pull it through the ring (there will be two loops on the hook). Then pick up the thread again and pull it through both loops. Knit until you get the desired number of stitches. The first row ends with a connecting post to the first chain loop.
To knit the first row with double crochets, you first need to knit three air loops for lifting, and then start basic knitting with double crochets, introducing the hook into the center of the ring from the air loops. Complete the first row with a connecting post in the third of the lifting air loops.
Spiral knitting
Begin knitting with two chain stitches, then single crochet into the second loop from the crochet hook to create a small ring.

Place a contrasting thread or marker between the last stitch of the ring and the first stitch of the first row. This will help you trace the beginning of the spiral. After the mark, knit with single crochets, knitting them directly into the loops of the previous row. When knitting in a spiral, there is no need to close the circular rows with connecting posts.

To make it easier to count rows, mark the beginning of each next row with thread or a marker.
Cunning: mark the beginning of the rows with one long thread, which, after completing the work, can be simply pulled out of knitting.
ABBREVIATIONS:
vp = air loop
c.p. = lifting air loop
L = length
Crch = hook
P = loop
p / st = half-column
repeat = repeat
prvzh = knit
ps = lush column
Rd = row
conn. st = connecting post
St = column
St-mini-popcorn = column of mini-popcorn
St-popcorn = stick of popcorn
Art. b / n = single crochet
Art. s / n = double crochet
Art. with 2 / n = double crochet
Color = color
Adding and decreasing loops
Single increments:
Doubling the loops
Crochet stitches are easy to add. To add a separate loop, pass the crochet hook through the loop you just knit and knit again. This will double the loop.

Two single crochets at the beginning and / or end of the row
In the first or last stitch of the previous row, knit two single crochets.
Decreasing individual loops:
Knit together
Knit each column according to the general sequence, while there are always two loops on the hook: the working loop and the last loop of the column. If the stitches need to be knit together, then knit each stitch to the last loop. For example, if you need to knit two double crochets together, then a working loop should lie on the hook and along the last loop of each column (three loops in total).

To finish, pull the thread through all the loops for
hook. Now the two stitches are knitted as one.
The number of loops has been reduced by one. 
Color change
It is accepted to introduce a new color from the last column of the previous one before the new color of the row. Tie a row so that there are two loops on the hook, and then crochet the thread of the new color.
If the last column in the row is a single crochet, then insert the thread after knitting the column so that there are two loops on the hook.

Now two loops need to be knitted with a new color. Crochet the thread.

Then knit one lifting chain loop, turn the work and knit the next row in a new color with single crochets.
Color change when knitting in a circle
When knitting in a circle, enter a new color not in the last column of the row, but in the connecting column.
At the end of the row, pass the hook through the first loop of the row, pick up the new color thread and knit a connecting post. Then knit one lifting loop and work on with a new color of thread.

If the icons converge at the bottom, then the columns need to be knitted from one loop (make an increase).
If the icons converge at the top, then the columns need to be knitted as one (make a decrease).
Fashion bracelets. Crochet


SIZE
Length (without fastener) 15.5 cm
Width 2.7 cm
MATERIALS
Yarn (L 125 m / 50 g) in the following colors: denim and dark blue, 50 g each
8mm silver lock
Instant glue
Hook 2.5 mm
SAMPLE
Crch 2.5 mm
28 P = 10 cm
Main pattern
For this bracelet, tie two cords from ce. and conn. Art. In this case, the first connection. Art. knit in the second ch. from the hook. Fold the cords in half and tie with a sea knot.
Operating procedure
Tie one cord of each color.
Dial 12 vp + 1 b.p. Knit a connector in each loop. Art. Pull the thread through the last loop and close.
Completion of work
Fold the cords in half and tie a knot as shown in the pictures. Make sure the knot is in the middle of the job.

Now place the ends of the cords on top of each other and use instant glue to glue the cords into the lock.


GENTLE BRACELET
SIZE
Length approx. 17.5 cm
Width approx. 4.5 cm
MATERIALS
Hook 2.0 mm
Sewing needle
For black bracelet
Yarn (L 165 m / 50 g) black, 50 g
2 black buttons with a diameter of 1.5 cm
For purple bracelet
Yarn
(L 165 m / 50 g) purple, 50 g
2 purple buttons with a diameter of 1.5 cm
SAMPLE
Crc 2.0 mm
32 P = 10 cm
Main pattern
Number of bp for this bracelet there must be a multiple of 8 + 1 + 1 lifting loop.
This set of loops is needed to knit on both sides of the initial chain. Take a look at the knitting pattern.
The numbers represent the rows. After the 4th row, there is a short chain from st. b / n (= Рд 5), and further knitting should be continued on the second side of the work (Рд 6-8).
Operating procedure
Dial 48 VP + 1 vp + 1 b.p.

1st Rd: in each P prvzh st. b / n, while the 1st Art. b / n prvzh in the 2nd century from Krch. 3 vp, twist knitting.
2nd Rd: Skip Art 3, Art 4, and Art 1. with 2 / n (in the same P), * skip 7 Art, 4x and 1 Art. s 2 / n (in the same P), rep from *.
Skip Art 3, Art 1 to complete the row. s / n, 3 vp, turn work.
3rd Rd: 1 vp, 1 st. b / n (in the 1st vp openwork of the previous row), * 4 vp, 1 tbsp. b / n (in the next vp of the previous row), from * repeat to the end of the row. To complete: 1 vp, 1 tbsp. s / n (in the 3rd VP before. Rd), 1 VP, turn the work.
4th Rd: 1 tbsp. b / n, 4 vp, 1 st. b / n (in the middle of the arch from vp before. Rd), * 4 vp, skip the arch from vp, 1 st. b / n (in the middle of the arch from vp), from * repeat to the end of the row. To complete: 4 vp, 1 tbsp. b / n (in the 3rd century pp before the rd).
5th Rd (short side of the bracelet): 1 tbsp. b / n (in the same P as the last item b / n), 2 tbsp. b / n in the next. two vp, 2 tbsp. b / n in st. s / n 2nd Rd, 2 st. b / n in vp first row.
6th Rd (second long side of the bracelet): 3 vp, skip 3 st, 4x and 1 st. with 2 / n (in the same P), * skip 7 Art, 4x and 1 Art. s 2 / n (in the same P), rep from *. Skip Art 3, Art 1 to complete the row. s / n, 3 vp, turn work. Knit the columns with two crochets in exactly the same chain loops as the columns of the second row of the bracelet.
7th Rd: 1 vp, 1 st. b / n (in the first vp openwork before. RD), * 4 vp, 1 st. b / n (in the next vp before. Rd), from * repeat to the end of the row. To complete: 1 vp, 1 tbsp. s / n (in the third VP before. Rd), 1 VP, turn the work.
8th Rd: 1 tbsp. b / n, 4 vp, 1 st. b / n (in the middle of the arch from vp before. Rd), * 4 vp, skip the arch from vp, 1 st. b / n (in the middle of the arch from vp), from * repeat to the end of the row. To complete: 4 vp, 1 tbsp. b / n (in the 3rd century pp before the rd).
Completion of work
Dial 8 vp, knit 1 tbsp. b / n in the middle of the short side of the bracelet (this is the loop for the first button), VP 8, conn. Art in 1st Art. b / n 4th Rd (this is a loop for the second button). Pull the thread through the last loop and work. Sew two buttons to the second short side of the bracelet.
Tricky trick:
To keep the bracelet flat, press it with an iron at the lowest temperature. Place a thin, damp cloth between the bracelet and the iron to avoid damaging the pattern.


SIZE
Length (without fastening) approx. 17 cm
Motif diameter approx. 3.3 cm
MATERIALS
Yarn (L 125 m / 50 g) in the following colors: chestnut, jade and cream, 50 g each
5 x 24 beads with a diameter of 2.6 mm, a mix of matte metallics (golden, blue, light and dark gray)
3-row gold-tone clasp, 1.5 cm long
Brown sewing thread
Hook 2.5 mm
Sewing needle
SAMPLE
Crch 2.5 mm
Round motif diameter = approx. 3.3 cm
Main pattern
The bracelet is made up of individual bracelets sewn together. Make circles from st. b / n and st. s / n. To knit a row of st.b / n, start with 1 ch. and finish connecting, st into this loop. Rows from st. s / n start with three vp. and finish connecting. st in the last of these loops. Collect the beads on a string and then tie in the last row of the circle st. b / n.
Doubling the columns
In one loop, knit 2 tbsp. s / n.
Double crochet
In one loop, knit 2 tbsp. b / n.
Color order
1st Rd: chestnut.
2nd RD: jade.
3rd Rd: chestnut.
4th Rd: thread with beads.
5th RD: cream.
Attention: when changing color, knit the last columns of the previous row with a new color so that the transition is smoother (see "Basic instructions").
Operating procedure
Take a sewing thread, fold in half and cast 24 beads on it, repeating the following sequence: light gray, blue, dark gray, golden. Set aside the finished thread.
1st Rd: knit 8 tbsp. b / n in a ring of threads (amigurumi ring). Close the circle st (= 8 st).
2nd Rd: 3 vp Knit a row of st. s / n, doubling them up. Finish the row of connections. Art in the 3rd century. (= 16 Art).
3rd Rd: 1 vp Knit a row of st. b / n, doubling every second column. Finish the row of connections. st in vp (= 24 Art). Conn. knit with the last (chestnut) thread and the beaded thread.
4th Rd: 1 vp, change the work. * Slide 1 bead to work and then prvzh 1 tbsp. b / n. Repeat from * to the end of the row, complete it by connecting. st (= 24 st).
5th Rd: the thread runs between the second and third rows. On the seamy side of the work, knit a circle of connections. Art.
Tie five circles like this.
Completion of work
Sew the circles together with chestnut thread, then sew the lock. Close up the remaining threads.

Buy the book by Stephanie Brich, Jennifer Stiller “Fashion bracelets. We knit crochet ": http://www.labirint.ru/books/ 589267 /
Still interesting:
Send your photos
Do you also make beautiful crafts? Send photos of your work. We will publish the best photos and send you a diploma of the participant of the competition.I have long wanted to try to write a description of something I invented))), made MK for the New Year holidays, and here - a rally! Bracelets (in my experience) are loved by all girls, so it will work well as a small gift (or an addition to a large gift))).
So let's get started!
We need a small amount of yarn - cotton, linen, silk and other (artificial and natural) fibers will do. Theoretically, wool is also suitable for winter, so that the bracelet, so to speak, warms up especially!
It is necessary to choose a hook for the yarn that allows you to knit the single crochet stitches tightly enough. And the finger - your index finger of the right (or left, if you are left-handed) hand will be very useful to you!
1. The basic figure is a RING. Wind 4 turns of thread around your finger - tightly, but so that you can remove it. 
Remove by gently holding with your thumb and ring finger: 
Secure the entire structure with half-loops: 
Knit 8-12 single crochets in the center of the formed ring - you get half a ringlet: 
The number of columns depends on the thickness of the thread - experiment and find one that will allow the ringlet to keep its shape and fill half of the circle. I usually have 10 columns.
Wrap 4 turns on the finger again (close to the previous one) and knit 10 columns - you will get 2 half rings: 

Thus, tie 7-8 pieces (depending on the girth of the wrist): 
Connect with a half-column into a ring: 

Tie your rings in the opposite direction: 
At the end of the row, cut and secure the thread. The first tier is ready. There can be as many tiers as you like (my husband suggested that I tie the sleeves to the blouse in this way)), usually I make from 2 to 7. The connecting chains between the tiers do not look very nice, so we will knit each tier separately, attaching to the first one.
The beginning of the tier is usual - 4 turns and 5 (!) Columns in the center of the ring (that is, exactly half of a half).
We attach the second tier by threading the loop on the hook into the middle of the ring of the first tier: 
We pick up the loop and tie the remaining 5 loops: 

We connect in a ring and knit the second halves: 


Thus, you can make the required number of tiers, changing the color, using section-dyed yarn, yarn remnants, etc. I really like combinations of yarns with different textures (silk + linen) and any funny and illiquid section)))
I came up with this knitting technology myself, I will be glad if the number of bracelets after my MK increases dramatically! All good mood and successful handicraft adventures!
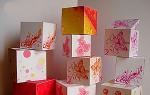
Bracelets are now at the peak of popularity, they are made from the most unimaginable materials, they use both special accessories and improvised means. I suggest you create a bright knitted bracelet with your own hands. Its uniqueness lies in the fact that it is soft, durable and comfortable to wear. This bracelet will become a symbol of your personality. In addition, it turns out to be knitted very quickly, which means that you can please your friends and loved ones with pleasant gifts.


Required materials and tools:
- hook 3.5 mm;
- tapestry needles;
- scissors;
- yarn of three colors;
- button (about 1.5 cm in diameter).
We knit the first half of the bracelet
Take milky yarn and knit 37 stitches of air chain. In the last loop, knit two double crochet stitches. In total, you have 38 loops at the base. Add burgundy yarn, twist the knit and knit a row with burgundy threads using a double crochet stitch. When you reach the end of the row, knit 12 stitches and return to the beginning of the bracelet. You should now have a buttonhole. Secure the end of the burgundy thread and cut it off. The first piece of the brightly knitted bracelet is complete. Of course, you can use any color, the beauty of this bracelet is that you don't need to leave the house to create it. You can use small balls and remnants of old threads.


We knit the second half
Now we will move on to knitting the second part of our bright bracelet. Take green thread (or any other thread of your choice) and use it to make a loop around the first column of milk yarn. Knit to the end of the row with single crochets. When you get to the edge, do not turn the bracelet over, continue to knit in a circle with single crochet, as if tying the entire bracelet. When you get to the beginning of the green edge, cut the thread and secure it. You can make the bracelet wider, for this, before tying it with single crochets, knit another row or two in your favorite color.


We knit a button
In order to make a fastener, I suggest you knit a button. Take green threads and, having typed 13 stitches, knit 14 double crochets in them. Cut off the thread and hide the ends. Place a button in the resulting circle. Now thread the green thread into the tapestry needle and use it to stitch along the edge of the circle, and begin to tighten. Sew the resulting button to the edge of the bracelet that does not have a loop. That's all, another bright accessory is ready for the summer! Wear it with pleasure!
If you like to knit or just like knitted things, you may find these bracelets to your liking.
Some of them are quite simple and can be done with children in a small amount of time, some are complex for craftswomen.
Cute and delicate thin crochet bracelets with pearl beads:
A curly bracelet that looks like a leaf with a clasp - a wooden bead:  A cute bracelet that looks like roses and their petals:
  Shiny Knitted Butterfly Bracelet:
  Knitted bracelets with names and funny phrases for every day are suitable for a party with friends, for going to the store, and even for a wedding! The main thing is to choose the color, texture of the threads and sew on the words printed on the fabric. You can even sew on small drawn pictures if you buy a cloth, a couple of brushes and acrylic paints:
  Weaving idea for a bracelet knitted from three chains, consisting of double crochets and air loops:
  A bright series of multi-colored bracelets for children with decorative buttons:
  Blue and blue flowers are separate elements, collected on the links of the chain:
  You can knit such a bracelet from any center of the napkin patterns:
  Here is another interesting knitted bracelet:
  Double crochet and single crochet circles, collected in one bracelet chaotically:
  Light, juicy bracelet with a knitted button:
  A huge ornate bracelet with buttons (photo below).
Personally, I don't understand why not remove the huge clasps, replacing them with invisible ones. Although, perhaps, the author's goal is to present buttons as an element of decor ... Hmmm, personally, I think that the accent in this bracelet should be precisely on the openwork pattern interspersed with green beads. Large, shiny buttons, if you really want to, can be sewn on a simple surface.  From the same series:
  Gorgeous bracelet with toy houses and trees:
  Red openwork bracelet with pico (these are such small balls made of air loops, giving the pattern a playfulness):
  An easy way to knit a bracelet bracelet:
  White openwork bracelet with a pineapple pattern with the addition of mother-of-pearl beads, pearls and chains:
  Regular crochet crochet posts decorated with embroidery:
  Cute bracelets for girls:
  Air loop chains plus metal fittings:
  Knitted bracelet "almost a week" 🙂 or "rainbow" - as your heart desires. You can wear it one at a time or create a new pattern by varying the number of bracelets and their location:
  Finally, a very simple bracelet: knit any pattern like a scarf. The width of the "scarf" = the girth of your wrist, make as many rows of height as you like, join with a seam like a sweater sleeve and here it is, a bracelet:
Any representative of the fair sex knows that everything is important in the image of a woman - from underwear to accessories. Therefore, many ladies spend a huge amount of time shopping. There they look for lipstick to match the shoes, a handbag to match the color of the cap and bracelets to match the dress. It often happens that you can't find a really suitable accessory.
Knitted bracelet
This happens when a woman chooses an unusual color for her outfit. In this case, you can make the accessory yourself. Recently, a knitted bracelet has become an increasingly popular accessory.
At first glance, it may seem that making it will be a difficult task, because you need to be able to knit various patterns, but this is far from the case.
A knitted bracelet can be made in one evening if you have all the necessary tools and materials.
Materials (edit)
You can knit a bracelet with knitting needles or crochet from threads. The tools should be small in order to make a delicate bracelet. Knitting needles and a hook of sizes 2,3 and 4 are suitable. The yarn for making the bracelet should be taken from cotton. Woolen bracelets will be appropriate for health purposes. In case of dislocation, it is enough to put on such an ornament and the hand will pass in less than a day.
The knitted bracelet can be made in multi-colored or solid colors. Beads can be knitted as decorations.
Progress
- We make a blank.
- We knit the product.
- We decorate the bracelet.
Making a blank
For the manufacture of this product, we need a cardboard part from scotch tape or toilet paper, if the needlewoman has thin hands or it is a children's bracelet. Cut off the circle to the desired width. Now it needs to be made waterproof. To do this, the cardboard can be tied with tape or painted with varnish. The second method is more preferable, because the varnish will keep the cardboard more reliably. In this way, you can use a varnish that is not needed.
We knit the product
As soon as the varnish dries, you can start knitting the product with knitting needles from threads. We collect air loops. There should be enough of them to tie our bracelet and not pull the thread. We knit regular single crochet stitches around the entire circumference. Try not to pull the thread too tight. We knit with knitting needles from threads such a circle according to the size of the workpiece.

Then we knit another one of the same, only we pull the thread harder. This will be the inside of our decoration. We connect the two parts together around the workpiece. Crochet. Here you can use a thread of a different color, then you get the edging.
Now you need to knit the decoration of the product
Take a thread of a different color and knit a separate pattern. Here you can apply all your imagination and skills. You can associate a pattern with flowers, or with geometric shapes. You can immediately attach the stripe pattern to the model, as shown in the picture. You can use two or more colors. If the pattern is knitted separately with knitting needles from threads, then it must be sewn with a needle and thread of the color from which the decoration was made.

It is worth saying that even a novice needlewoman can make such a model with knitting needles from threads. You can involve a child in making jewelry. Knitting from threads will teach him perseverance, instill in him a love of needlework.
Making such an ornament for hand with knitting needles from threads is a very profitable activity. The materials for the bracelet cost just a penny, but the result is a real work of art. Such a piece of jewelry can be worn to work, worn on a visit or at an exhibition. It will look great with an evening dress or a summer suit with shorts. Many such bracelets can be made - for every type of wardrobe. They can always be disbanded and remade if they are no longer needed.

We should also pay attention to the fact that this decoration can be easily washed both by hand and in the washing machine. It is important to follow the wash cycle suitable for this type of thread.
Redesigning the bracelet
Such an ornament can not only be made from scratch, you can remake an existing bracelet. If there is a chain decoration at home that has long gone out of fashion, then it can be given a new look. You will need a hook size 2.5. To get started, knit a thread on one side of the chain and start knitting in a simple way, without a crochet. Pull the thread from the other end of the chain. Now knit another row with single crochets.
From the next row, knit the loops along with the chain elements. Once you get to the end, work two rows with regular single crochets. The ends of the knitting must be fastened to the last loop of the chain. Secure the thread. To knit such a piece of jewelry on hand, it is important to choose the right thread: it should not be too thin, otherwise the bracelet will look ugly, but it should not be too thick, otherwise the chain will not be visible and the whole meaning of the jewelry will be lost.
Don't forget to make a clasp if necessary. It can be removed from other unnecessary jewelry.