Hedgehog from seed applications step by step. Using all sorts of materials to create an hedgehog craft. Needle from seeds
Crafts from grains, cereals and various seeds with their own hands - a great way to take children with benefit, because work with such natural material works finely trains a small motorcy of the hands, which helps to improve the overall and speech development. Also such classes help to raise patience in children, effort and perfection.


Features of creativity using natural materials
Not only schoolchildren can make crafts from the cereals with their own hands, because such a joint creativity is suitable even for young children. True, it will be necessary to be non-extent with the kids so that they do not harm themselves.
So, as a material you can come in handy:
- all sorts of cereals and grains - buckwheat, rice, millet;
- legumes - peas, lentils and multicolored beans;
- any seeds and seeds - watermelon, pumpkin, melons and sunflower, etc.

You can even take. Also during the work will be needed: dense paper or cardboard, glue, scissors, fabric, plasticine, patterns of various patterns, decorations (at your request).
The best crafts from cereals, seeds and seeds with their own hands is the applications and paintings. You can invent stories with a child yourself or use some ready-made patterns and transfer them to paper. The complexity of the work should depend on the age of children, consider that the baby should be interested in making the craft itself, albeit with your help, but not to be quite aside.

Create appliques and paintings with your own hands
The topic of work can be any. But very beautiful and original trees are obtained from grains and other natural materials on the topic of spring. Spring landscapes (crafts made of watermelon seeds and cereals), lush flowers (especially good flowers from pumpkin seeds - asters, sunflowers, snowdrops) are excellent ideas for children's creativity.
The more you use different croup, seeds and seeds, the better, because they all not only differ in their size and form, but also in color and texture. That is, you will have a huge space for fantasy and creativity. And if for your crafts from the grains, some special colors are needed, you can always paint your materials using watercolor paints or gouache.
Try starting with simple appliqués. For example, as crafts from pumpkin seeds can make a basket with flowers.
- Draw the contours of the basket on a sheet of thick paper or cardboard and spread them with glue.
- Next, lay out pumpkin seeds on these contours so that there is a bulk basket.
- Draw flowers in exactly the same way - it can be sunflowers, asters, poppies, chamomile, snowdrops or any others. Use for their creation of seeds of various sizes - pumpkin, watermelon, sunflower seeds.
- Camerals of flowers can be made from beads or fall asleep with fine litter.
- Draw your bouquet and paint the basket in brown. You can decorate the applique of sequins or stickers, add some parts from plasticine.
On the subject of spring it is easy to make a vase with flowers - just as a basket. So that children's crafts from seeds have been kept for a long time and did not appear, you can sprinkle their hair with a lacquer or cover with a transparent nail polish.
Favorite occupation for children will be the creation of applications and paintings depicting various animals, birds or fish. Come up with the story with the child and embody a fairy tale using a craft from pumpkin or watermelon seeds, as well as other all kinds of materials.


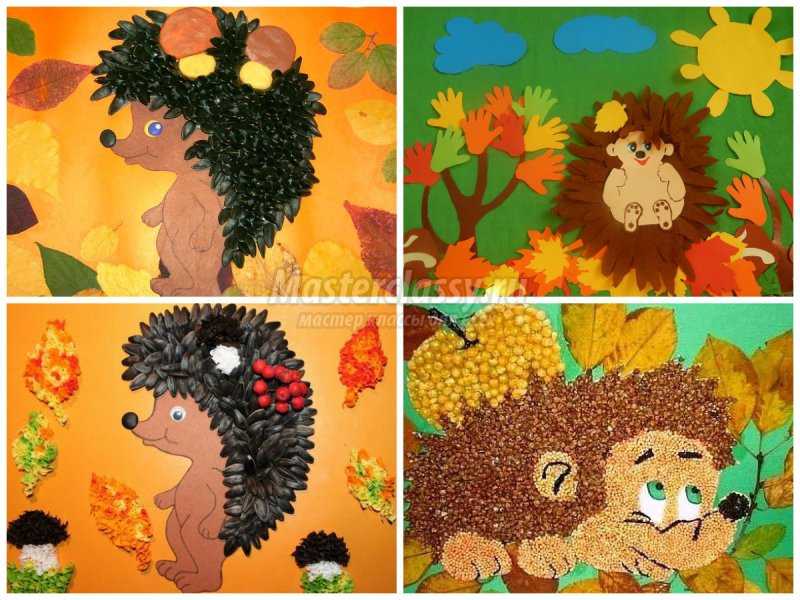
Incredibly cute fish, hedgehogs, bees, snails, clarops, cats and other animals. See how easy it is to make a picture of the seed with a hedgehog.
- Print the image with the image of the hedgehog or draw it yourself.
- Apply a good layer of glue on my back and begin to gradually attach seeds on it (it can be watermelon seeds or sunflower seeds).
- It is necessary to glue seeds so that they are all directed by sharp tips in one direction.
- The rest of the body of the Hedgehog can be simply painted, and to striking the mushrooms or fruits made from plasticine onto the spines.
But what can be created as an interesting picture with peacock with watermelon seeds, as well as semolina and corn cereals.
- Draw a peacock on thick paper or print a ready-made template (even the usual coloring is suitable).
- Easy glue round ends of feathers and pour them off their cornframe. Do the same with the paws of birds.
- When it snacks a little, slid off the remnants.
- Decorate the feathers with watermelon seeds, tightly gluing each of them.
- After some time, cover the whole rest image of the peacock with glue, and pour it off with semolina, clearing the contours with toothpicks.
- The head can be painted, and the picture is decorated at your own discretion. As you can see, crafts from watermelon seeds are made very simple.


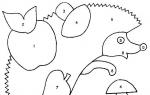
One of the first techniques of creativity with which the child get acquainted at the earliever, in the younger group of kindergarten, is applique - "Hedgehog", "Butterfly", "House", these are the simplest examples that the baby can do on its own, using affordable and safe materials. It is not at all necessary that it was, because the child can use any material accessible to it - natural materials (cones, autumn leaves), cereals and seeds.
Hedgehog from Leaf: Applique
Working on the cradle "Hedgehog of Leaf", Applique Patternyou can come in handy only if you have chosen a complex pattern. As a rule, templates are used where it is necessary to observe the clear boundaries of the parts that you have to lay out from individual fragments. When it comes to a children's handicraft, you can leave templates aside and guided only by your fantasy. To make it easier for the child for the first time to work on such a picture, you can paint the contours of the future craft with a pencil. In some examples of working with natural materials, in particular, the leaves are not allowed to use scissors, and before the pediatrician of the kindergarten, the task is not just to glue the leaves in the correct order on the basis, but also to select the material of the appropriate size and shape.
When for the first time is created autumn Applique "Hedgehog"It is necessary necessary to provide the preschooler to provide scissors so that it could, if necessary, firing the edges of the elements, having received the form you need. This is especially necessary when forming a muzzle and torso, as well as the paws of our forest animal.
Divisions of various difficulties using autumn leaves make children and in kindergarten, and in primary school classes, choosing the appropriate complexity. This work is suitable for the senior and preparatory group, as well as the first class school. Thus, the guys develop fantasy and spatial thinking, they learn to seek something new in the usual things faced every day. Today, fulfilling the schoolboy will lay out the leaf in the right order, and tomorrow walking through the park and collecting material for future works, in his imagination the most various images will be born - from this leaflet there will be a face of a cat, and this one can use for the wings of a butterfly or birds.
Before starting the performance, show the images of the hedgehogs stored from the network: What cute are these animals with a sharp face and barbed fur coat. Now decompose the collected leaves on the work surface, and offer to choose those that are suitable for our craft. For example, for needles it is necessary to choose toothed small leaves, such as birch.
Autumn Applique "Hedgehog"

The work is carried out using a tube-acting, to which the square of the paper is "winding", and then fixed on the working surface on glue or plasticine. The square is fastened to the base so that its mean is glued, and the edges stick out up, so it turns out a bulk carriage.
For carriage, only very thin paper should be used, which would be easily frozen as we need. For children's crafts, one-layer napkins can be used, which should be cut into small squares - with a side of 15 mm.
If you are preparing the material so that the child gets applique "Hedgehog" from colored paper, the squares should be chopped yourself. You can mount the squares to the surface on the glue or use a more plastic base - plasticine, which must be applied to the cardboard surface.

Hedgehog for appliqué It is necessary to prepare in advance, draw the contour of the forest animal on the cardboard: a torso, sharp face, spines and legs. In the technique of a carriage, we will only make a barbed fur coat, and draw the muzzle to the felt-meters. And among the barns we will have a small forest apple, which we will decorate by the quasan squares.
To fulfill the work we need:
-
Hedgehog of watermelon seeds: Crafts for children. Step-by-step master class with examples of children's work, creative tasks.

Hedgehog from watermelon seeds and plasticine: handicrafts for children
Watermelon is a favorite delicacy of children and adults. And what to do with watermelon seeds? Of them make watermelon oil, watermelon flour and, of course, children's crafts. Let's make a hedgehog from watermelon seeds today.
Hedgehog Materials and Tools
To work, you need to cook:
- color cardboard
- plasticine,
- pVA glue,
- seeds of watermelon,
- black marker.
Step by step description of the manufacture of hedgehogs from watermelon seeds
Step 1. Preparing the harvesting for the execution of the hedgehog
What you need to do at this stage:
- Cut the template for the harvesting for the hedgehog from the cardboard of yellow.
- Stand in a pencil, separating the body from the head.
- Cut a circle of paper or cardboard of black color, stick onto the blank.
That's what you get as a result of the first step.

Step 2. Cooking on the silhouette of the hedgehog layer to which we will attach watermelon seeds
Roll the ball from plasticine black or dark gray, stretch it with her fingers on the billet in the body of the body. The layer should not be very subtle, otherwise the watermelon seeds are not attached.

Step 3. Decorate the hedgehog barns from watermelon seeds. We draw up the hedgehog.
- To stick seeds in a plasticine with a slope towards the back, because the hedgehog of needle is growing under such a direction. Start their fastening of a tedious of the tail and so a series of chained to gradually reach the line separating the body from the head.
- Black felt-tip pen draw eyes and eyebrow.
Step 4. Lepim the fungi for the hedgehog.

For the manufacture of fungi we need:
- roll small balls from brown plasticies.
- roll from white plasticine sausages.
- Connect balls with sausages, slightly finishing the ball.
We get these mushrooms.
Step 5. Attach the mushrooms on the back of the hedgehog.
Attach the fungi on the back of the hedgehog with light presses. Hedgehog is ready!

Examples of children's work: our hedgehogs from watermelon seeds


Creative tasks for children
- What kind of natural materials can I make a needle hedgehog?
- What do hezhi eat? What can I give our hedgehog? What would you attach him back?
- Think from which materials can you make a similar hedgehog? What do you attach him to the needles? Make a hedgehog for your imagination!
Good luck in creativity! Prior to new meetings in the heading "DIY" site "Native path".
Get a new free audio course with game application
"Development of speech from 0 to 7 years: what is important to know and what to do. Cheat Sheet for parents"
Click on or on the coup cover below for free subscription
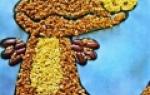
Good day dear friends, I would like to share with you the original idea of \u200b\u200bmaking a hedgehog with your own hands from seeds. Such an exercise is perfectly suitable for both the kindergarten and to school and will not leave anyone indifferent. Autumn holidays have already passed, but they will still have an excellent opportunity to make such a hedgehog, and if you can't wait, you can do it for yourself. The author of this master class on the manufacture of Hedgehog is Lyudmila Finieva and her son of Arseny.
For the manufacture of hedgehog we will need:
* Foil.
* Plasticine.
* Seeds.
* Twine.
* PVA glue.
* Acorns.
* Leafs.The method of manufacturing hedgehog:
For the manufacture of Yozh, we first take foil, you can use Foil for example from chocolate. We take foil and begin to crush her to get a lump, and from another piece of foil we will create a muzzle to our hedgehog. To secure the muzzle with the torso, we rush these two blanks with a large piece of foil and get the result as in the photo.
The shape of the hedgehog is ready, now it is becoming cracking plasticine. The body is sealed with black plasticine, and the muzzle is brown.

I will place a face with a twine, take a little twine and lubricate it with PVA glue and then glue. The foundation itself is also needed to lubricate with glue and then we wake the twine. Best twine applied from the nose. When the muzzle is ready and dried, but you can start making the body, sticking the seeds in a checker order as it is most as possible so that plasticine can not be seen. Plasticine is better to use the color black, then it will not be so possible.

From plasticine, make eyes and spout to our hedgehog.

We will make our hedgehog fungus from the acorns and plasticine, add leaves and decorate the back of the hedgehog.


Look at what a cute and funny got a hedgehog, I think that the author of this craft will take a worthy place in the competition.


Napkins of brown, purple or other dark color for fur coat, red, yellow - for apple
Plasticine