Mimosa twig do it yourself on the eighth of March. Mimosa from corrugated paper. How to make mimosu with your own hands. Video Master Classes
Good day. Consider a wonderful master class on creating mimosa from the needlewoman Victoria Katamadze. Acacia silver translated from Italian sounds like "Mimosa". One of the first spring messengers is the appearance, in flower shops, bouquets of acacia silver (as we call it mimosa). With the appearance of mimosa in the apartment there is a smell of freshness and spring!
Inspiration on creating mimosa from wool and silk served this bouquet

To create a branch of mimosa we will need:
1. Polystyrene balls
2. Wire with a diameter of 0.3 and 0.5 mm
3. Paper corrugated green or Japanese production paper for silk floristics
4. semolina cereals (for the first versions of mimosa)
5. Wool for felting yellow (for the second mimosa)
6. Scissors
7. Acrylic paint №119 (for the first mimosa version)
8. Glue PVA
9. Silk treated with gelatin
10. Paint for Batika Davydova No. 13, 14 and 29
11. Pipette
12. Synthetic tassel
13. Pinzet
14. Soldering iron, double and single knife
15. Rigid tires

For pattern, create a herbarium sprigs mimosa (twig and leaves under the scotchpiece on watercolor paper)


Mimosa leaves under scotch tape on watercolor paper
By the living sheet mimosa, make the pattern and sander the entire twig (to know the exact location of the leaves)

Overlap green paper wire with a diameter of 0.3 mm and cut on a length of 3 cm long.
For one twig (brooches) we will need 57-60 overlapped paper wires for 3 cm long.

We will need polystyrene granules
You can disassemble the foam on the balls and throw them into boiling water (so that they become more round) or use the filler for furniture

For the twig we need 57-60 balls of different diameters and the same amount of wire

Purify the ball with a toothpick, the wire tip lubricate the PVA glue and insert into the ball.
This is the basis for our flowers, we need it for the first version of the Mimosa (using semolina) and for the second option (from wool)

Lubricate the ball glue PVA

Omit, lubricated glue, ball in the semolina cereal

Uniformly covering, lubricated PVA glue, semolina ball (first versatility of mimosa)

Covering semolina all balls

Color balls, coated with semolina, yellow.
You can paint watercolor, gouache, batik, acrylic paints.
In this case, artistic acrylic produced by Gamma No. 119 was used

On wire with a diameter of 0.5 mm, with the help of corrugated paper (or paper of Japanese production) and glue, begin to collect a branch of yellow balls

We glue the first ball with a diameter of 0.5 mm and overlap 2-3 mm paper, we glue the next ball and overlapping, the main skeleton, 2-3 mm and the trail. ball and so until the end of the twig

On one branch we collect from 10-15 balls

For one twig mimosa (brooches) we collect 5 small twigs

We start collecting a large twig from small

We collect all small twigs in a large branch

For the second version of Mimosa, we need to need wool to felting yellow.
Cut the wool very finely into the lid.

Lubricate the ball with PVA (as in the first version)

Omit lubricated glue ball in finely chopped wool

If the wool is poorly adjacent to the glue, add it to the ball with your fingers

For one twig of mimosa (brooches), we collapse in the wool 57-60 balls

Collect twigs from balls

For one big twig (brooches) we need to collect 5 small twigs

Of the little twigs we collect big

For the manufacture of leaves from silk we will need:
1. Paints for Batika Davydov № 13,14 and 29 (you can use the paint for a batik gamma (not acrylic) mix yellow with a drop of black or blue. Mixing these colors, we get green)
2. Cold Water Jar
3. Synthetic brushes
4. Pipette
5. Pinzet
6. Green paint breeding capacity
7. Rectangular slice of twigted silk (I used the Atlas)
8. Old newspaper or paper on what we will paint our silk

In the glass mixed paint for batik №13,14 and 29.
Slice slice to the paint and put mimosa to the natural sheet. It turned out close to natural sheet color.

The rectangular slice of nurtinous silk is lowered into a cold water capacity and expand on paper (or an old newspaper)

Color, wet, on one side in green

Turn over the cloth using tweezers and paint in green on the other hand

Paper leaves stencils
In the stencils cut out the leaves.
For the twig of the first option - two small sheets.
For a twig of the second option - one big leaf

The sheet is folded in half, each small lateral leaf (on both sides) is cut by a Christmas tree.

This is a sheet.

We cover the wire with corrugated paper length: for a large sheet-13 cm, for a small leaf - 9 cm

Wire lubricate the plow glue and glue to the sheet

Left sheet of silk, right real sheet mimosa

To corrugate leaves, you will need:
-Pashank
- Road knife
- Double knife
-Lest tires

What does a double and single knife look like

On tough rubber, with the front side of the sheet, we carry out a central vein with a double knife

On rigid rubber, with the front side of the sheet, we spend the same knife in the center of each side leaf.
For comparison in the photo, on the left alive sheet mimosa

To the finished twig mimosa tie the leaves with a thread.

First option:
We bind one small sheet, overlap the main stem corrugated paper with green paper on a centimeter and tie the second sheet.

Steel, after tied leaves, overlap to the end of the corrugated green paper

The mimosa twig (the first option, using semal cereals) is ready.

Mimosa twig (second option, using wool for felting) is ready.

Mimosa twigs are ready!

Spring bouquet mimosis. Master class with step-by-step photos
Chichkina Elena Vasilyevna, Educator, MBDOU "Ermakovsky kindergarten №3", p. Ermakovskoye, Krasnoyarsk Territory.
Description: This master class is designed for children from 7 years, teachers of additional education, parents and creative people who love to create beautiful and unique things with their own hands.
Purpose: Souvenir, gift, bulk souvenir, home decoration.
What do not say, and Mimosa is a family-friendly flower. After all, they love her not only for wonderful flowers, but also for her special unique spring beauty. From a long time, it was worshiped as a symbol of spring, youth and purity.

Mimosa-beautiful flower,
Heat and hope of creatures
Spring awakening sprout,
And to the new heights of the rapid ...
Like gold beam at dawn,
Through the winter stupus and ice,
Mimosa, all in sunny color,
And the smell of her, as if honey ...
And give men mimosu,
All women in March, in spring,
Not as a sign of the end of frosts,
And in the sign of the admiration of you ...
Purpose: Making a spring bouquet of mimosis with their own hands
Tasks:
- Continue acquaintance with the time of year: Spring;
- to teach souvenirs from threads for knitting and throwing material;
- develop interest in artistic creativity;
- develop a small motorcy of the hands, the eye, fantasy, aesthetic taste, composite skills;
- fix the ability to handle the instruments of labor - scissors, threads, glue;
- to form labor culture: learn accuracy, the ability to carefully and economically use the material, contain in order workplace;
- to bring up independence, patience, preferabity, sense of satisfaction from the habit to bring the case to the end;
- educate love and respect for parents and relatives, the desire to present a gift made by them, made by their own hands.
Manufacturing technique:
- Designing
Materials and tools:
- 2 scissors;
- Wire;
- Yellow knitting threads;
- PVA glue;
- line;
- Corrugated paper green.

Safety regulations when working with scissors
1. Work well-adjusted and sharpened scissors
2. Signs must have stupid, rounded ends
3. Tribes put the rings to yourself
4. Protection for the movement of blades during cutting
5. Do not leave the scissors revealed
6. Start scissors rings forward
7. Do not play scissors, do not bring to face
8. Use scissors for the purpose
Rules of safe work with glue
1. When working with glue, use the tassel if it is required.
2. What is the amount of glue that is required to perform work at this stage.
3. The glue is cleaned with a soft cloth or a napkin, cautiously pressing it.
4. Clean and hands after working well-by-water with soap.
Progress:
We take 1 scissors and motors of yellow threads, open scissors and wind the threads on the scissors, about 25 revolutions.

We close completely scissors and move the threads to the tip of the scissors

Fasten the wire and tie


We take the second scissors and cut the threads, as shown in the photo

We turned out such a wonderful ball on the wire, we make such balls about 20 pieces, so that Mimosa turned out to be lush.

We take green corrugated paper metering strips of 6 cm long and 1 cm wide, they need so much how much we got the billers. Cut them.

We begin to wrap the stem of our floweries, pre-flaming the PVA glue, so that the skeleton stuck to the wire.

We do this work with all the flowers.

We take corrugated green paper, fold it with "accordion" and measure 0.7 mm and cut off


With this paper tape, we will enroll our mimos - while collecting flowers in the twig

We connect with green ribbons and glue our flowers

We add 1 flower, pre-flaming glue. We do this work until it turns out a lush twig mimosa


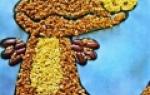
Of all the colors most of all kids and adults love to do mimosu. These yellow little balls with green "branched" leaves create unusual bouquets, postcards, paintings. Embroidery, create from satin ribbons, knit, tinted, burn out, but especially interesting to mimosa of paper. DIY children can make individual twigs and even build whole bouquets.
Appliques with kids
Kids (1-3 years) do not like to wait, so prepare a pre-small landscape sheet, cotton pad, pva glue, toothpick (angles cut immediately), green double-sided paper (chopped on thin stripes).
Now show the child how to make mimos with your own hands from the watt (it can be replaced with a soft napkin). Tearing a lump, rolling with fingers, dip in glue and stick on paper. Once all the balls take, place a spread-toothpick with leaves between them. The child will remain only with finger paints to paint their mimos.
With children from three to four years, practice the technique of Ramblering. Thanks to it, there are volumetric mimosa of corrugated paper, and children develop prepare yellow, green and brown paper (corrugated, cottka or, in extreme cases, double-sided color), PVA glue, cardboard. From the brown strip kids should roll the sausage and glue the middle of the sheet. It will be a branch.
Mimosa in the technique of Rampening
Glit small branch sausages to it. Then from yellow squares (2x2 cm or 1.5x1.5 cm) roller balls. Let the child first oversleep the leaflet, then begins to compress, to move the corners and only then the resulting lumps are twisted.
The older the child, the squares you can take a smaller size. Immediately from the green paper cut the leaves, bend and cut into narrow strips. Glit a few leaflets to the twigs, on top of them there are mimosa balls. They can be glued by the second layer.
Between mimosa or on top of it put another couple of leaves. The background can be scratched with paints or pencils. Place the picture in the frame, hang on the wall. On this style, you can make mimosa of corrugated paper, like artificial flowers.
To do this, we need a spheria, green and yellow paper or napkin, glue. Cut wire on small segments.

Mimosa branch
Then take the square of the napkins, put the wire on it, begin to flicker paper, forming a ball. Wire gluild green paper. To form lush balls, swinging them into the glue, and then plunge into the painted yellow semolina camp. Flowers leave to dry, but still make leaves.
You can draw a sheet according to the type of fern and each branch is still cut into small stripes. For another option, cut the usual wide sheet, like a tulip, cut on strips. But there is another third version of the manufacture of leaves. The long cut of corrugated paper is cut into narrow strips.
Now see what a mimosa sprig will get out of paper. Take a skeleton, stick the edge of green paper on it, have a couple of balls, screw the wire and wind the spirals with leaves. If you do everything right, then the sheets strips will look at different directions.

So that the balls looked organically, the wire gently pierce the green paper, and then wrapping her twig. In some places you can insert balls of balls. To do this, connect together a few wires with flowerflocks. By this plan, you make the rest of the branches, put in the vase and get a whole bouquet. Such mimosa of paper from afar as a real one.
Flowers in a quilling technique
In this technique you can make mimosu three ways.
- A strip of yellow paper twist in a tight roll (a circle that the end of the strip is gliding). The diameter of such a circle is no more than five millimeters. This type of colors is suitable for creating small unacceptable flowers, which form the vertex of the twig.
- You also do tight roll, which then slightly push forward, forming a cup.
- Striped yellow paper cut into narrow segments. Then winding it into the tight roll, glue the end, and the strips are all pretty shake. It turned out the blossomy flower.
Such a mimosa of paper is done easily, but is suitable for postcards, vases or paintings. Let's start with the creation of a flower. On a skeleton, wrapped with green corrugated paper, glipe flowers made in the third way. At the same time, some balls are very flushed, some retain the form of bud. Mimosu glue tightly to each other on a wand on all sides.

Under the flowers gluing the leaves. In this case, a wide long sheet will go, cut on narrow segments. To add realistic, leafleka bend vertically, and each strip is rounded with scissors or pencil to create a visual wind effect.
Mimosa with tulips
Of the paper, you turn out beautiful only require greater hardness, attentiveness and perfection. Consider how to make mimos of paper with tulips.
- Prepare the pattern of the paintings, drawing the sky, the lumen of the sun.
- Cut out the paper from paper or draw watercolor.
- Prepare mimosu, made in the third way.
- Make a few twigs for mimosa. To do this, take the green wire, connect to the twig and wrap or corrugated strip.
- Cut immediate leaves for mimosa and tulip.
- Make a few branches in advance (I mean Mimosa of paper).
- Tulips do as follows. We put together the squares of the paper on each other, roll into the tube to the middle, forming a triangle. Now every edge is adding to the top of the triangle and twist in the petal. Bold the petals to the bud on the stem so that the edges are convex (twisted).
- Collect tulips on the stem.
Now you have twigs in the picture and stick to the sequence. We draw up work in the frame and admire the masterpiece.

Mimosa from paper: Create a miracle with your own hands
Bouquets can be made entirely in Quilling technique. To do this, find a beautiful photo with a vase and print it on the printer. Cut, glue the picture. To create a volume, sometimes pick up the fabric in the color of the vase, cut into its form thick foam rubber, tighten the cloth, decorated and glued to the cardboard.
Now look, how to make mimos of paper in the picture. On the canvas with a pencil, the direction of the branches is slightly planned. You have a trial version of flowers without glue. Work with the direction of branches.
As soon as I liked the bouquet option, take a picture of it and work on it. Get started to glue the first layer of colors and leaves. Then increasing the volume due to the subsequent layers. Sometimes leaves are inserted between the balls. At the base of the vase, glue more leaves whose bending will allow you to hide the seams or irregularities. Despite its simplicity, the picture of 30x30 centimeters may require a subtyreach of work. But the result stunned by its realism.

How to make mimosu do it yourself on March 8
Especially loved postcards for spring holiday with mimosa. Such work more often make schoolchildren. Bobbins from scotch, corrugated cardboard, crepe paper, glue, white watman will be needed for work. First you prepare the basis of the postcard. Bobbins are blocked from the inside and outside the corrugated cardboard.
Make tight roles and on the one hand glue the sidewalls by ringlets. Now we glue two rings, it turns out an interesting handicraft. Mimosa from paper is created in the third way (fluffy balls). Print leaves on the bottom ring, with top there are balls. Flowers must be on top of the eight, and not fall into the ring. If the leaves do not withstand the weight of the balls, then make ready-made mimosa twigs according to any described method above, stick to the ring.
Now on the Watman, circle the o'clock the resulting eight, cut out. In the upper ring, write your congratulations and get a cradle at Watman. It turned out a gorgeous handicraft with congratulations and flowers.

Brief results
The most popular flower for crafts is mimosa of paper. You can create unusual souvenirs, postcards, paintings, bouquets with your own hands. Try to make small crafts with mimosa and you will see how bright work with it.
For each of us, gentle, fluffy mimosa is a symbol of awakening spring and femininity. Let's try to do, Mimo do it yourself?
Of course, before you take for work, you need to know the secrets of making mimosa. Therefore, today we have prepared a selection of master classes for you. Where do you learn how to make mimos with your own hands.
Mimosa do it yourself In the form of a small elegant broach or a small bouquet, it will serve as an excellent little surprise to the International Women's Day.
To make mimos do it yourselfOf course, you have to work a little bit, because small yellow fluffy requires accuracy and patience.
What can I make mimose from? For example, from wool for filling, from yarn for knitting, from polymer clay with flockplant spraying, from foam balls, which are processed in the yellow-colored semolina, and even from ... balloons.
Today's selection of master classes will help you make sure that you can make Mimos with your own hands you can the most in many ways.

Mimosa do it yourself. Four master class with step-by-step photos
1. How to make mimosu do it yourself, master class on floristry from Alena Kryuchkov.
2. Mimosa do it yourself from polymer clay, master class From Lyudmila Burakova.
3. Mimosa do it yourself from yarn, master class From Olga Pryenskova.
4. Mimosa do it yourself from threads, master class from the "Master of Needlework".
How to make mimosu with your own hands. Video Master Classes
Mimosa from Foamyran:
Mimosa is the perfect addition of the spring bouquet or composition. After all, Mimosa for many years was considered the main symbol of spring. From bright yellow twigs made up wonderful bouquets, and also portrayed on greeting cards by March 8. Bright fluffy inflorescences Mimosa will add your work brightness and sunshine, and also fill empty spaces between other colors in the composition. Such colors inserts can be created easily with your own hands. And in this lesson we will show an interesting and simple way to create mimosa. The main components for the manufacture of mimosa will be hot glue, semolina and corrugation. Flowers-balls form from glue, the invoice is pressed by the semolina, well, and the stalks and leaves will be made of green corrugations and wires. For a detailed description of Mimosa's manufacturer, read in this photo class.
But first prepare the necessary tools for work:
- glue thermo-gun;
- transparent glue;
- yellow gouache;
- semolina;
- wire;
- scissors;
- synthetic 3-handed brush;
- pVA glue;
- green corrugated paper.

Stages of crafts
Step 1. We start with the creation of a flowering, we all need 27 peddlelook to create one twig. We form small loops at the ends of wire segments. The top of the flower can be toned with a thin strip of green corrugations. 

Step 2. When the stems are ready to go to the next step - the creation of flowers. Heat the glue rod in the thermo pistol. We apply on a wire loop a small drop of hot glue. When it completely freezes, we increase the flower diameter by repeated layer of glue. Now the flower has acquired the desired diameter. 
We appline a thin layer of PVA glue and lower the harvesting in the semolina. 
The first flower is ready. 
On the rest of the stalks, we grow exactly the same flowers. 
Step 3. Collect the billets of mimosa gouache yellow. We leave them for 15-20 minutes to dry completely. 
Step 4. In the meantime, the flowers are dried, modeling the leaves. Cut from the green corrugation four rectangle size 5 * 2.5 cm. Cut them diagonally, fold pieces of paper so that the bodies are directed in different directions. 

We glue them along the cut line, give the shape of the elongated leaf, we cut off the contour and give a beautiful curved shape. 
Step 5. Next, we form from the three or four stems of the bundles and begin to collect the mimosa twig, fixing them with hot glue and a strip of green or brown corrugations.