Registration of postcards on February 23 inside. Mast must be pressed between two chocolates
In anticipation Day of Defender of the Fatherland The relevance of the issue grows at times. The most valuable gift for men will be the thing made from a pure heart, with their own hands. In this article, tell how to make a postcard yourself by February 23.
The main thing in the article
Postcards by February 23 in a kindergarten of paper: photo ideas and instructions for execution
In the kindergarten kids only begin to develop creative skills. Homemade postcards for the holiday for dads, grandparents or brothers can be for kids depending on the age of children you can offer the following gift cards that children will be able to do themselves.
For the smallest
The smallest can give dads drawn postcard. It may be brush strokes with different paints or finger drawing. Relevant postcards with baby palm. The main thing is that the teacher or mom signed children's creativity, and the baby will gladly present his own pope gift.
For the middle group
Children from the middle group not only draw, but can also cope with glue, so they can be offered to make an applique as a gift for February 23. If the kids are already taught to handle scissors, then let me cut the items for the future postcard yourself. If they have no such skills yet, then prepare the necessary blanks for the composition in advance. Application can be folded in the form of a rocket, ship, tank or car. 
For senior group
Babes from the older group can prepare different postcards on February 23. The following options will be excellent:
- Drawn postcard.

- Applique.

- Creativity using Manka, which is glued to glue and paint different shades.

- One of the new directions is the compositions of the napkins.

Any of the options will look great and promptly pleases the defender of the Fatherland, which will get such a self-made postcard as a gift.
Postcards for the Day of Defender of the Fatherland to School: Photo Instructions
We offer schoolchildren of primary classes to make postcards in the form of medals. They may be simple or complex using multiple elements.
Simple gift medal
We prepare the following tools and necessary materials:
- pattern under the medal;
- decorative parts;
- color pencils or paints;
- scissors;
- lace or ribbon for medals.


Medal by February 23 in Origami
For the manufacture of such a gift you need:
- color cardboard;
- green colored paper of two shades;
- scissors;
- glue (preferably in pencil);
- lace or ribbon.

How to make your own hands postcard dad: templates and photos
Run for your favorite dad you can postcard with. The idea is original and not heavy in execution, so even a child can cope with the manufacture of such a gift.  To work you need to have:
- color cardboard;
- paper (blue, red, white);
- scissors;
- line;
- glue, for children it is better to take in a pencil.
Now you need to do the following workpieces:

How to make a bulk postcard on February 23?

There is nothing difficult in gluing a volume postcard. We describe its step-by-step making. The main element of the postcard will be a boat. For a bulk boat, you should prepare a color cardboard of blue. It will be the basis. Next, fold the leaf of white paper in the pressure, on the template to make a boat. 
Line designation:
________ - lines for cut;
_ _ _ _ _ _ - lines for bending.
For decor, you can use the following templates. 
Now it will only stay to decorate the resulting card, gluing the prepared decor.  Gift card can be with any volumetric element. So, for example, you can make an interesting option with the aircraft.
Postcards appliques for February 23: Manufacturing instructions
For postcard applications, it is necessary to prepare the following:
- color cardboard, which will be the basis of the postcard;
- colored paper;
- glue;
- scissors.
Now to the work process:

You can make another applique with a boat.

Postcard-shirt on February 23: how to make it yourself?
Options to fold a postcard-shirt set. It is not limited to its manufacture and color. The photo below offers two ways, how to fold such an unusual postcard as a paper shirt. 

Funny postcards on February 23: Photo ideas


Postcards with congratulations to the Day of Defender of the Fatherland


Children's postcards on February 23
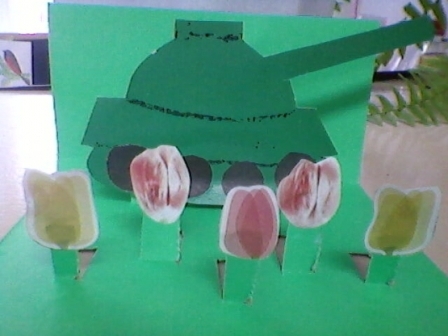
The kid can give his dad or grandfather with a greeting card with congratulations made by his own. Perfect for children's performance postcard with tank. For its manufacture will be needed:
- base of cardboard;
- colored paper;
- scissors;
- glue stick.
Initially, it is necessary to print stencils for the tank. 
Transfer the details (elements) template for colored paper. Let the child cut them out. Parts of the tank must be glued to a pre-prepared cardboard. Card ready! You can also use felt or any other suitable material. 
How to make a video postcard on February 23?
Today, even a schoolboy can make a video card by February 23. All that is needed - a phone with a camera.
Video greeting card can be:
- in the form of replacing pictures or photos for the song;
- just recorded video with congratulations.
After such a postcard is completed, it can be recorded on a flash drive, which to give a defender of the Fatherland or such a congratulation is quite possible to send through social networks.
Production of beautiful postcards Men to the Day of Defender of the Fatherland: Video
Already around the corner one of the important holidays is the Day of Defender of the Fatherland. If you still can't come up with, what to give to your beloved men, then create unique gifts for them with your own hands. This article contains the easiest, but at the same time, interesting and detailed master classes of crafts on February 23 with their own hands, which your child can easily be able to present a dad or grandfather as a gift for the Day of Defender of the Fatherland. I present you the 10 best master classes - how to make crafts on February 23 with your own hands with step-by-step photos.
Such an approach to solving the problem of finding an unforgettable gift is traditional when giving the children of their dads and grandpa on February 23. How many such gifts create children's handles! For this, not only a variety of paper and plasticine, but also candy, ribbons, ice cream sticks and many other unusual items for this.
The availability and convenience of such materials allow them to constantly use them, and with each new craft to apply them in a new way. It is no secret to anyone that the same materials can be used in crafts of various complexity. There are many similar workshops, which are also aimed at children of different ages and with different skills.
Most often as a gift for February 23, children choose airplanes. But the ways are their creation of a huge amount, as well as possible materials for this: cardboard, paper, boxes from the matches and much more. In this master class, I will show how to make an airplane from a plastic bottle in a papier-mache technique.
We take a plastic bottle, in my case this is a small bottle of 0.5 liters with a volume of 0.5 liters. I cut off the knife slightly above the middle, also cut off the spout of the bottle.

We make cuts on both sides and connect the blanks.


If you wish, you can copy our sketch and transfer it to a sheet of A4 paper, bent in half.

With the help of glue and tape attach wings and tail.


For the wheels of the aircraft, 6 covers from a plastic bottle are needed. With the help of the tape, connect two and four covers together.

We glue the wheels and begin to shook the plane with pieces of the newspaper, pre-impregnating them with PVA glue in the papier-mache technique.


The top layer is gluable with white paper or white napkins. After all the layers of crafts are dried, paint a ready-made acrylic paint aircraft.


It remains only to add an applique in the form of a star, and on the portholes can be glued with cut photos.

Our plane is ready for flight!


02. Plasticine tank do it yourself
The tank made by his hands from plasticine is an excellent dealing to the Day of Defender of the Fatherland. It can be further attributed to the exhibition or give a grandfather, dad or brother.

For this master class, we will need plasticine green, black and red, also a piece of wire, toothpick and pencil.
The lower part of the casing of the tank will be made in the form of a bar of a rectangular shape, sharpening one of its side.

We prepare two black stripes, adding along the entire length of the toothpick, 10 large pellets and 4 small out of green plasticine.

Put the cakes with the back of the pencil and draw the axis with the edges of the toothpick.

We collect 5 wheels together and 2 small on the sides, pay them by Trak.

We glue from above the green protection tape.

We glue the caterpillars on the sides.

We take the second green bar.

We stick it, squinting the front part.


We attach ahead of the blow and add small parts, antenna and a star from red plasticies.


Our plasticine tank is ready!


In this lesson, we will make such a not a complex plane from cardboard.

Draw all parts of the aircraft.

For the case, you can take the packaging from the juice.

Cut the blank, as shown in the photo. Stars from red paper.


The tail of the plane is glued to the match box.


Cardboard is ready!

Such a gift can be done for dad or brother. For this master class will be required:
- candy;
- food film;
- toothpick;
- scotch;
- penoplex;
- blue corrugated paper;
- silver cord;
- glue.

From the fastener cutting a circle.

You can draw a sketch of the steering wheel first on paper, then transfer to the penplex.


Edges decorate with cord.


Candy wrap the food film.

With the help of tape attach them toothpick.


Ready sweets decorate the steering wheel.


Our sweet steering wheel is ready!
05. Tank of two sponges
Such an exercise can be a wonderful gift from the child to the holidays on May 9 or February 23. Its manufacture does not take much time, and from the materials there will be a sponge for washing dishes. Our master class shows a phased manufacturing of a tank of girlfriend.

To work will be required:
- two green sponges;
- scissors;
- line;
- dark Flomaster;
- glue pistol;
- ruble coin;
- green straw.

From one of the sponges we tear the dense layer.

On the reverse side of this dense layer of sponge using a ruble coin and a dark marker, we draw six circles.

Cut them.

Then we take the adhesive gun and use it with these mugs on the side of another sponge (three mug on each side).

We proceed to the manufacture of the tower of our tank. To do this, on the remaining soft part of the sponge (from which the dense layer, the tight layer) is scheduled for a square with the sides of 4 cm.

Cut the tower with scissors.

From the green straw cutting 8 cm - it will blow our tank. We insert it into the tower, after having previously done in it a small recess with the help of scissors.

On the lower side of the tower we apply hot glue.

Fix the tower on the main part.

If you wish, you can decorate the tank, for this, cut out small stars from the red cardboard.

We glue them on the side of the tower. Our tank is ready.

Such a craft will become not only a good gift on February 26, but also serves a toy for the boy.
Such a star is very simple - for her we need wire, red yarn and PVA glue.

With the help of the round-rolls, we make a star from the wire.


Leave to dry.


To create this, the plane will require wooden clothespins, two chopsticks from ice cream, a piece of cardboard for tail, two thin wooden tubes and acrylic paints.


With the help of hot glue and tubes, we attach storms from the ice cream among themselves.

From the cardboard make a blank of the tail.

We glue the tail to the clothespin.

Collect the finished aircraft with acrylic paints.


Relieve a sense of patriotism in children is one of the most important tasks of teachers and parents. But younger children just just talk about the war, about the battle, victory and defeat. For them, visual benefits, games and classes dedicated to military topics occupies a very important place.
Therefore, the child should not only hear about the war, but also to watch illustrations, film, photos, and also capture your emotions in drawings or crafts. Despite the fact that knitting is mainly engaged in girls, this application will undoubtedly cause interest in the young defenders of the Fatherland.

To connect the applique of the "tank", you need to prepare the following materials:
- Hook number 1;
- Middle thick yarn, for example, "jeans";
- Decorative asterisk. If this was not found, you can take it from the New Year suspension to decorate the Christmas tree;
- Scissors
- Glue "Moment", preferably transparent.
Knitting applications are starting with his "caterpillars". To do this, we recruit 10 air loops.

Then they see another 3 air loops for lifting, and then knit to the end of a number of columns with one nakid. In the most recent loop of a row, knit 7-8 columns with Nakad, so that the fan of the loop is turned out. If in this place the edge bends, then the number of columns without a nakid increase, as the application must be flat.
Next, knit columns with Nakud on the opposite edge to the very last loop, from where we started a row. In this loop, we again make the "fan" from the columns with Nakid, but already in fewer than in the previous case, as there are already several loops in this place. As a result, you should get this elongated oval - "Caterpillar" tank.

In the second row, first, I first check 5 columns without Nakid.

After that, we make 1 air loop to highlight the start of knitting the top of the tank.


Turn the knitting and again I will prove 8 columns without Nakid.

To make a tank gun in this place, knit 5 air loops.

We add another loop for lifting, and then on these air hinges, there are bars without an attachment to the end of the row, including 8 cabeshes "Cabins" tank.

We again turn the application and knit 8 columns without Nakid. At the end of the work with the help of the "moment" glue, we gently glue the tank with an asterisk to the "Cabin".

Applique "Tank" is ready. It can be used in the manufacture of postcards for Victory Day, February 23, or any other thematic crams.
Cook a gift to a man? Do not decorate a gift box? Or maybe you prepared an original postcard and you need a bright accent for her? Male flower made will help get out of any situation. To create such masterpieces, you can use candy candies, notebooks, kraft paper, and anything.

On the Internet you can find special sheets that need to be cut.

You can take any designer paper with neutral or male pattern.

And someone may like this variant of coloring.


So, we start to create. For work you need:
- The above-described paper size is 5x5 cm. Having mastered the technique, you can create flowers of any size. Paper can be carefully cut or have torn edges.
- Adhesive for fixing modules.
First flower version
We fold the module in half, then once again in half to get a smaller square.

You need to make 8 modules thus.

Four modules should be glued to any piece of paper with a small gap, placing an inserted angle.

Then, just only without indents, we glue four more modules from above, turning them into 45 degrees.

We decorate the middle, cool the edges slightly, and the stylish decoration is ready.

If when sticking the first four modules, leave the gap between them more, the flower will look different.
Flower more complicated
Fold paper squares as shown in the photo. 
First there is a diagonal line, then the sides of the square are converted to it. The resulting airplane is folded in half along. We make 8 identical modules. Last Action: You need to gently attach the modules one to another using the resulting pockets.


At the output we get the original decoration for the male gift.

The glue in this case will be needed only to fix the finished decor directly on the gift product. If you make modules from squares with the same pattern, fold the modules strictly equally, relative to the pattern, then your colors will look carefully, and get an additional pattern.
Here is a pretty tank can be made from matchboxes and colored paper.


Put the boxes with green paper as shown in the photo. For the tower we take a green cover from a plastic bottle, for a blow - toothpicks are wrapped with green paper.

Wheels cut out of black paper.

It remains only to collect all the parts and the tank is ready!


How to make a tank out of money
If your man served in tank troops or just a specialist in the game in "Tanks", then make it such an original gift.

Gift man do it yourself
How to make another very original look here.


Original gift set "grow greens"
How to make this original look here.


DIY on February 23, created by a child with their own hands with great care and attention, in this holiday are of great value.
The unique gift will bring joy not only to parents, but also the child himself, because with the help of him he will express his love for them. Let him bring close to people joyful emotions!
Not all men positively treat useless gifts, therefore, help your child to create your own hands such a crawler, which will be useful and will not be dust somewhere in the closet. If you think about a little, then the gift created may be much amazing and practical than the purchased one.
Good all day! In February 14, another holiday comes, which is celebrated in our country annually on February 23. Last time we told you about what, and also done with children
Today we continue and will be together with the children to congratulate our defenders and make them interesting and original postcards.
This type of work for school students or pupils of kindergartens is the most common. Because it is not so difficult to make such a miracle, you just need to listen to the instructions of the teacher and everything will turn out.
So, if you have not yet decided to make and give, you may stop at this option.
On this day, all moms, daughters, grandmothers and in general the whole female half of the population congratulates the men's half with this celebration. It is so instituted that the symbols of this holiday are state flags, military equipment and other transport, as well as sprockets on the shoulder.
Therefore, all drawings or pictures are related to directly. I propose to make the first version of the paper - this is a tie using the Origami technique.

And I also really liked the idea with a dollar bill or you can take our rubles and minimize, so, it looks cool, and as they say a little sleep at hand.

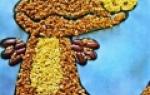
For the smallest craftsmen of the second younger group of kindergarten, you can make work from plasticine.

Now make a postcard on which the car will be depicted. Such adorable and funny creation you can do with the children of the senior and preparatory group, or use in primary classes.
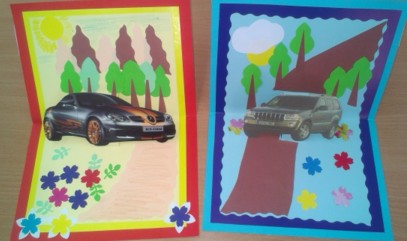
Stages of work:
1. Prepare everything you need to work, it is paper, glue, scissors and pictures with machinery.

2. Cut the necessary details to issue the plot.
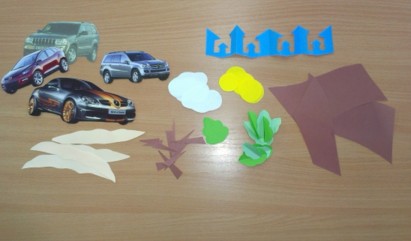
3. Then, so that the machine seems to be volumetric to do an incision, while folding the paper sheet in pressure.

4. This is such an interesting and pretty plot will succeed.

5. The outer side you can arrange as you like using various decorations and decorates.

6. You can do both appliqué and simply paint with colored pencils or markers.

Cool design in scrapbooking technique
I give you a few ideas that impressed me, you can take them as the basis of our work, and create your story. See how brightly you can make a star.

Milo is very talented, even the flower is not excessive here.

Wow, you, Message or a small surprise).

In general, it looks wonderful and not primitive.

So we create to joy to everyone!

And surprise, in general, act.

And I also offer you a phased instruction that you can take to your creative work in the style of scrapbooking, here's from here:
Original ideas of greeting cards for schoolchildren by February 23 with templates
I want to do and decorate the postcard as it is special, I know that many are interested in the options for bulk products, because they look great and amazing. Moreover, if there is a phased instruction, then you will be able to make such a miracle with your children at school.
Or you can create this creation at home and at home, and then your son or daughter will give it to dad.
Stages of work:
1. First of all, you will need to find double-sided cardboard, it is desirable to take blue or blue, it will be the sea background. Then fold the blue leaf input and glue the basis in the form of a boat.

2. Accordingly, to glue the base from the ship, you need to first do it, for this find the image of the ship or ask me the template, I will send it to you for free. So print on a sheet A4 and cut out through the contours using the stationery knife the desired image.


4. Stick gently to a blue basis white.

5. That's how it should come about.

6. It looks just fantastically beautiful and charming.

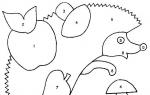
You can make a simple applique of colored paper and from geometric shapes, for this draw patterns, and on them already glue the composition.


You can go to others unacter by printing this sample, and then paint it or execute appliqué.

I liked another kind of postcard, I gladly show it to you.
We need:
- color or cardboard paper
- scissors

Stages of work:
1. Draw templates, how about you should turn out. I have shown you in this picture, a difficult thing, even the newcomer will cope. But what kind of color to make for every workpiece, decide for yourself, this is a creative work that can be done in class lesson.

2. For the basis, it is best to take a color cardboard or double-sided or monophonic. Bend the sheet in half and on one part cut the circle.

3. Now it remains to make a product. Find the appropriate text or email your hand.

4. Stick congratulations inside the postcard.


6. And the front side will look like this. As if the ship sails on the waves.

I also saw this guy yesterday, I suggest you, too.

To create such a charm, cut the blanks with scissors.

Stick all the background desired to you need. The flag can be made of satin ribbons and matches or use the wand instead of a stick from cotton disks.

Want at all a masterpiece, take a look here, stylish and very cool idea for any age of children.

We make postcards with children in kindergarten from paper for dad and grandparents
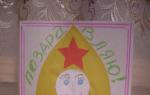
An excellent option will be a fairly simple postcard depicting a bear in military uniform. You need to make such a background on a sheet of paper using the printer.
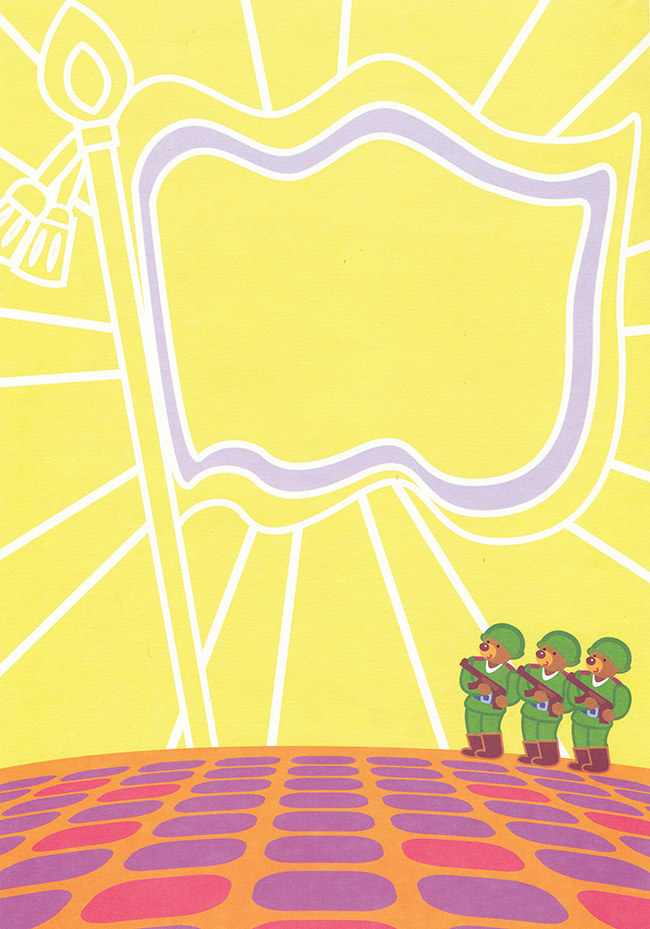
Cut stencil stencils.

Then stick them on the background.

And on the reverse side, write or print a congratulation.

Well, and very little young talents, I also found such a simple idea.
We need:
- multicolored cardboard with embossed
- colored paper
- scissors
- rule
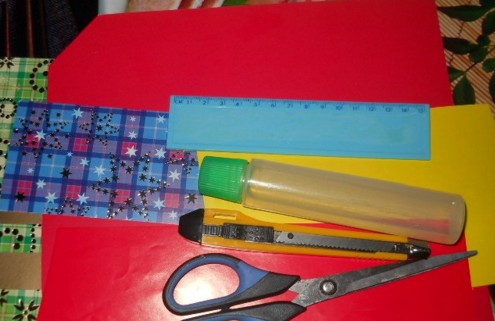
Stages of work:
1. Print asterisks on A4 sheet, or make stencils, and then draw them on color paper and cut out.
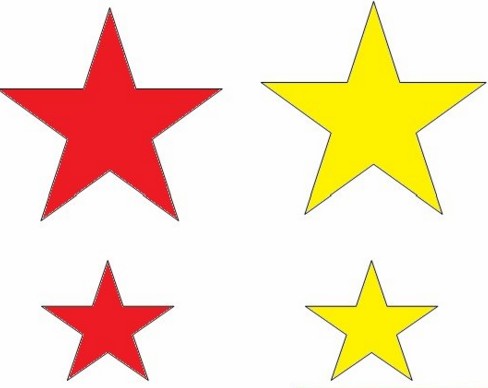
2. Fold in half a sheet of cardboard with embossed. Cut two strips from colored paper and stick their flashes. And also decorate the star.
3. Such a very beautiful and cute result, on the other side write wishes.

Unusual Pank Qwind-style gift
It will actually be cool if you make a postcard and to it in addition to everything you will present a small souvenir in the form

Who is familiar with this technique, it will easily create any plot).

And who is not yet familiar, so I found you the video from which you learn how to do it:
You can retreat from the topic and make from numbers, but in the same style.

Master class on how to make a shirt with a jacket
The easiest option can be a souvenir in Origami techniques, a color double-sided paper is used or a white sheet A4.

It turned out a small shirt with a tie.

In addition to everything, this postcard you will need to come up with a poem or congratulation and read it with an expression.
Either you can still go to another way to make a tie from a blue or blue sheet first, and decorate it with all sorts of stickers, sequins, rhinestones, etc.

And then glue and get the easiest gift option.

And if you want to do something more serious, then use this instruction.

It is necessary, as shown in the picture make a layout of the product.

Then using the ruler to roll over these lines. Of course, paint the line with a pencil, not a felt-tip pen, a felt-tumbler is shown here to be better visible.

Here is an image of the jacket.

It will remain a collar, make it according to the scheme.

Then cut and roll.

Finish the work by sticking the right strokes for completeness, this is a tie from satin ribbon or paper and a poem.

You can also make a postcard with a little secret.

For the holiday of the Day of Defenders of the Fatherland in Gardes and schools, they begin to prepare in advance: to teachers and teachers need to come up with that their pupils will give their favorite dads and grandfathers, and all these ideas are incarnating under the sensitive leadership of adults.
Congratulations to a man on the Day of Defenders of the Fatherland We offer the most expensive gift - made by the child's hands with a postcard or pattern. What can kids make for their dads and grandparents? Read in the article article.
How to draw a postcard on February 23 with a pencil and paints for children?
In kindergarten, children learn to draw their first schematic drawings. Step-by-step lessons will help educators in the preparation of gifts for the Dadas and Grandparents on February 23, because it is in the preschool institution, the kids will learn about the holiday and his meaning, and why men congratulate on this day.
Let's start with the drawing. We need:
- protractor (we will draw a star with it)
- circle or other device with which you can draw a circle
Go to drawing:
- We draw a circle and spend two lines in it, which will be divided into 4 equal sections.
- Measure 72 degrees on the transportation and diameters within two opposite sections of the line.
 Measure 72 degrees on transport and carry
 - Remember 72 degrees from the already spent line and blacks are directly straight, and then the third.

 Repeat
 - In order not to get confused, we note the points that I doubt. How to properly spend the lines in the photo.


- We should have 10 identical sections. Syllote in the middle of each line (through one straight). We draw a star and spin the corners slightly.
- I wipe the circle and extra lines inside the star. Find out the outline around the star.

 We carry out a line all over the contour
 - Now you will depict a George ribbon with bent down the edges. We will continue the edge of the tape on both sides of the star.

 Draw a ribbon
 - We carry out three parallel black lines on each part of the tape. A schematic drawing turn into a postcard, squeezing a star and a tape, and adding the inscription "Happy Defender of the Fatherland Day."

 Take the ends of the ribbon to the edges of the sheet
  Draw stripes on the ribbon
 Video: Simple drawings. Soldier
An excellent drawing on the topic of the Day of Defender of the Fatherland is a valiant soldier in the post. Such a drawing will decorate and a postcard, and a school wallpaper, prepared for the holiday.
For drawing, you will need:
- blank paper
- simple pencil
- colour pencils
- rule


- We divide the sheet into two halves, spending a vertical line in the center. The left side should be a little right. Draw an oval in the upper third. It will be head. Under it draw the contour of the future collar.
- Focusing on the preliminary markup, draw in detail the head of the soldier, to whom the hat is dressed. We add the neck, shoulders. The soldier will be in the bushlate, because they will make it a contour.


- Draw a face, hands. Dorify small details of clothes.
- Do not forget to draw our protector automatic, which he holds in his hands. First, sketch the lines, and then draw in more detail. The photo shows what you need to portray.


- Now you need to draw the defensive coloring of the shape and the contour of the banner in the back background.

- We write on the left side of the sheet inscription "Happy Defender of the Fatherland Day" and specify the background.
- After that, it will also be left to decorate the drawing.


If the previous drawing is difficult to draw, then with a schematic image of the tank, represented in a step-by-step lesson below, the child can cope without adults.
- For drawing, you will need pencils and sheet of paper. It is better to use a tetrad sheet into a cell. So the child will be easier to navigate and spend all the lines correctly.
- We draw a tank blowing: in the center of the leaf we carry a line 4-5 cm long, and above it at a distance of about 1 cm one more parallel.


- On the left side of the line connect, and on the right side, I will show the beginning of the beginning.
- Start draw tank tower. To do this, we will depart down by 1 cm and at a distance of about 1/3 from the length of the blow. Draw a stretched rectangle with a length of 10-12 cm. Departed from the edge of the base of about 0.5 cm, we put the points and connect them with a semicircle.

- Bottom draw the base of the caterpillar tank. How to do it, shown in the photo. Inside the base, draw 5 circles and sketch them with a black pencil.

 Draw a tank tracked tape
 Painter in black 5 circles at the base of the caterpillar ribbon
 - Dorisuy the star in the center of the tower and the developing flag on a long river. Spread the tank with green, an asterisk - red and add the inscription.


Video: Simple drawings. Children's tank
Video: Postcard Dad on February 23, Military aircraft
The schoolboy will easily cope with the "Military Ship" pattern, which will be a good gift of dad or grandfather, if tanks and airplanes have already been given to the perpetrators of the holiday.

Since the Day of Defender of the Fatherland was once had the name "Day of the Soviet Army and the Navy," then it is all the military: and on land, and at sea.
That's what we will draw:


To begin with, you will prepare everything you need:
- blank paper
- simple pencil and black felt-tip
- color pencils or in stock paints


- We split the sheet into two halves, having conducted a horizontal line. Do not forget that all the preliminary contours do not draw without push to the pencil so that then the trace of the broken lines are left.
- Ship will draw in the lower half. First, draw a wavy line that will portray the water surface. Draw stern with all the necessary protrusions.
- On the left on the stern draw a gun. In the central part of the stern, we add such elements: the captain's logging and radar. They are easy to draw them, if you exactly repeat all the lines, as in the photo.


- In the lower part of the Captain Cutter, I draw a torpedo battery, add a number of portholes.


- We draw a developing flag and for greater realistic paintings add a couple of flying birds flying away.
- You can stop on this and go to coloring. But for a greeting card, this is not enough: you will also have to add an inscription.
- It is necessary to figure out the drawing: a warship - gray-blue, water - blue, at the bottom of the ship draw the red stripe and pick up the desired colors for the image of the national flag.


Video: How to draw a cool drawing on February 23?
Ideas and postcard templates by February 23 in kindergarten
- The issue of preparing for the holiday on February 23 begins to disturb the educators of kindergartens and school teachers long before his offensive. This only at first glance it seems that there is nothing difficult in choosing a suitable option for the present.
- But this is not exactly the case, since the process of creating your own handicrafts or postcards, which the children will then give the most expensive people - dads and grandfathers, must pass them, and therefore from complex elements or multi-tiered paper structures stand right away.
- Simple, but the original postcard or workout is much more like the little "creators" masterpiece and adults. What can be prepared for holiday gifts on February 23 with children in kindergarten - see photo selection below.


 Cover for postcard


Ideas and postcard templates by February 23 to school
The guys in school are already able to do a lot, and therefore the simple image of a tank or aircraft will not bring such pleasure as the creation of cards with their own hands with a surprise that advanced details, special applications and so on.
See the photo presented below a selection of gifts for the holiday of February 23, made by schoolchildren, and inspire!


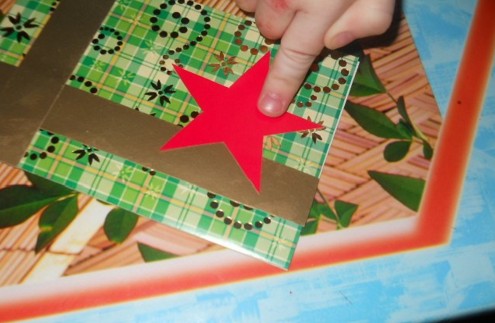
- From color red paper cut the star. So that it turns out to be volumetric, you need to beat the "ears" that will be glued to the postcard. The star bends over the lines by external fins, and internal - inside.
- Glue an asterisk on the wrong side of the postcard (turn).


- Decorate with stripes cut out of colored paper golden color. Little star will also make golden.
- Insert 3 golden strips vertically and horizontally on the front side of the postcard, as shown in the photo. Next we glue a golden star. So that the strips glued exactly, it is better to pre-stand the point of the point where they should be.


 How to fold the star
 - The bulk postcard can be made in the technique of quilling. For the manufacture of postcards, except paper (color and white), you will need toothpicks, glue and scissors.
- We fold the sheet so that one part is a little longer. We write on it. Large digits of the date of the holiday. Two must be on the front side of the postcard. After the twice is drawn, on the second postcard page add a triple. Cut the numbers at the outer edge.
- We prepare the "curls" from the stripes of colored paper. To make them, the strip of color paper needs to "put" to the toothpick and spin. As the resulting curls, stick to the postcard - can be seen in the photo.
- We apply each spiral with the cocked side to the numbers, trying not to leave large gaps between the curls. Add a star between the numbers and subscribe a postcard.
- Draw a boat or print a ready-made template on double-sided cardboard.
- Cut some sections in the picture.
- We fold the folding of the fold line.
- Flomaster draw a dotted line along the edges of the postcards and images of the ship.
What postcard by February 23 to do for brother?
Brother can be surprised by the original postcard "ship".
 Postcard "Ship"
 Such beauty can be made in half an hour. So let's get up!


For a brother, which has not yet served in the army, you can make a postcard-shirt.
Video: Do \u200b\u200bit yourself / Postcard - shirt / gift for February 23
Winter period is rich for holidays. Recently, a new year is, and now a series of no less pleasant heart of dates is approaching. How to congratulate on the day of lovers, I already wrote. And now it's time to congratulate our men, and give them gifts and postcards on February 23, made by their own hands.
In kindergartens and schools boils work. The kids are enthusiastically drawn, they make, cut out, glue various crafts to surprise and deliver their dads and grandparents.
With the help of simple materials, you can make bulk greeting cards, compose a poem with my mother or write good and heartfelt words in your own words.
An unusual postcard will suit for the defenders of the Fatherland and for any other holiday.
To work, you will need:
- Sheet of color cardboard
- Scissors
- Simple pencil

- I will be in half a sheet of cardboard format A4

- Call the palm pencil and cut out the contours

- Take the color cardboard and cut the strip of 4 -5 width. If you have scissors with a curly edge, it is better to use them - the result will be more interesting. If not, do not be sad, cut out in a straight line.
- I will drive it in half, then two more times in half. It turns out a small clamshell, like a children's book
- Now we add it to the harmonica
- From the edges we will turn again

- I cut out the number 23 and glue the palm. If you do not have a sheet with numbers, you can draw or cut out of colored paper

- On the strip, which was folded by the harmonica, write a wish and decorate with rhinestones
- Do not forget about the palms, they also fit and put the signature

- We glue a wish first to one palm, then they are compatible and glued on the other side to the second palm. Here is a gift with a surprise for the feast of the strong spirit of men.
Postcards on February 23 with your own hands for kindergarten
Children love to make marsh and give various crafts to their parents. Now the population turn came to receive a gift for the Day of Defender of the Fatherland.
Prepare:
- Corrugated Cardboard - 1 sheet
- Corrugated cardboard strips - 3 pcs.
- Stickers of aircraft
- Colored paper
- Double-sided tape
- Glue, scissors, paints
- Simple pencil
- Asterisk
Process steps:

- Take cardboard blue and fold it in half
- Cut the desired strip length and glue around the edges - the frame is obtained. Draw clouds

- Prepare a sheet of paper blue. We stick to it stickers-airplanes and cut down the contour, leaving the edges of 3-5 mm
- We glue on double-sided tape planes on a postcard

- Cut the numbers and letters and stick with a tape to the picture. We scatter on it and contour picture of the star.
Making postcards with appliqué for dad and grandparents
This master class is perfect for kids from kindergarten.
It will take:
- Colored paper of different colors
- Glue stick
- Scissors
- Simple pencil
- Line with circles of various diameters
Stages of execution:
If you do not have in the farm ruler with circles, we use fir-handed materials. For a large circle a plate will fit. For circles less round items with diameters, approximately 6, 4, 1.5 cm

- First prepare the items for the future rocket
- Combate the first part with a plate. From it we will make a case
- Then cut out 4 parts with a diameter of 6 cm - it's nose and legs
- Two parts of 4 cm - these are portholes
- And pieces of 10-12 smallests for the universe

- Details are ready. Now we will deal with the case. Take the biggest circle, we note the point anywhere in the circumference, and the wings will be on both sides. Should turn out the figure like a triangle

- One circle of red we enhance the nose rocket
- Two more bend in half
- And one we turn out like a rocket hull - a triangle
- Glue the side sides of the rocket together
- Printed nose
- Based on the bottom of the legs. In the middle of the triangle, and on the sides, folded in half a circle
- Now turn the portholes

- Take the prepared sheet of black paper, depicting the sky and the revolving side to attach the rocket glue
- And the final chord remained - scatter the planet across the sky, between which our rocket rushes.
Making a postcard using queening for boys
Quilling is an exciting lesson for those who like to make a simple material. Twisted into the tube strips of paper, and various volumetric compositions are performed.
For work prepare:
- Two shades queen paper
- Cardboard sheet for greeting cards
- Qulation tool or any fixtures for winding tubes
- Cutting pictures on which you can write a wish
- Glue PVA and Glue Pencil
- Brush
- Scissors
For the feast of Defender of the Fatherland, we will make a tank, because the boys love to play the war.

- Cardboard for the base bend in half
- Cut half the base from color paper contrasting and stick. Here you can write a wish or poems

- Now, with the help of a queen tool, screw the paper, we form the petal of the necessary shape and lining the tip using an adhesive pencil. If there is no tool, you can use a conventional pencil. Disadvantaged, and you can easily wind the necessary details

- Prepare nine petals of the same color, and from a contrasting shade tweet six pucks for tracked wheels and one large petal with two sharp edges

- Now twist the numbers 2 and 3 and curls to decorate
- We glue the body of the tank and wheels on the PVA. In the upper left corner put the numbers and decorate curls.

Cutting pictures can be replaced with scissors cut from colored paper with curly edges. And write a wish.
How to make a postcard for the day of the defender in the Origami technique
Beautiful congratulations can be made using Origami technology. Such a postcard will serve as an excellent gift not only on February 23, but also on May 9th.
Prepare for creativity:
- Cardboard
- Colored paper
- Scissors
- Ribbons
- Paper in striped

- To begin with, we make the basis for a postcard. Cut from the cardboard the rectangle of the desired size. Approximately 15 * 20
- Get on it multicolored paper. Or, as an option, paper for scrapbooking with different drawings. Decorate on the sides of the ribbons and place figure the edges with scissors

- We will make a shirt made of striped paper. You can make it from any other, even in polka dot. Will still look wonderful
- We fold the sheet in Popolam
- Then we unfold and once again we add to the middle of both sides

- I turn over the paper by the face down, once again we go through the bends and wrapping the bottom of the right corner at the right angle, and we do the same with the left side

- Bend the sides to the middle and take a ruler. Apply downstairs and raise paper up. The second time we apply a ruler and once again wrap up paper

- Deploy and see rectangles. We apply the line diagonally and we turn on both sides. Faceted chances

- We take behind the chances and pull up to folding. That's the figure turned out

- I turn over to the other side, we apply a ruler to the top and turn off a small strip for a collar shirt
- We again turn over and degrades bend to the center on both sides, leaving the sacket for the neck

- Both bending to the width of the rectangle. The length of the shirt is at their discretion. Can leave so, but you can bend until the length of the shirt does not suit you

- Cut on paper tie, try, bending over the corner, and we are lined in the center

- Deploy and glue all the details in parts
- Based on find a place where we put on glue shirt
- Now print on the printer or write a wish or appeal. Tape width 3.5 cm., From both sides, cut out the corner and sweep them to give the inscription volume
- We stick to the tips to the postcard, we seek for the middle so that it is not glued and that's it.
How to make a star on February 23 with your hands from paper for classmates
I will tell you how to make a bulk star in a simple way. It will take a template for which it is easiest to make the craft. But you can draw yourself. There is nothing difficult in this.

Prepare color cardboard or paper, glue and scissors
By template, cut two detail. You can use different colors or do in one color scheme. Red marked places that need to glue. All lines inside the star bending and we press with the help of girlfriend. For example, the edge of the line or rods of the handle (of course, which has already served its).

Places for bonding flexion and lubricate glue. It is better to use adhesive pencil. From it, the paper does not wet and disappear. Lubricate the necessary places with glue, connect two halves and presses hard to each other.
And another way to create a star is styled in the picture. Follow the items and get a beautiful five-pointed asterisk.

Video on how to make a sweet gift made of sweets for your favorite men
Men are still big sweet tools than we, women. And an interesting decorated candy bouquet will not leave any man indifferent - neither small or big.
Ideas for inspiration
I picked up various postcards for you. Inspire and create your masterpieces.