Template Christmas tree for cutting from paper A4. Paper Christmas trees do it yourself: stencils for cutting. New Year tree patterns for crafts
For the successful versatile development of the child, activities are of great importance to the development of shallow motility hands. One of the types of such activities are appliques from colored paper, templates for which are developed by the methodologies, taking into account the peculiarities of age groups of preschoolers.
It is important that the complexity of the task corresponds to the age of the child so that classes are carried out systematically, gradually becoming accomplished, and passed under observation and with adults.
What is the use of applications on a template for development
Appliques from paper - Creative process, thanks to which children will know the world around and acquire a lot of skills. In addition to the development of shallow hands, it is coordination of movements, studying the colors and their combinations, the concept of composition, acquaintance with various materials and textures, the development of observation, imagination and fantasy.
Work on the application in the team contributes to organizedness, excerpt, accuracy. It is also necessary to note the development of spatial imagination: by applique, children create a whole of several components and, on the contrary, learn to share the integer on the part.
Scientists have proven that the cerebral cortex center responsible for small motility is located next to the speech center and contributes to the development of speech skills.
Types of Template Appliques
There are three main types of appliqués:
- subject - cut parts have a simple, clear form and proportion, an image that is not associated with any plot is created;
- scene-thematic - compliance with a certain story (taken from a fairy tale or invented independently);
- decorative - decoration of postcards, photo frames with patterns of geometric shapes.
Simple appliques for children 2-3 years
Simple appliqués from colored paper using templates can be engaged in 2 years. However, some experts believe that children from 1 year can be fulfilled.
Primary classes are gluing pieces of paper on a sheet in arbitrary form. At this stage, the child should understand and remember the main actions: smear, turning over, attach, smooth. Kids still attracts the process itself, strive for the result they will be later.
The second stage of complexity uses templates. The child must place the items are also chaotically, but within the contour, the defined image occurs.
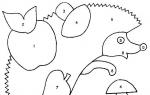
 Appliques pattern with colored paper "Hedgehog"
 The template is a schematic image of the future picture, drawn or printed on the printer. Uncomplicated templates for appliques from colored paper can serve, for example, a tree with balls, a tree with apples and others.
For such work, you need to prepare elements: balls, apples, etc. The child should determine how to arrange them in templates.
 Palma Applique Template
  Flower Appliques Template
 For young children, it will be interesting to perform a simple breakdown applique. The baby watches as an adult shakes paper on long strips, then headses them on the nurses. These pieces need to fill out the contour. 
If the child wants to break the paper itself, then from these uneven, awkward strips, too, you can also create an application, for example, herb. Ants are drawn with finger paints.
Next, the task is complicated: you need to get an element to a specific place of the template or drawn circuit. So, with the help of cut circles, the caterpillar image is performed. At this stage, children are not only interested in the process, but also the result. 
In the manufacture of appliques from colored paper using templates and contours with children up to 3 years old, cooked cut elements are used.
A three-year-old baby can already instill skills to work with scissors with rounded ends.

At the same time, it is necessary to explain how to properly keep scissors and paper, so as not to be hurt. You need to start with direct cuts, then work out bends and rounding.
At this age, children are already capable of creating simple story pictures. The elements glued on the template allow you to create a specific image.
The background for appliqués can be an applied circuit with partially drawn elements. For example, a template aquarium with algae and stones at the bottom of the children can be inhabitants: fish, jellyfish, etc.
An interesting occupation can be the connection and gluing the cutting picture. If the child copes with such a task easily, it is recommended to complicate it: add rain to the umbrella, to glue the windows to the house with the attached roof. Such classes are developing fantasy, observation, a sense of proportion.

Appliques for children 4-5 years
At this age, appliques from colored paper and templates are harder for them. Preparing, together with adults, items for the future picture, the child shows more independence: cuts, picks up colors and, thus, it turns out the concept of composition.

Such activities develop logical thinking, allows you to show creative deposits.
For children, 4-5 years old is a fascinating occupation is the manufacture of postcards that they then give parents and friends.
The base is folded in half and inside the postcard are elements that form a storyline.
Templates developed by experts are only examples indicating the direction of work.
Parents and educators can make their ideas. For example, use in the applixation of the carved outline of the baby's carved contour - such pictures cause amazement and delight in children.
 Appliques with palm
 Application technique from some circles reveals the relationship between parts and the integer.
Developing the creative imagination of the child, it is necessary to show him various techniques for working with paper: for example, fold it in the form of a harmonica. For such a picture you need to prepare the basis, apply contours. Complicated and the process of gluing. 
Complex appliques for children 6-7 years
Children of senior pre-school and younger school age have already have defined skills.
Appliques from colored paper using templates during this period help the further development of shallow motility, thinking, memory and concentration, the ability to plan their activities.
An important circumstance is that the child foresides the final result of its work. 
At this age, children consolidate the cutting skill of individual parts and solid silhouettes, symmetrical elements of folded paper folded, as well as the ability to create compositions and correctly position them on the basis of their separate parts.
At this stage, children study combinations of colors, analyze and compare the details. It becomes diverse and texture of the material: In addition to ordinary colored paper, the crepe ("stroke") is used, melted (glossy), textured (embossed or imitating velvet), foil.
During this period, you can move to the volumetric symmetric compositions. 
To perform such a task, templates (clouds, balloons) are cut in the usual way. Next, two identical templates are flexed in the center and fasten together (can be sewn). Prepared elements are laid on the basis.
For the manufacture of volumetric bird, the template bends in half and gluits, except for the wings that bend along the dotted line. 
The resulting result can be pasted with one side and the wing to the base (in the form of the application) or turn into the craft, tiring on the thread and hanging onto the twig. 
Having learned at the previous stages of the Aza composition, children 6-7 years are able to create whole pictures - landscapes, still lifes, using ready-made patterns for appliques from colored paper or manufacturing them with an educator or parents.


Appliques using a disposable plate
Disposable plates are a convenient material with which you can create original and beautiful compositions. Made of polystyrene or cardboard, different colors, with different embossed pattern, they can be both the basis for appliqués and items for it. 
The manufacture of appliques from colored paper on a disposable plate with templates can be attracted by children since younger. On a prepared color background, children have simple elements in the form of a pattern.
The complicated option is to use for the background of two or more colors and more complex elements. Children 6-7 years old are already thematic compositions on plates or use them as a material for individual elements.
Examples of gradually complicating applications on plates: 
Combined applications
After appliques from colored paper, templates can be diversified by combining various materials.
Appliques from Crap
This type of applications can be engaged even with young children. The algorithm of work is as follows: adult inflicts glue to the harvested pattern, the child is a rack on him with a barrel and slightly presses his finger. 
The remaining not glued grams should be shaken. Such an occupation brings up attentiveness from the child and accuracy.
Older children can use different types of croup. In this case, the glue is applied alternately into separate sections. For colorful pictures, it is recommended to pre-tinker a gouache bar in different colors. As a template, you can take your own drawing of the child, it stimulates it, causes inspiration.

Appliques from Pugovitz
To perform such an applique, preliminary preparation is necessary. After examining the drawing and choosing a color, a child, with the help of adults, picks up suitable on the color and size of buttons. Then you should decompose them in the figure to present the desired result, and proceed to sticking. 
For junior children who do not have the right skills, you can apply a pattern on a pattern on a layer of plasticine - a child will attach buttons in indulgence. This technique is applicable when working with croups.
For combined applications, wool, napkins, egg shell, natural materials - leaves, petals, seeds and more are used.
Multilayer applications
Multilayer (overhead) Appliques from colored paper or other materials are performed using the templates developed or manufactured independently.
Such work is developing spatial imagination, brings up aesthetic taste. They are performed from paper, fabric, skin, felt - the main thing is that the edges of the material do not appear. 
Multilayer appliqués, like other varieties, there are varying degrees of complexity. For small, this is a simple sticking of the details on each other. Fastening elements only from one edge, you can create a combination effect.
More complex appliques are characterized by a large number of parts, for their manufacture requires good skills to work with scissors, a sense of proportion and color.

Older children, with developed shallow motility of hands, possessing the skills of making complex parts, create real works of art - unusual compositions and even portraits. Black and white effects are given special colorfulness.
Multilayer application is already a truly creative process in which the fantasy and the artistic abilities of the child appear. It is necessary to think through the image, color range, the sequence of action, so this work implies a certain level of intelligence.
Appliques from pieces
Applications from cut or torn pieces of colored paper using templates are a fairly simple form, even small children can perform them. On the bottom sheet you need to apply a picture. In addition to the finished templates, you can use children's coloring or invent a sketch yourself.
The manufacture of appliqué elements is carried out together with the child - small children with pleasure tear paper into pieces. If there are already working skills with scissors, you can enable these elements to cut.
An important detail: the younger than the child, the larrhery should be fragments.

 Pose of the right colors, you can begin to stick. The glue is not applied to small details, but on the template, by plots.
When classing with the kids, this process is carried out by adults, older children apply glue with a tassel. By gluing pieces of paper, the child must accurately fall into the contour.
A type of appliqués from pieces is torture. This technique is quite complex, but for children 6-7 years old it is quite forces, especially when collective work.
For mastery techniques, teachers and parents are offered master classes on this topic.

Appliques of autumn topics
Bright autumn paints make it possible to create colorful pictures of autumn nature. For applications on this topic, both colored paper and natural materials are used: multicolored leaves, late colors petals, seeds, spikelets, twigs and other items. 
In the manufacture of appliques on the autumnal topics of colored paper in templates and in the free composition, the main attributes are saved - the flowers, mushrooms, fruits, yellow, silhouettes of trees are cut and painted. Mandatory component - autumn leaves.
When working with natural material, it is necessary to prepare it. The collected leaves must be pre-aligned and dried under the press. If the leaf is required to give any form, then the fresh sheet is used, which is then dried.
For collages and mosaic paintings, you can cook cardboard templates for which elements are pasted. 
Autumn nature - fertile soil for children's fantasy flight. Appliques from leaves placed in photo frames will decorate any interior.
Autumn lights will be a spectacular decoration. For this, a glass vessel is covered outside with multi-colored leaves (paper or natural), a small candle is put inside.
Appliques of winter themes
To create winter and, in particular, New Year appliqués applies any of the described techniques, depending on the age of children.
The most common view of winter applications are snowflakes - this is the subspecies of the applique of the silhouette type. Properly fold the sheet, crop the edge and sharp corner, make cuts it is recommended first on ordinary paper - so the skill is produced.
In addition, pendants of such snowflakes decorate the room. Thin, air snowflakes can be pasted on the windows and other surfaces. 
For young children, it is better to prepare templates (circles with the contour inflicted) and make a burst snowflake from pieces. For flat, voluminous, multilayer snowflakes, it is required to pack the circuit for cutting.
For the manufacture of traditional Christmas trees, triangles made of green paper are used, a snowman is made of white circles, an educator or parent helps supplied with details. 
Older children can be offered to make a tree from a paper strip or create a picture of the winter forest using templates using small paper pieces or cotton. 
Brightly and voluminously looks a Christmas tree from paper balls. For this, template and elements are made of fastened paper. The main color is a dark green, for garlands are made of multicolored balls.


An interesting applique with the image of winter accessories allows children to show creative fantasy.
Any ornament, animal figures, winter pictures, beads or rhinestones can serve as a decoration of the cap and the mobs.
Wata is used to simulate fur. 
With the help of a disposable plate, you can make a craft-mask of a white bear. The holes are cut into the plate - eyes, the surface is covered with pieces of paper, a disposable cup is used for the nose. 
Senior preschoolers and young students are capable of creating complex winter landscapes under the leadership of adults using mixed techniques. 
Appliques of spring topics
Snowdrops and valley, starlands and blooming trees - these signs of spring are traditionally used in children's appliqués from colored paper using templates. The smallest perform simple tasks, having prepared elements on the contours. These same images can be complicated by adding pictures of spring nature. 
More complex compositions - voluminous, multilayer, with a large number of elements - create children with skills to work with glue, scissors, tassel and using different techniques. 
Lilac in a vase from cereals, a spring picture in a drawing and appliqué technique - these and many other ideas offer specialists to parents and educators for developing classes with children. 
Applique is fine activities. Having achieved the desired result, the child is experiencing aesthetic pleasure, thereby communicating to the world of beautiful, to the world of art. A simple and accessible method for creating artwork makes an applique one of the favorite types of developing classes with children.
With the help of templates, it is easy to make original bulk trees from paper, which are equally good as a New Year's decor of the interior and homemade Christmas toys.
You need paper or loose cardboard, template and scissors.
Volumetric Christmas trees: 3 options
1. Option
Despite a schematic appearance, the Christmas tree looks beautiful and interesting. To make it, it will take a rectangular segment of paper to be folded twice.

The width and length depends on the desired christmas sizes, but it is important to take into account the template data so that it fit into the area folded twice.
Print the template and cut it out.

Next you can make a Christmas tree. But, this is if you have ordinary paper. A Christmas tree with cardboard needs to be done like in my example, since it is not on any printer you can use dense paper. That is, the printed and carved pattern to circle on cardboard and cut out again, but already a cardboard blank. Alternatively - redraw.

Please note that the direct dotted line must be on paper bending. Cut over the lines should also be fraught.
It turns out such a billet tree.

For further work, discover it.

Then the cut bands are needed through one direct to the other side, making the bends on the sides. That is, you first drive inside the second strip.

After that, leave the third unchanged, but direct the fourth strip to the other side.

Repeat actions until the band runs. Follow the side bends, it is desirable that they were smooth. The smallest can be bent with a thin object - a rod from the handle, a skewed stick, and the like. At the very end, hence the sidewalls a little. It turns out such a bulk tree from paper, stable on the surface.

Option 2
Another pretty Christmas tree that is easy to do using a pattern.

Fold twice and cut over all lines, except dotted.

Open the workpiece.

Canceling in the other side of the strip, alternating them through one.

Tree is ready.

3. Option
The pattern is not much different from the first. The difference is that there are more direct lines.
Use the template.

Cut paper blank.

Open it and direct the stripes to the other side, alternating them through one. Bend the sidewalls.


These are the bulk trees from paper.

They can be decorated with paper toys, the most different New Year decor, stickers.
Today you will learn how to make a bulk tree from paper with your own hands. This master class describes not one bulk tree of paper, but at once several different options for crafts. Make them will help our ready-made patterns.
Tools and materials Time: 20-30 minutes Difficulty: 2/10
- printed Christmas tree templates on A4 format paper;
- scissors;
- glue;
- acrylic paint and brushes;
- fluorescent paint (not necessarily);
- sequins, decorative snowflakes and other decor at your discretion.
The bulk tree of paper is a simple and very original way to decorate your home on the eve of Christmas and New Year!

These crafts are so simple that you can easily connect children of preschool and younger school age for their manufacture! Undoubtedly, you will all have fun to create various compositions from 3D Christmas trees!
Detailed description with photo
We offer you four options for the manufacturer of the paper Christmas tree with your own hands, but if you still have no enough enough, you can experiment with the sizes of trees or create your own template. Features here are endless!
Option 1. Christmas trees with asterisks
The first option includes a large number of trees, so we suggest starting with it.
Initially print below the presented templates on A4 format paper.
Template 1.
Template 2.
The first option suggests that you simply cut the tree along the contour, and then shift in them the grooves on the drawn lines.
Then these strips you need to bend in opposite sides through one. So you have a ready-made bulk tree from paper!
For the second option, also cut the trees along the contour. Drawn lines inside No, which gives you the opportunity to experiment!
You can cut arbitrary lines here at the top, and below to put asterisks using a figure steppler. Or cut thick lines, and between them put asterisks, or cut curves lines, or .... In general, fantasy will tell you, and below in the photo you can see what happened with us!
Option 2. Christmas tree with a deer
If you want to go to more complex compositions, try cutting a Christmas tree with a deer, the template of which is provided below!
Template 3.
For the manufacture of this Christmas tree, first cut the deer, then bend the paper for the Christmas tree in the middle and cut it out. After that, bend the paper for a small tree from the right edge and also cut it along the contour.
If desired, make decorative sprockets and snowflakes on the tree, decorate with glitter, etc.
Option 3. Luminous bulk tree
Print the template provided below on standard A4 paper.
Pattern 4.
- Cut the stars and use them as a template for stars.
- Attract your baby's Christmas tree cutting. Let he cut the tree along the contour and the inner lines. Depending on age, you may need a little help.
- Make sure all lines inside are cut.
- With the help of green or any other, in your desire, paint paint the craft in 2 layers. Between the staining let it be good for both times.
- Fold paper strips inside the tree in opposite sides to create a 3D view.
Stars: In this workshop, for the manufacture of a bulk tree made of paper with a luminous effect, we used glowing in the dark spray paint, which was found in our local craft store. We simply spray paint on paper, and stars cut out of it.
Alternatively, you can buy ready-made paper that glows in the dark and cut the asterisk from it.
Get stars on your Christmas tree.
The bulk tree of paper, created by their own hands, is ready! We hope our step-by-step master class with templates you liked.
Subsequently, you can use this crawl as a small night, but be prepared for what he will serve you very long!
And as a small surprise, you add an interesting video to the master class, in which the professional decorator will tell how to make a somewhat different, but no less beautiful version of the bulk tree made of paper with their own hands.
You can create a New Year's atmosphere with handmade articles cut out of paper. They are called extent, which means "cuttings". Here you can find silhouettes of New Year's characters: Santa Claus and Snow Maiden, snowmen, dwarfs, various Christmas trees, balls and bells, snowflakes, snow-covered houses, deer figures and cute animals.
Today we offer you the stencils of New Year's units of various subjects. Let's inspire the actions of the masters and ready-made works on the decoration of windows, christmas trees, postcards, New Year scene. The given templates are easy to print on a sheet of white paper, cut and stick on the window with soap solution, or fasten in other corners of the New Year's interior.
Small dazes can be decorated with a window or create a composition on a windowsill or table, larger clippings can be decorated with walls in the room or on stage.
These images may turn out:


Stencil stencils for silhouette cutting Snow Maiden and Santa Claus:


Choose your favorite stencil with the image of Grandfather Frost and his granddaughter. As a tool, you can use thin scissors, stationery knives, necessarily a board-lining, not to scratch the table.
Vytnanka Christmas tree
Cut the Christmas tree can be stencil as a silhouette, but you can make a symmetrical clipping, turning the sheet of paper in half. Standing Christmas tree we make one way: we glue two symmetrical Christmas trees on an oval stand of paper, or we fold each Christmas tree in half and glue together.


Snowflakes and ballerina
Snowflakes are very different. Especially if the master attaches all his fantasy. So, you can cut a symmetrical snowflake, folding the paper several times. Look at what pattern applied in the form of a stencil and which unusual tip have snowflakes.


Inside the snowflake can be a completely independent composition. For example, a New Year's snowman or a snowy forest.


Snowflakes can take the image of light snowy ballerinas. To do this, cut out separately the silhouette of the ballerina, we dress openwork snowflakes on it and hang for the thread. It turns out a very gentle air decoration.

Christmas balls
Christmas toys can be cut both by symmetric diagram and individually stencil. These decorations can be supplemented with a composition on the window, dress up on the Christmas tree, attach them to threads to chandelier or curtains.


Bells
Make carved bells on a stencil. If, with the inside of the tenderloin, glue translucent paper, for example, tracing, then such a bell can be used with the backlight effect.


Deer, Sani, Walking
Another fabulous New Year's hero is a deer. With it connected delivery of the wizard of Santa Claus and Snow Maiden. We offer stencils for cutting deer, wagons and sleigh.


Snowmen
Charming Dobryaki Snowmen must decorate the New Year's home. Their figures simply cut symmetrical, but you can make a "family photo of snowmen" or a composition with a Christmas tree and children.


New Year's figures
You can cut beautiful numbers of the upcoming New Year, using these templates:


Beasts, signs and symbols
You can make a non-standard new year decoration. To do this, cut out the silhouettes of your favorite pets, the heroes of fairy tales and cartoons, birds and animals in the fabulous winter forest.


Cut the figures of the sun and the moon along the stencils, add your composition.


Snow-covered houses
It will be very cozy if there will be a snowy house on the window in the New Year's picture. It may be a small hut or a whole palace.


Children
Who is the strongest of everyone waiting for the New Year and Grandfather Frost? Well, of course, children! With the help of silhouette cutting out of paper, we make toddler figures near the Christmas tree, with gifts, singing and dancing, in one word, we introduce the true atmosphere of the holiday!


Candle
We offer options for dulling - candles. They can be independent or combined with balls, bells, branches and bows.


Nativity
To christmas, you can cut the thematic outtasis dedicated to events and circumstances of this event. It can be silhouettes of Jerusalem, an angels, shepherds and magic images. And do not forget about the Bethlehem Star!


You can separately cut the silhouette of the Bethlehem Star:


The central place among the Christmas dolenoks need, of course, to take off the Christmas Verteup - the cave in which the Savior was born. Nursery Divine Baby is cozy surrounded by hay and pets.


Composition with backlit
Learning paper cuts from paper, you can decorate not only the window, but also create a bulk panorama on the windowsill. Especially effectively happens if you put the garland or a small backlight inside the box.


Take care of the design of Christmas decorations - dolenok from paper along with children. It is not only useful for the development of imagination, training with small motility hands, but also gives you a lot of pleasure from joint creativity, and after - from the contemplation of the resulting beauty!
MK: Christmas tree Torch balls from napkins
Panel "Christmas tree" master class with step-by-step photos
Ovchinnikov Dmitry, 9 years old, student of grade 2 "Paper fantasies" MKudo "Spare-Demena Children's School of Art" Savior Demensk, Kaluga region
Leader: Tsukanova Tatiana Petrovna, teacher of the class "Paper fantasies", MCOO "Spare-Derenskaya Disthy", Savior-Demensk, Kaluga region
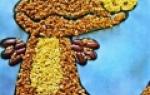
Description: Panno "Christmas tree" - the work is made in the technique of applique - the balloting balls from the napkins is designed for interior design, for a gift, to participate in the exhibition.
Purpose: Our master class is intended for children of younger school age, primary school teachers, teachers of additional education, creative parents. Perhaps they will be interested in teachers of kindergartens for classes with the children of the preparatory group. It will be interesting for people who are fonding appliqué technique.
Purpose: Manufacture of Panel in Technique Application - Torker Balls from Napkins
Tasks:
- Teach the independent manufacture of template, sketch
- to learn the successive manufacture of panels in the technique of appliqué - Torling balls from napkins;
- to teach cut the napkins of different sizes, roll balls;
- to learn to glue balls to the pattern of the pattern;
- to develop fine motility fingers, the accuracy of the movements of the hands, Eyemer;
- develop memory, attention, creative imagination;
- develop fantasy and encourage creative initiative;
- to educate accuracy, perfection, independence;
- to educate interest in decorative and applied art
In this master class, we offer to make a panel "Christmas tree" in the technique of applique - Torker balls from napkins
Many children in our class like paint work with colored balls from napkins. Dima wanted to take part in the competition "Merry New Year" with his work and decided to make a Christmas tree!
Christmas tree
Well, a tree, just Divo,
As it is elegant, like beautiful.
Branches weakly rustle
Breeds bright shiny
And swing toys -
Flags, asterisks, flappers.
Here the lights lit on it,
How many tiny lights!
(Chernitskaya Irina)
For work, you will need materials:
Green and White Sheet of Paper, Cold Cardboard, Napkins Cutlery Colored, Pencil, Felt Packs, Scissors, Glue Pencil

Safety with scissors:
When you relate, wide open scissors and keep them ends from yourself.
Stone so as not to damage the fingers of the left hand.
When working do not hold the scissors to the ends up.
Do not leave them in the disclosure.
Do not work with scissors with weakened fastening.
Transfer scissors only in a closed form, rings forward.
Work with scissors only at their workplace.
Rules for working with glue:
At the end of working with glue tightly close the lid
When glue hitting the skin, it must be wiped with a wet napkin
At the end of the work, wash your hands with soap.
Progress
Idea, sketch, template ... In a conversation with Dima, we found out that the Christmas tree should be on the whole sheet and spaced vertically. Drawn on the draft and cut out approximately, turned out, tried out - it turned out well! Will be template this billet

How to decorate the Christmas tree? Big balls and garlands. Attached this template to the sheet of paper, circled along the contour

Dima drew garlands, balls - just covered the cap from the adhesive of the pencil, covered the drawing with a felt-tip pen, made sketch

and outlined colored markers how to decorate the Christmas tree

The template and green paper lay down the long side in half, the paper clips fixed, circulated and cut out


Blucked on a colored cardboard green Christmas tree

Cut off the strip of paper 2,5 centimeter wide, folded the harmonic


The square rounded the corner, turned out


Blucked on the Christmas tree on the sketch

Prepared on the color of the napkins, cut into four parts and made the balls. I put glue on the white circle, and gently laid out the napkin balls first around the circumference, then closer to the center of the circle


Oh, what outfit in the tree
On the day last December!
As among her needles
Festive balls are burning!
(Dana Kadyr)
Between the balls spent the lines, they were not noticeable, focused on the sketch, but a little changed the direction of the threads. "Light bulbs" in the garland alternate in one rhythm


Branches shaggy bent
Down to the heads of children;
Breaking beads rich
Overflowing lights;
Ball behind the ball hides
And star behind the star
Filaments light rolling
Like rain golden ...
(Kudasheva Raisa)

Christmas


Christmas tree, Christmas tree, Christmas tree
Christmas tree, Christmas tree, Christmas tree -
Green needle!
Burn in lights different -
Green and red!
Came to the feast of the Christmas tree,
It is worth it,
And on the top of the star
Sparkles and glitters.
Loves the Christmas tree people
Dress up for the New Year.
In every house tree there,
But only here!
(From the Internet)
But a snowman hurries for a holiday, this is also the work of Dima

Such pictures will decorate for the new year the children's room, raise the mood, create an atmosphere of the holiday!
Lights on the Christmas tree bright
Everywhere is lit up,
In all houses, across the country
Guys are smiling
(Nekrasov Lydia)
New Years is soon! Successes to everyone!