Kinusayig technique balls and cones. Master class on kinusayoga for beginners: New Year's balls, roses and much more. Christmas decorations from plastic balls - materials and tools
Master Class " Christmas toy ball»
Description:
Master class designed for middle children school age, teachers of additional education, educators, and just creative people.
Purpose:
New Year's toy.
Purpose:
Making a New Year's bowl with their own hands.
Tasks:
teach kinusayig technique;
consolidate the skills of working with the stationery knife and sawing;
develop small motor hands, eye meter;
develop art and aesthetic taste;
Develop creative abilities, fantasy, imagination.
Preface to work.
New Year's toy is one of the characters of the holiday and has its extremely interesting story. Even in the late middle ages, residents of European countries began to decorate their homes for the new year. Until the middle of the 18th century, the decorations were exclusively edible. These are apples (today are balls) nuts, all sorts of sweets and fruits. From the second half of the 18th century, christmas decorations become more elegant: paper flowers, gold-plated spruce bumps and empty egg shells, and more - figures from the chased brass - fairies, angels, etc.
In Russia, as you know, the custom to meet New Year On the night of December 31, Peter was introduced on January 1, and he also commanded that it was Spruce to become the main New Year tree. The most favorite toys for many years have been, again, edible products - sandurines made of sand dough, which turned into color, gold or silver foil, and even gilded nuts, apples and of course, candles. Many toys were made with their hands from the girlfriend.
Since the beginning of the 2000s, original, "homemade" toys have become popular. Figures from straw, paper, fur coats and pieces of fabric; Plush animals, felt swans and angels.
On this master class, we will produce a New Year's toy - a ball in Kinusayig technique.
For the manufacture of toys in Kinusayaga technique we will need the following:
foam ball
several types of fabrics suitable for each other in quality,
stationery knife, thin nail file,
different ribbons for the final design of the ball,
scissors, ruler, handle.
Adhesive gun.
And so bend. To begin with, we find the ball pole. We enhance in the pole in the port of the tailor needle, then stretch the thread between them and spend the knob along the contour. And so on all sides. We draw 8 strips on the ball so that it turned out 8 parts. Everything needs to be done as carefully and even, so that all parts are the same.


Now we take the stationery knife and cut through the marked lines to the depth of near the centimeter.

The technical part is over. Time to connect fantasy. We take the fabric and cut a piece of arbitrary shape from it about the size of our painted lobby on the ball plus 1.5 centimeters on the sides. To save fabric, you can prepare milets. Now, with the help of a saw, we stick the edges of the fabric into our slits.

We do neatly, without folds, excessive cut off and finally hide all the edges.
We take another fabric and do the same. Fill in all parts of the ball with pieces of fabric, we get this "raw" ball.

Now you need to make a real festive attribute from it. We take a golden ribbon or lace, kpripim close on top of the ball in the center.
Now you wind up all our slits, sneaking with a lace with glue.
A thin satin ribbon to the tone of the fabric is planted on a needle and fastened to the ball center. From the lace, which we have already used, make a loop and krepim, it will be a chant pendant.

Here I have nothing against shine, tinsel and shop toys when it comes to new Year's holidays. Just sometimes you want something unique and stylish, what we call our own. About this and take care.
Remember your first children's toys? My were glass. Such are dangerous for children and are short-lived. But what are they cute and beautiful! Plastic came to replace the glass toys. Their problem is that they are monophonic, not very high quality and rapidly bother. If you have accumulated a mountain of boring plastic balls, I will show you how to remake old christmas decorations. And I'll tell you how to make New Year's toys in the technique of Kinusayiga.
Remove old New Year toys
New christmas decorations Every year without special costs? Easily!
Part of old new Year's toys We cover the cloth, some are placed braid and paper. Such alteration opens a lot of opportunities for the design of your Christmas tree: Christmas tree in Tiffany style, a Christmas tree with burlap toys, a Christmas tree with turquoise or even black ornaments. After all, find fabric, braid or paper of the desired color is much easier than finding the right Christmas balls.
Christmas decorations from plastic balls - materials and tools
- Plastic Christmas balls
- the cloth
- Scissors
- Threads and needle
- Different braid
- Paper with notes
- PVA glue
- Acrylic paint
- Brush
- Termocles.
Update Christmas decorations with fabric
1. We take our ball and measure its diameter with braid and ruler. The circle of my Christmas ball - 15 cm.

2. Cut the template from cardboard with a diameter of 15 cm.

3. Obligate the pattern on the fabric and cut the circle.

4. We take a thread with a needle and make a dotted seam along the edge of the fabric. At this stage, it is well swapped to hang a bowl on the Christmas tree.

5. Place christmas ball In the middle, tighten and tie the ends of the threads.

6. We take a suitable braid, cut off a small piece and glue it with a thermoclayer around the tip of the ball. After the glue freeze, cut the extra fabric to get a neat beam.


7. From the same braid we make a small bow and glue it to the ball.

Such balls can be supplemented with any decor.


We update the Christmas toys with paper
1. We take the Christmas ball and remove the fastening for hanging from it.
2. Take the paper, too, and tear to stripes. I used notes that are stored specifically for needlework. The papier-mache method I have already used to decorate the star from the cardboard.


3. Printe paper strips to the pva glue ball.

4. We return the fastening for hanging, paint it with acrylic paint in the desired color and stretch the braid.


It may seem that to redo the Christmas toys do it for a long time, because it takes at least 20-30 decorations on the Christmas tree. I dare to argue: only 10-15 minutes leave for the update of one toy. If, starting from November, every evening spend on one new year toy for 15 minutes, by the end of November you will have 30 toys, and if you do two or three, then all 60 or even 90!
Christmas decorations made of foam in Kinusayig technique
Foam balls I acquired when we went to. My internal drive whispered: Buy, but suddenly come out! Two years they lay without a case. And then I found out about the technique of Kinusayig and decided that the hour of foam balls was found.
Kinusayiga It originated in Japan due to the desire to re-use the pretty expensive fabric of the old kimono. This technique is called a patchwork without a needle, because the loskutka fabric that is used for it do not need to be sewed. Initially, a pattern is applied to the panel of kinusayig onto a wooden plate. Then the outline of the contour makes the recess of about two millimeters. Loskutka fabric is inserted into the cutting grooves.
To comprehend the art of kinusayga, we will make a more primitive thing that does not require such skill, but no less nice.

Christmas decorations made of foam - Materials and tools
- Foam balls
- Small pieces of fabric
- Scissors
- Tape or rope
- Termocles.
Christmas toys do it yourself - work
1. We take a foam ball and divide it on 8 equal parts using a rope and gel handle.

2. We make a depression with scissors about one centimeter on the markup.

3. We learn the approximate size of the division of the ball and prepare the template, as in the photo. Petals should be in size more than ball divisions.

4. Cut from the fabric eight petals.
5. We apply the flap to the division of the ball and begin the scissors to the tissue along the recesses.

6. Cut 5 ropes or ribbon with a length of equal to the diameter of our foam bowl.

7. We applied the heat meters along the ball sections and glue the braid. When 2 ropes remain, they need to be glued so that the ends form the threads for hanging.


8. We supplement the Christmas ball with a bow.


Here is another portion of New Year's toys handmade Ready.

In the next master class, I will show.
And you already decided what kind of christmas tree you want this year?
On the eve of the new year, it is very important to inspire and make anything beautiful with your own hands to please the relatives on the holiday, at the same time rushing long autumn evenings. Maybe my master class on a New Year's toy in Kinusayig technique will inspire you.

For the manufacture of toys in Kinusayaga technique we will need the following:
- foam ball
- several types of fabrics suitable for each other in quality,
- stationery knife, small scissors or thin nail file (as more convenient),
- different ribbons and tapes in color for final bulb design,
- and also scissors, ruler, handle.

So proceed. To begin with, we find the ball pole. I took a ball with a diameter of 8 cm. We enhance in the pole in the port of the tailor needle, then stretch the thread between them and spend the handle along the contour. And so on all sides. I flashed on a bowl of 8 strips to get 8 parts. Everything needs to be done as carefully and even, so that all parts are the same.

Now we take the stationery knife and cut through the marked lines to the depth of near the centimeter.

The technical part is over. Time to connect fantasy. I took three types of fabric: golden, green and black with floral pattern. Fabrics to each other. We take the fabric and cut a piece of arbitrary shape from it about the size of our painted lobby on the ball plus 1.5 centimeters on the sides. To save fabric, you can prepare milets, and you can not spend time, and then just cut off all unnecessary. Now, with the help of a saw, we stick the edges of the fabric into our slits.

We do neatly, without folds, excessive cut off and finally hide all the edges.

We take another fabric and do the same. Fill in all parts of the ball with pieces of fabric, we get this "raw" ball.

Now you need to make a real festive attribute from it. We take a golden ribbon or lace, kpripim close on top of the ball in the center. I used PVA glue.

Now you wind up all our slots, sneaking with a lace with glue, so that later he does not slip.

A thin satin ribbon in the tone of the green cloth is planted on the needle.

and Krepim to the balloon center. From the lace, which we have already used, make a loop and krepim, it will be a chant pendant.

From the golden tape, we make a bow and also fasten to a ball with a needle.

In my opinion, it turned out a wonderful New Year's ball.
Make such a ball with your own hands is not difficult. All houses have remnants of unnecessary fabric. The main thing is desire and a little imagination. After all, it is so nice to make my own and close one gift with your own hands!
 Or make elegant
.
Or make elegant
.
Also in school years Babies performed simple, but unique decorations for the new year. Now with help of various techniques You can create amazing in your beauty new Year's balls Quickly and just do it yourself. The only thing you need to stock up to make such products are a fantasy, because borders in creativity as such do not exist.
Learning to make a variety of New Year's balls with your own hands in MK
How to make small papier-mache balls
To create such a creative ball from Papier-Masha, you need a few old newspapers glue and an inflatable ball. This technique is familiar with everyone since childhood, so there should be no particular difficulty.
- The ball must be inflated to the desired size and tightly tied with a thread.
- The newspaper needs to grind into small squares. It is not necessary to do it carefully the main thing that the pieces are not too big.
- The first layer of newspapers on a bowl is lit without the help of glue. It is necessary so that the ball itself does not stick to paper and could easily remove with ease. The paper is enough to dip in water, after which it can easily attached to the surface of the ball.
- All subsequent layers are missing with glue to it paper.
- You need to do at least 8 layers. The resulting product should be strong enough.
- Layers need to be increased so that the tail of the inflatable ball always remains outside.
- After all layers are ready for the product to give time to dry. It will take a couple of hours.
- After all layers dried up an inflatable ball need to pierce with a needle and gently remove the paper out of the cocoon.
- The resulting hole need to mask a pair of paper layers at the same time, without forgetting to attach a tape. Ribbon is needed so that the ball can be hung on a fir.
- If you plan to decorate the ball with paints, then it is worth the last layer of making white paper so that the paints look brighter.
- Turn on all your fantasy to decorate the ball.
Also, the ball can not overlap with white paper, so it will look much more interesting. On the newspaper paper You can draw animal face, which will look pretty funny and interesting.
We study step-by-step quilling technique in the decoration of the ball

Quilling technique is quite simple in performance, but requires ambitiousness. Having mastered a pair of techniques of this technique, you can make such a Christmas ball. Quilling has a lot of techniques in its assortment, with which you can create truly sophisticated interior decorations. You can use the ball from the foam as the basis.
Weave with a detailed description of unusual balls from threads

- Inflate the ball to the desired size.
- It is good to wind it with threads and deceive with glue.
- Suspend in a dry and warm place to glue completely dry.
- Burnt an inflatable ball with a needle and pull the thread from the cocoon.
In order for the ball from the threads to look more brightly and creatively needs adhesive while the glue does not dry to sprinkle it with glitter or other material.
Let's try to make a simple paper ball

- Paper should be twisted in the harness. In order for it to be enough to connect several harnesses together with glue.
- Taking the ball from the foam should be glued one end of the harness to the top.
- The harness needs to wrap the whole ball so that there is no enlightenment between poisons. Each series of burning needs to be labeled with glue.
- When the whole ball of paper will be ready to attach to the thread in the form of a loop.
When the ball will be ready for it, you can cover the paint from the balloon of il to ordinary paint.
How to make a New Year's ball with your own hands in the technique of decoupage

- For decorating balls in the technique of decoupage, ordinary plastic Christmas toys will be suitable. To begin with, such a ball must be prepared. To do this, the wire mount is worth removing.
- The entire surface of the ball is treated with sandpaper and rinse the paint with a liquid for removing the varnish. This is necessary in order to the surface be better lay in paint.
- After the paint is removed, you need to primure the surface. To do this, mix the PVA glue and the usual gouache. This mixture should be applied in several layers on the surface of the ball. Each layers need to give time for drying.
- As soon as the balls can drip directly to the decoupage in the technique. For this you need napkins with an interesting pattern for you. The drawing must be cut and applied to the surface of the ball, after which the glue should be glued on top.
- After the drawing is dry, you must neatly cover the ball another layer of paint. It is necessary in order to compose the face between the pattern and the main surface of the ball.
 Video on the topic
There are many techniques for creating Christmas balls and their decorations. In the video master classes are provided by such equipment as artichokes, kanzashi, hook binding and many other techniques.
We present you a video camp with master classes to create various balls.
Following the instructions from the video, you will make a wonderful ball of beads.
In the process of viewing this video you will get acquainted with the wonderful technique of artichoke and learn how to do christmas decoration In this technique.
In order to make a ball in the technique of Kinunsayig, the glue, nor threads. How exactly this technique is being done, you can learn in detail in the video.
Any decorations in this technique look very unusual, and the ball of canzashi is truly awesome.
Before the holidays, the eternal question of choosing a gift. Of course, you can buy cheap souvenirs in the nearest store, and the problem is solved. But the formal approach is not possible if we are talking about close and expensive people. We understand the master class on the study of the film Kinusayge will help create a miracle for beginners and create unique crafts for the house. This technique allows charming roses on a panel postcard, which is perfectly suitable as a gift for a wedding or day of all loved.
Another kind of craft in this technique - souvenirs for the kitchen.
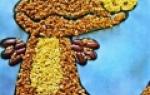
And even new Year gifts You can make Kinusayge technique - look at these original soft Christmas balls.

As can be seen from the photo of finished works, Kinusayigu is like something like patchwork sewing, really another name of this art - patchwork without a needle. Schemes for kinusayg are diverse: starting with rectangular houses and ending with paintings with animals and people.
The basis for the work is soft material - foam. Therefore, this kind of needlework is quite suitable for children and does not cause them difficulty. The kid himself can make Christmas balls or patchwork on a foam as a gift for grandparents. And deal with kinusayege help step by step description and video.
We study a step-by-step master class on kinusayge for beginners and for children
Work begins with training essential materials and pattern for panel. For kinusayge, you will need:
- remnants of colored fabric;
- a piece of foam;
- PVA-glue;
- scissors;
- splicer of seams, a dump knife for paper, a nail file or any sharp object (what exactly will be convenient, you will understand in the process of performing a patchwork);
- buttons and needles.
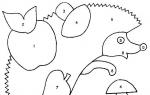
For the first craft should not take complex drawings. Let's start teaching the technique from the execution of the flower on the foam. This picture easily draws both an adult and a child. A leaved with a sketch is fixed on a piece of foam with buttons.
To transfer the picture, we stick it with a needle along the contour through small intervals.
The next stage of work is the most dangerous, so it is better not to trust it. A sharp knife (or a splitter of the seams) on the points cut the picture on the foam.
Next comes the most interesting! Performing work begins with the smallest detail. For it, the flaps of the fabric is cut, which is glued to the base. So that the loskuts correspond to parts of the drawing can be carved by using the previously drawn sketch and not forgetting to make the allowances of 0.5 cm on each side of the part. The carved piece of the material is applied to the foam and with the help of an acute subject refueling in the slot.
Thus, the entire flower is "filled".

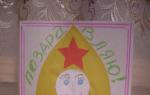
If the background is made for your baby difficult, you can cover it acrylic paintsFor example, so done for the second job. These are such interesting pictures as a result. Simple materials, a little time - and panel is ready for a gift!
Try the volumetric kinusayge on the example of the New Year's toys
Using volumetric blanks in the form of balls from foam, you can make unusual decorations for tree.
The first stage is the most responsible. It is necessary to divide the ball on the "lobby" as smooth and neat. The partition lines are watched by a regular ballpoint handle.
Board novice craftsmen: Wrap the workpiece with ordinary thread, adjusting which you can get the required number of parts of the ball. Polek can be from four to eight. Do not do anymore. Too thin pieces on the foam will require and thin tissue flaps that will be repaid in the process of their "harboring". In principle, the drawing on the toy can be any. It is interesting for a ball with tissue strips of different sizes.
According to the outlined lines, the foam blank cuts through a sharp knife to a depth of 1 cm.
Then, using elegant flavors, preferably with glitter or New Year's motifs, decorating a future toy. A piece is cut off from the material, which, with a sharp knife or file, is refilled in the slot. Everything, as in the manufacture of panels! To make a job faster, you can make molds for "poles". The allowance for refueling should be at least 0.5 cm. Here it looks like already laid a piece of fabric.

The other parts of the ball are equally filled. As a result, it turns out such a toy.

Elegant and festive will make her decorative ribbons, cords, lace, rhinestones and beads. To start the place of the joints, it is closed with a golden cord, which is fixed by PVA glue.
The final stage - we make a bow and a ribbon so that the toy can be placed on the New Year tree.

Video lessons for beginners on the subject of the article
So, the technique of Kinusayge is mastered and I already want to create something with your own hands. Ideas for creativity - weight, and to make sure that we watch the video.